
How to Add Audio or Music to Canva (Easy Guide)

Adding music to your Canva creations will bring them to life! It’s easy to do, and you can add music from a variety of sources. In this guide, we’ll show you how to add audio or music to Canva step by step so you can create stunning visuals and presentations with sound.
There are many ways to add audio or music to Canva. You can either upload your own audio files, record your audio, or choose from Canva’s library of royalty-free music and sound effects. Follow this guide to learn how to add audio or music to Canva using each method.
1. Uploading Audio Files
2. recording audio, 3. choosing from canva’s library, final thoughts.
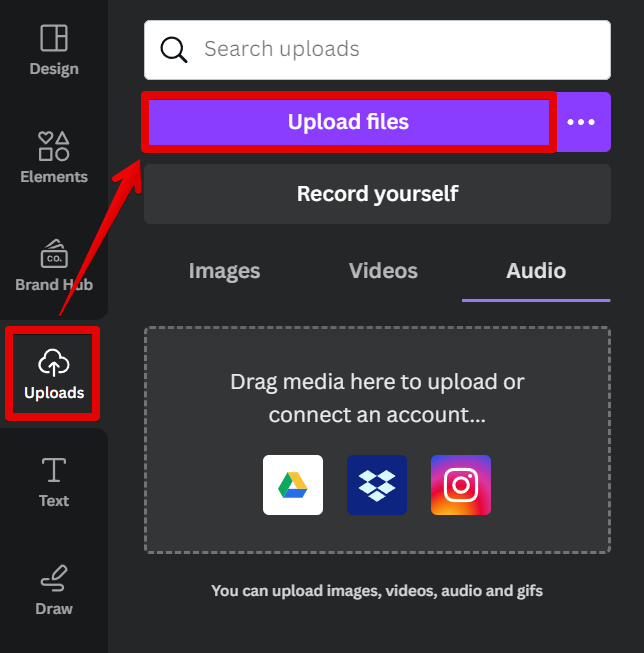
The first way to add audio or music to Canva is by uploading your own audio files. To do this, click on the “Uploads” tab in the left-hand sidebar and select the “Audio” option. Then, you can drag and drop your audio files into the upload window.

The second way to add audio or music to Canva is by recording your own audio. To do this, click on the “Record yourself” tab still from the “Uploads” tab, turn off your Camera, then click “Record”.

There are also additional settings on the upper right-hand side where you can choose a different microphone and other audio recording options.

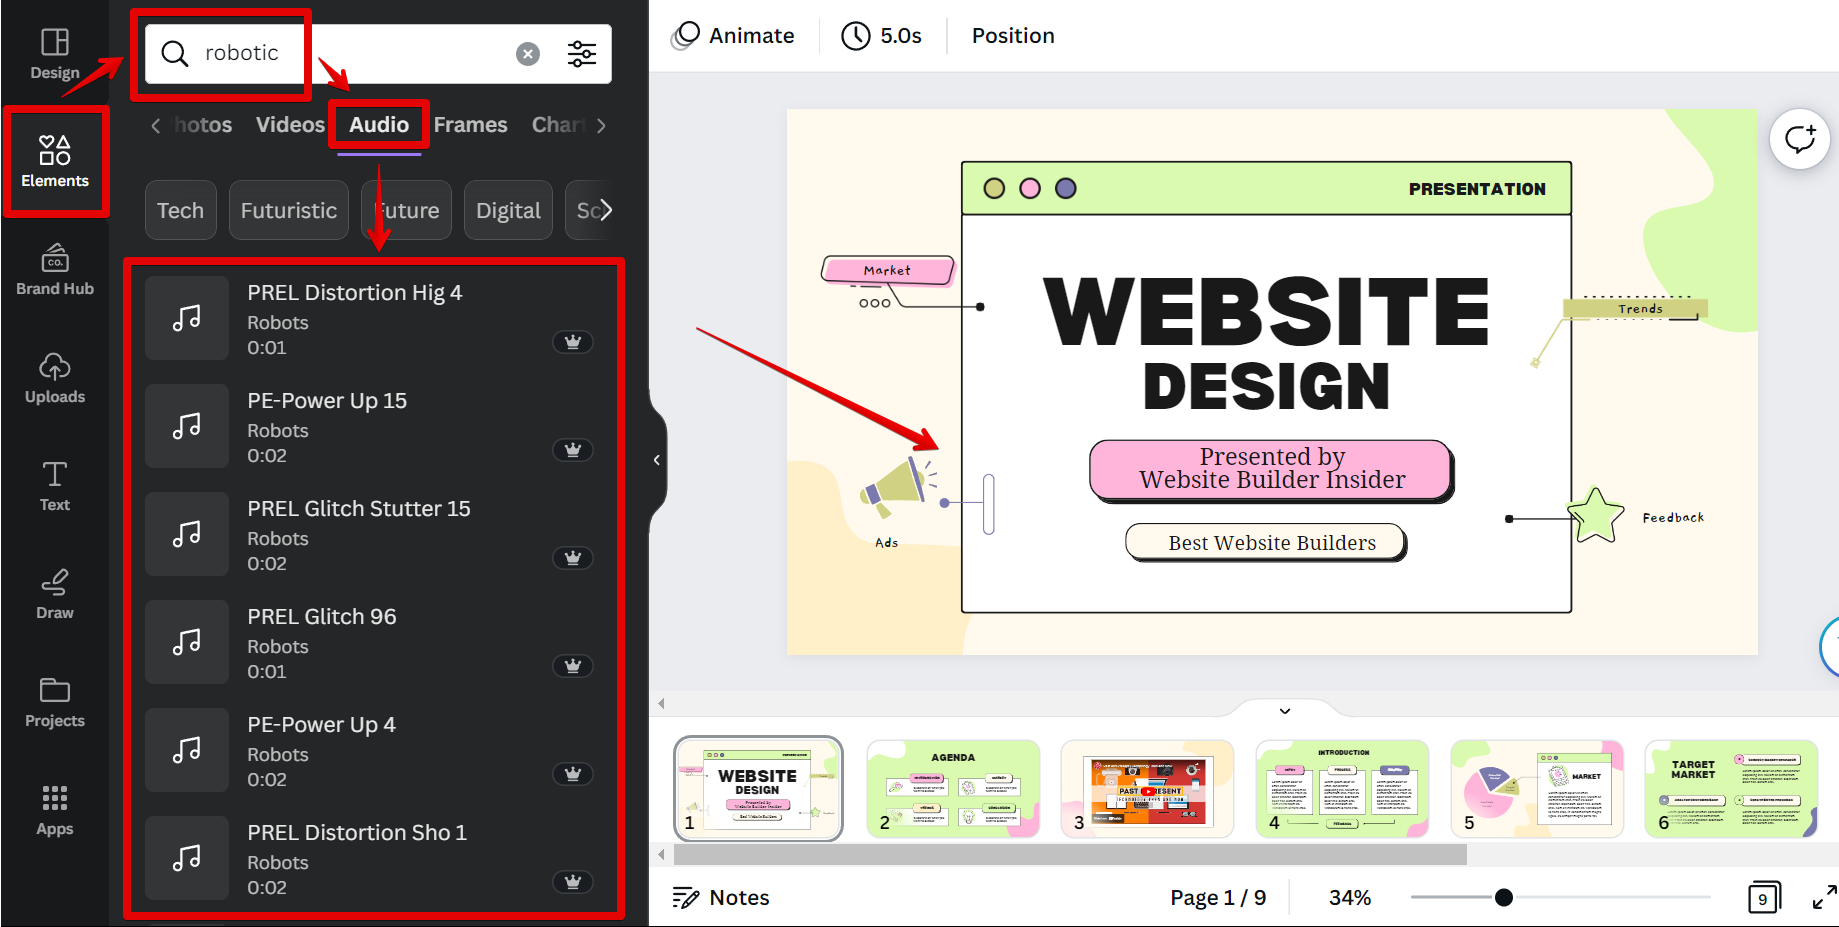
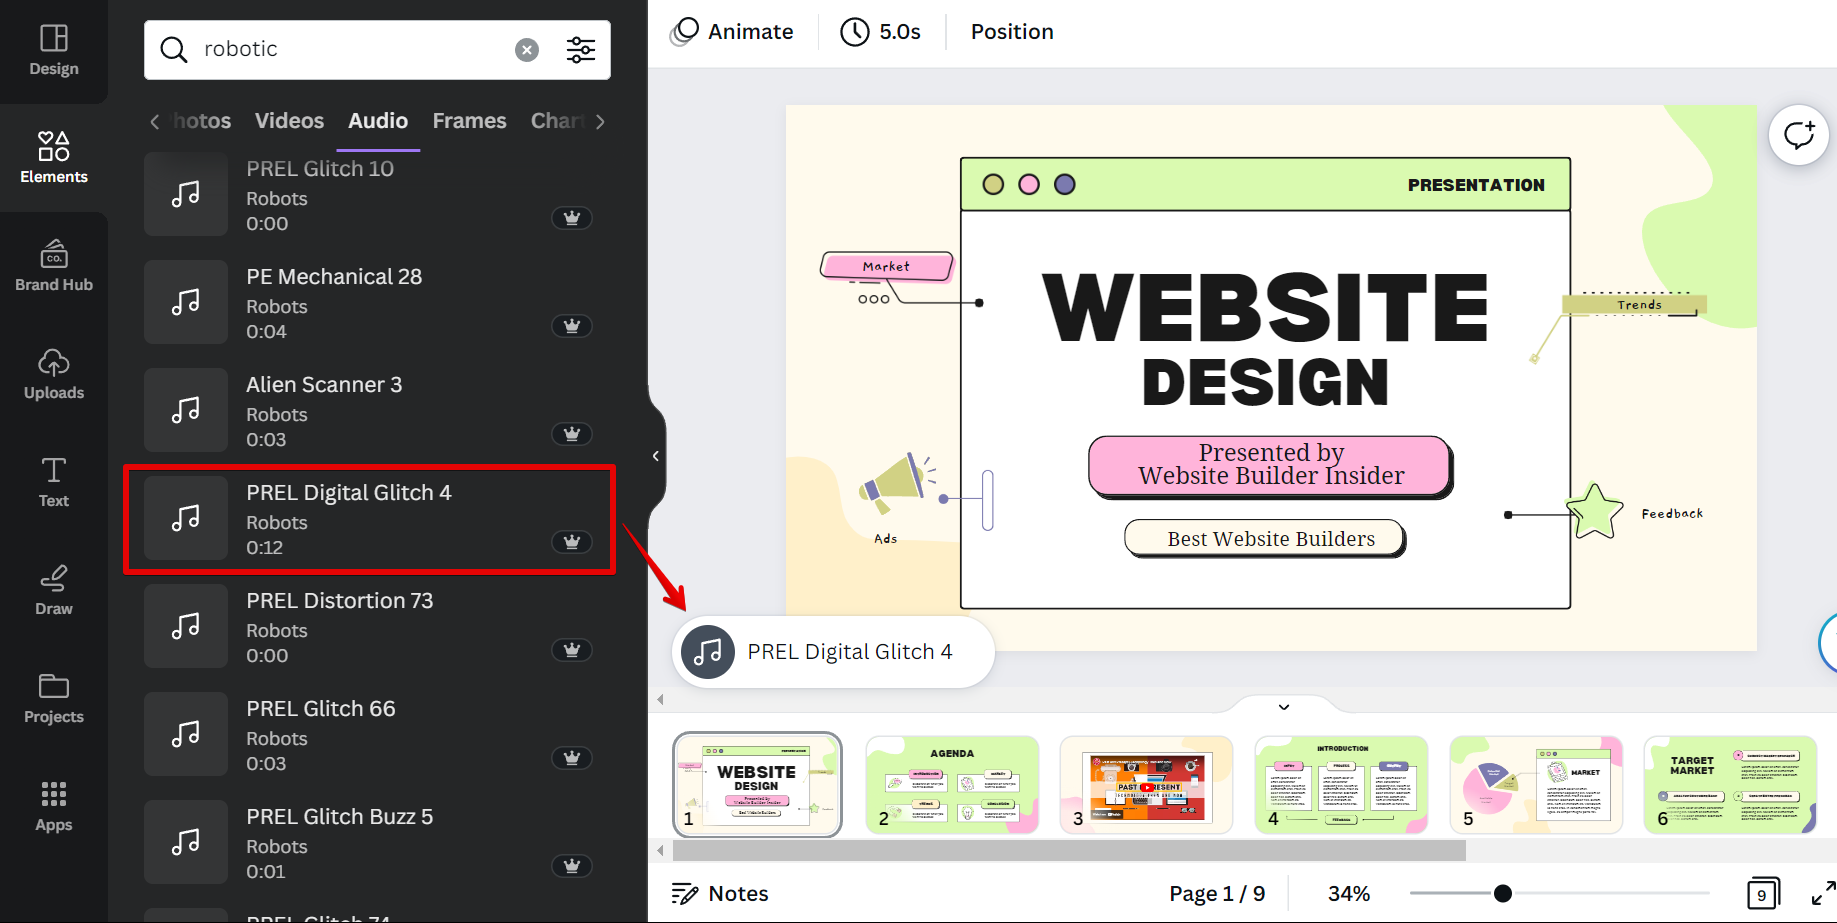
The third way to add audio or music to Canva is by choosing from Canva’s library of royalty-free music and sound effects. To do this, click on the “Audio” tab in the left-hand sidebar and you will see a variety of options to choose from. Click on the one you want and it will be added to your design automatically.

If the “Audio” tab does not appear on the sidebar, click on “More” to expand the list of options and find “Audio”.
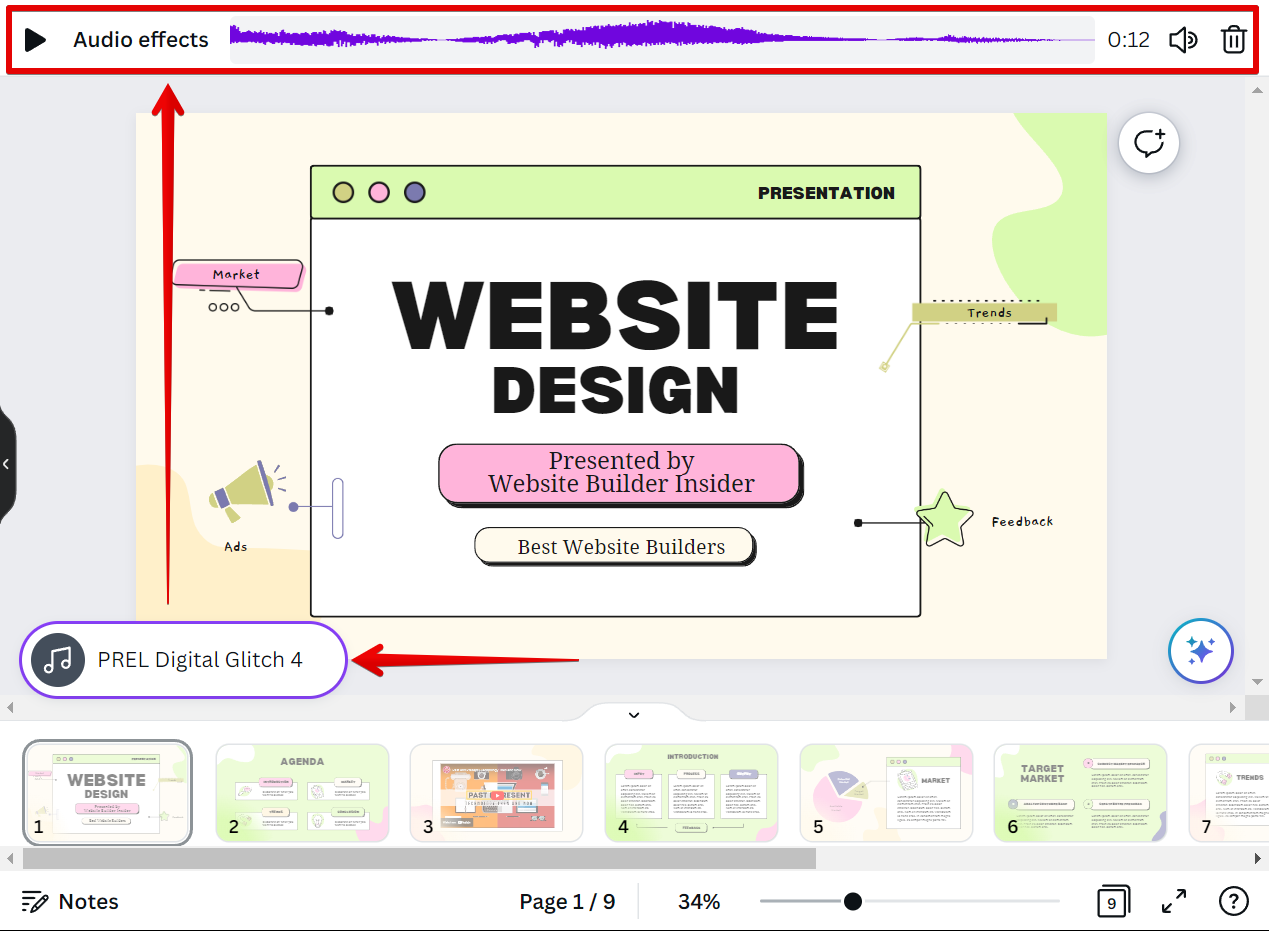
Once you’ve added your audio or music, you can adjust the volume by clicking on the speaker icon in the upper right-hand corner. You can also click and drag on the waveform to select a specific part of the audio clip to play.

And that’s it! You now know how to add audio or music to Canva.
Adding audio or music to Canva is a great way to make your designs more engaging and appealing. If you’re not sure how to get started, try one of the three methods described in this guide. And, don’t forget to adjust the volume to ensure that your audio is loud enough to be heard clearly. Thanks for reading!
Related Posts:
")
How to Add Voice-Overs to Canva Presentations

Namrata Gogoi is an author covering Buying Guides and device-related tips and tricks. She loves learning and writing about gadgets and accessories that are functional, innovative, and have a positive impact on people's lives. Since 2016, she has covered smartphones, computer accessories, household electric appliances, and any product that helps bring convenience to one's life. Previously, she worked as an IT Analyst at TCS but found her calling at Guiding Tech.

Ashish, Computer Engineer by profession, has been writing about tech for 16 years, with a primary focus on Windows and Smartphones. He has a keen interest in writing about social media, as it constantly evolves, introducing new features to explore.
- You cannot edit uploaded audio files in Canva.
- Present and Record may be unavailable in every country.
- AI Voice-over apps will have limitations on the number of minutes in the free version.
Method 1: Add Audio Files
Since Canva has limited customization options, you must ensure the audio files are trimmed before uploading. Also, all your files must be appropriately named and uploaded to avoid confusion later.
Step 1: Open the presentation and select the slide where you want to add the voice-over.
Step 2: Click the Uploads section on the left and switch to the Audio tab to reveal all the audio files.
Step 3: Drag and drop the audio at the bottom of the selected slide, and position it appropriately using drag.

Repeat the above steps for all the slides. Once everything is in place, tap the Play button to view and hear your voice-overs. If you have missed uploading an audio file, you can manually do it when editing the presentation.
This method comes in handy when you cannot access the Present and Record option, which we have explained next.
Method 2: Present and Record
Canva has a built-in method—Present and Record—for adding voice-overs to already-made presentations. One of the most significant drawbacks is that you need a quiet room and don’t have the option to trim the recorded audio.
Step 1 : Open the presentation and click on the three-dot menu at the extreme right corner.
Step 2 : Select Present and Record from the list of options > Start Recording.

Step 3: It will prompt you to allow access to the camera and microphone. Since you only need to perform a voice-over, skip the camera permission and give access to your microphone. Once done, click on the Start recording button.

Step 4: Now, record your voice for all the slides. The slides with recorded audio are marked in red. Remember to move along the slides as the presentation asks.

When you need to pause, click on Pause . This way, you can also skip a few slides where you do not want any voice-overs.
Step 5 : Once the recording is complete, click on Done at the top right corner.

Depending on the length of the audio and the presentation’s content, the download might take time.

In addition to the direct download, Canva allows you to copy and share the link to the presentation directly.
Method 3: Using AI
Many voice-over AI apps can connect to Canva and help you convert text to voice using multiple voice profiles. Here, we are using Murf AI.
Step 1: Open Canva, go to Apps , and search for Murf AI .
Step 2: Click on it, sign in using your existing account, or sign up.
Step 3: Once done, it will prompt you to use it in the existing or new design .

Step 4: In the Canva presentation editor, you will have access to Murif AI on the left , where you can select language , a voice profile , and a text box where you can type the text and choose style , speed , and pitch.

Step 5: Select the slide where you want to add the voice-over, click on Generate voiceover , and Add to the design .

It’s easy to add voice-over using AI apps, but there are limitations when using a free account. For example, Murf AI limits voice-over time to 12-15 minutes.
Was this helpful?
Last updated on 29 April, 2024
The above article may contain affiliate links which help support Guiding Tech. However, it does not affect our editorial integrity. The content remains unbiased and authentic.
Leave a Reply Cancel reply
Your email address will not be published. Required fields are marked *

The article above may contain affiliate links which help support Guiding Tech. The content remains unbiased and authentic and will never affect our editorial integrity.
DID YOU KNOW

Namrata Gogoi
More in internet and social.

How to Send Live Photos as GIFs on WhatsApp

4 Best Ways to Put a Border Around a Picture in Google Slides
Join the newsletter.
Get Guiding Tech articles delivered to your inbox.
How to Add Music to Canva: A Step-by-Step Guide
Timur köklü.
Enhancing your visual content with audio can turn a simple design into a multimedia experience that captures and holds the attention of your audience. Canva, the popular graphic design platform, allows users to do just that—add music to their designs with ease. Whether you're crafting a social media post, a presentation, or a video, the ability to incorporate music provides an additional layer of creativity and emotion to your projects.

With Canva, the process of adding music is designed to be user-friendly, accommodating users of all skill levels. The platform provides a rich library of stock audio tracks and sound effects that can be layered into your designs. For those who have specific audio in mind, Canva also offers the option to upload personal audio files, giving you the flexibility to truly personalize your work.
Key Takeaways
- Canva simplifies the process of integrating music into various design formats.
- A broad selection of stock audio and the ability to upload custom tracks cater to diverse needs.
- The platform offers tools for editing audio tracks within your design projects.
Getting Started with Canva

Canva is an intuitive design platform that offers a plethora of features for users of all skill levels, from Canva Free to Canva Pro . This section walks you through the fundamentals, from setting up an account to navigating the various elements of the Canva interface.
Overview of Canva's Features
Canva provides a wealth of tools designed to cater to a diversified user base which includes individual creators, teams, and educational institutions. For the everyday user, Canva Free offers a comprehensive set of features, while Canva Pro elevates the experience by unlocking premium features such as extended libraries of Canva templates and advanced editing capabilities. Canva for Teams streamlines collaborative design efforts, and Canva for Education brings classroom-friendly tools at no cost to educators and students.
Signing Up for an Account
To start using Canva, one must first sign up for an account . This can be done directly on the Canva website. Users have the flexibility to sign up with an email, or via Facebook or Google accounts. Upon registration, users can choose between the Free version or opt for a trial of Canva Pro to experience the full suite of premium features.
Navigating the Canva Interface
Once logged in, users can navigate the Canva interface with ease. The main dashboard provides a search bar at the top, where you can search for design types and templates. The editor side panel offers access to various elements and functionalities. For additional features not immediately shown, Canva includes an Apps section which can expand the capabilities of the regular Canva editor . Whether working on a simple Canva design or a complex project, the interface is designed to ensure an efficient and user-friendly experience.
Adding Music to Your Canva Design
Enhancing a Canva design with music can effectively convey emotion and engage the audience. Below are specific steps to access, select, and integrate music into a design using Canva's extensive music library.
Accessing the Music Library
In Canva, users can access a rich audio library that consists of a variety of audio tracks . To begin, one should navigate to the Audio tab on the editor side panel where they can explore Canva’s extensive music library .
Browsing and Selecting Music
Canva’s audio library is organized into different categories and genres , making it easy to find a track fitting your project's mood. The search bar allows for searching by keywords . One can filter by attributes such as mood , pace , instrumentals , and vocals , simplifying the search for the perfect royalty-free music .
Previewing and Choosing Audio Tracks
Before making a selection, preview the audio tracks to ensure they align with the design’s vibe. Beat sync , where the visual elements synchronize with the rhythm, can be a crucial consideration for some audio choices. Users can adjust volume to the preferred level directly within the editor.
Using Canva's Audio Collections
Canva’s library boasts a selection of royalty-free music suitable for various design needs. Users may upload their own music files, broadening their choices to customize their Canva design further. For additional uniqueness, mixing multiple tracks to layer audio is also possible, up to the limit of 50 audio tracks per design.
Editing Audio in Canva Designs
Adding music to your Canva designs enriches the viewer's experience. Canva offers tools for uploading audio, including your own tracks, and for editing these tracks—covering everything from volume control to trimming and layering.
Uploading Your Own Audio Files
If you have a specific soundtrack in mind, Canva allows you to upload your own audio files directly into your project. Users can click on the "Uploads" tab, select "Audio," and then drag and drop the files they wish to use. It is important to note that this feature may be limited to Canva Pro subscribers.
Adding Music and Audio Effects
Canva provides a library of music tracks and audio effects that can be added to designs. By clicking on the "Audio" tab, users can browse through a variety of options, filtering by mood, genre, or searching for specific tracks. Selecting a track layers it directly onto your design. For more detailed instructions , you can review external resources.
Adjusting Volume and Audio Settings
Once an audio track is in place, adjusting the volume is straightforward. By clicking on the track, users can access the "Adjust" option to use sliders that fine-tune the audio's volume to the desired level. The ability to create a consistent audio experience across different elements is crucial for a professional outcome.
Customizing Audio Length and Layers
To ensure the audio matches the design's length or to highlight specific parts, trimming audio tracks is a useful feature. Canva enables users to clip audio tracks to play only chosen sections within a design. You can layer up to 50 audio tracks, giving a rich and dynamic depth to the overall design. For guidance on how to trim and adjust tracks, review resources from the Canva Help Center .
Advanced Audio Features
Exploring the advanced audio features in Canva provides users with robust tools to elevate their video projects. Pro users can harness Canva's extensive audio capabilities to create professional-level multimedia content.
Explaining Audio Features for Pro Users
Canva Pro subscribers have access to premium audio features that transcend the basics. The Audio tab in Canva allows Pro users to experiment with an expanded audio library filled with tracks tailored to different genres and moods. Users can also upload their own audio files, giving them full control to integrate custom sounds into their designs seamlessly.
Mastering Audio Timing and Transitions
Effective audio timing and utilization of transitions are essential for impact. Canva's timeline interface grants users precision in synchronizing audio with visual elements. Features like fade in and fade out can be managed with simple controls, enabling users to adjust the pace of audio elements to match the video's rhythm.
Syncing Music to Video Content
Synchronizing music to the beat of video content can turn a simple project into an engaging experience. Canva Pro's beat sync feature empowers users to align their music with the video's timing, creating a cohesive and harmonious final product that captures the viewer's attention.
Utilizing Sound Effects and Genre Tracks
Canva Pro offers an array of sound effects that users can apply to enhance the emotional and sensory aspects of their video content. From subtle ambient sounds to striking audio cues, these sound effects can be layered and edited within the timeline. Additionally, Canva's library provides a diverse selection of genre tracks, allowing users to set the perfect tone for their video narratives.
Finalizing and Exporting Your Design

After adding music and finalizing the creative elements of a project, the next steps focus on previewing the finished product, downloading the design to various formats, and sharing it across social media platforms.
Previewing Your Canva Project
Before finalizing a Canva project, it is essential to preview the design to ensure that all elements, including audio tracks, are properly aligned and in sync. This can be done directly within the Canva editor, which displays a real-time representation of the design. It allows users to experience the design as intended, complete with its audio accompaniment, before committing to a download.
Downloading the Design with Audio
After the preview and any final adjustments, the Canva design can be downloaded in a format that best suits its intended use. The options typically include file formats such as MP4 for video or presentations that maintain the audio integrity. Users must choose the format that retains the design's audio component, ensuring the music plays seamlessly upon playback.
Sharing Your Canva Creations on Social Media
Once the Canva design is downloaded, users can share their creations across social media platforms . This process can often be done directly from Canva's interface or by uploading the downloaded file to the chosen social media platform. Each platform may have specific requirements for uploads, so it’s important to ensure the design conforms to those standards for optimal playback and engagement.
Additional Resources

For those looking to enhance their Canva projects with music, additional resources are at hand to guide through every step of the process. Various tutorials and applications can significantly help in mastering Canva's editing capabilities and integrating music seamlessly.
Canva Tutorials and Help Center
Canva's own Help Center offers a range of tutorials specifically designed to assist users in adding audio to their designs. These step-by-step guides ensure that even beginners can navigate the Canva editor with ease. Topics include how to layer audio tracks, use Canva templates effectively, and make the most of Canva's stock music library to find the perfect sound for any project.
- Tutorials Available: A full gamut of user-friendly instructions.
- Canva Editor Guidance: Detailed insight into efficiently using the editor's audio features.
- Templates: How to apply music onto various Canva templates to enhance them.
Exploring Canva Apps and Integrations
Canva's functionality expands with its apps and integrations , which allow users to add advanced features and third-party services to their design toolkit. From sourcing music tracks to syncing with educational tools, these apps provide a plethora of options to personalize and amplify Canva projects.
- Canva Apps: Extend the native capabilities of Canva for tailored experiences.
- Integrations: Use external services for a richer design and editing process.
- Canva for Education: Educators can discover apps that provide classroom-friendly music options.
Through these additional resources, users can leverage the full power of Canva's audio features to create compelling and fully customized designs.
Frequently Asked Questions

This section covers common inquiries related to adding music to Canva, outlining clear steps and tips to enhance your design projects with audio.
What steps are involved in adding background music to a Canva presentation?
To add background music to a Canva presentation, one must select the 'Audio' tab from the left-hand sidebar, choose a track from Canva's library, or upload their own audio file. The chosen track can then be dragged onto the canvas and repositioned as needed.
How can one access the audio library in Canva to add songs to a project?
Accessing Canva's audio library requires navigating to the 'Audio' tab within Canva's editor, where users can browse and preview different music tracks and sound effects for use in their projects.
In the case where Canva's audio feature is not working, what troubleshooting methods can be recommended?
If the audio feature in Canva is not functional, users should first check their internet connection, clear their browser cache, ensure their browser is up-to-date, or try using a different browser. Should the problem persist, contacting Canva's support team is recommended.
What are the options for adding music to a video using Canva's tools?
Canva allows adding music to videos by using its built-in stock audio options or by uploading personal audio tracks. Users can choose to mix multiple sounds, adjust their lengths, and set the audio as background music or sound effects for their video.
Are there any limitations to the number of audio tracks one can add to a single Canva design?
A single Canva design can support the addition of up to 50 audio tracks . If a design requires more than 50 tracks, it is suggested to split the design into separate sections.
Can users legally use the songs from Canva's audio library in their projects without copyright issues?
Songs in Canva's audio library are typically licensed for use within the platform, enabling users to incorporate them into their designs without facing copyright issues, as long as they comply with Canva's terms of service.
How to Save Canva as PDF: Easy Step-by-Step Guide
Learn how to save your Canva designs as PDF with our simple guide. Whether for print or digital use, ensure the high quality of your projects with Canva's versatile saving options. Ideal for presentations or marketing materials, find out how to maintain your design's integrity across all devices.
How to Flip Text in Canva: Quick Tutorial for Perfect Mirroring
Discover how to flip text in Canva with our easy guide. Perfect for beginners, learn to add a unique touch to your designs, from social media to presentations, by mastering the art of flipping text horizontally or vertically on Canva's user-friendly platform
How to Change Stroke Size in Illustrator: A Step-by-Step Guide
Adobe Illustrator is a powerful tool for graphic design, known for its precision and versatility in vector art creation. One of the fundamental aspects of working with vector graphics is the ability to adjust stroke size. Strokes are the outlines of shapes and paths that can vary in width, and
How to Add Pages in Illustrator: A Step-by-Step Guide
Working with Adobe Illustrator, knowing how to manage and add pages—or artboards as they are known in the program—is crucial for an organized and efficient design process. Artboards in Illustrator are akin to individual pages within a document and can be utilized for creating multi-page documents, various versions
How Do I Add Audio to Canva Per Slide?

Step 1: Accessing the Audio Options
Step 2: uploading audio files, uploading from computer:.
- Select "Upload" and locate the audio file on your computer.
- Click "Open" to upload it to Canva.
Choosing from Media Library:
- If you prefer using Canva's media library, click on "Media Library" under the "Audio" tab.
- Browse through the available options and choose an audio file that suits your needs.
Step 3: Adding Audio to a Slide
- Select the desired slide where you want to place the audio by clicking on it.
- Under the "Audio" tab, click on the audio file you want to add. The audio will automatically be added to the selected slide.
Step 4: Adjusting Audio Settings
- To adjust the volume, click on the slide with the audio and use the volume slider located at the bottom left corner of the editor.
- If you want to loop the audio, simply click on the "Loop" icon next to the volume slider.
- To remove or replace an audio file, select the slide with the audio and click on "Remove Audio" under the "Audio" tab. Then follow Step 2 to upload or select a new audio file.
Step 5: Previewing and Presenting
- To preview your presentation, click on the "Play" button located at the top right corner of Canva's editor.
- Make sure all your slides with audio are playing correctly and adjust any settings if necessary.

About the author:

Related posts
How Do I Add Audio to My Canva Video? Adding audio to your Canva video can enhance the overall experience and make it more engaging for your audience. Whether you want to add background... October 4, 2023 canva -->
How Do You Add Audio to Canva Videos? If you want to enhance your Canva videos by adding audio, you're in luck! Canva provides an easy and intuitive way to include soundtracks or... October 4, 2023 canva -->
How Do You Add Audio to Canva Presentation? Adding audio to your Canva presentation can enhance the overall experience for your audience. Whether you want to include background music,... October 4, 2023 canva -->
How Do I Add Audio to a Slide in Canva? Are you looking to add audio to your slides in Canva? Adding audio can enhance your presentations and captivate your audience. In this tutorial, we... October 4, 2023 canva -->
How Do I Add Icons to Canva? Canva is a popular online graphic design tool that allows you to create stunning visuals with ease. While it offers a wide range of features and... October 4, 2023 canva -->
How Do I Add External Audio to Canva? Are you looking to add some external audio to your Canva designs? Whether you want to include a catchy background music or a professional voiceover,... October 4, 2023 canva -->
How Do I Add a Font to Canva? Are you tired of using the same old fonts in Canva? Do you want to add a touch of uniqueness to your designs? Well, you're in luck! Adding a new... October 4, 2023 canva -->
How Do I Add Audio and Music to Canva? Do you want to add audio and music to your Canva designs? Canva is a popular online design tool used by millions of people worldwide to create... February 18, 2023 canva -->
How Do I Add a QR Code to Canva Flyer? Adding a QR Code to a Canva flyer can be a great way to provide additional information or engage your audience. With Canva's user-friendly interface... October 4, 2023 canva -->
How Do You Add Music to a Canva Video? Are you looking to add some catchy tunes to your Canva videos? Adding music can enhance the overall experience and make your videos more engaging.... October 4, 2023 canva -->
You haven't yet saved any bookmarks. To bookmark a post, just click .
How to Add Background Music to Canva Presentation
Adding music to your Canva presentations is a great way to make them more engaging and memorable for your audience. The right background music can help set the mood, emphasize important points, and make your presentation stand out.
Step 1: Accessing Canva’s Music Library
The first step is accessing Canva’s built-in music library. This contains thousands of high-quality, royalty-free audio tracks you can use in your presentations.
Step 2: Searching for Tracks in the Music Library
Step 3: adding music tracks to your slides, step 4: adjusting volume and trimming track length, how to upload your own audio files.
While Canva has a great music library, you may want to use your own audio files. Uploading your own music or audio clips is easy:
How to Download Your Presentation with Audio
Once your Canva presentation has music set up exactly how you want it, you’ll need to download it as a video file to preserve the audio. Here’s how:
Tips for Adding Music to Presentations
Adding audio can take your Canva presentations to the next level and leave a lasting impact on your audience. With Canva’s user-friendly tools for browsing, adding, and editing music, it’s easy to create sleek, modern presentations with the perfect soundtrack.
Can I add music to Canva presentation?
Yes, you can add music to a Canva presentation. Select the Audio tab from the editor, search for tracks, and click or tap to add them to your design.
How do I add sound effects to my Canva presentation?
Can you add music from spotify to canva, how do i add apple music to canva.
To add Apple Music to Canva, you need to convert the Apple Music file to a compatible format like MP3 or M4A using a tool like AudKit Apple Music Converter. Then, upload the converted file to Canva and add it to your project.
About The Author
Related posts, how to share canva presentation, how to add notes to canva presentation and open it in slideshow, how to change canva slide size, how to add narration to canva presentation.
How To Add Voice Over In Canva (Step By Step!)
- Post author: Rohit Lohia
- Post last modified: September 10, 2023
Are you looking to add some voiceover to your Canva projects but not sure where to start?
I feel you. When I first tried to add audio to my Canva designs, I was totally lost too.
But don’t worry, adding voiceover in Canva is actually pretty straightforward once you know how.
In this quick guide, I’ll walk you through the simple steps for adding your pre-recorded voiceovers and audio recordings to any Canva presentation or design.
I will also guide you on how you can add AI-generated voiceover inside Canva using Murf AI.
So let’s get started!
Table of Contents
You May Also Like:
- 34+ Best Canva Tips and Tricks To Design Faster
- How To Create Sublimation Designs In Canva (Step By Step!)
- How To Overlay Images In Canva (My Easy Trick!)
- How To Make Text Vertical In Canva (Step By Step!)
How To Add Voice Over In Canva (Step By Step)
Below are the two methods that you can follow to add a voiceover in Canva:
1. Add Pre-Recorded Voiceover
To add pre-recorded voiceover to your design in Canva , firstly you have to record your audio from your mobile and then save it on your computer.
Then from the Canva homepage, Look for the ‘ Recent Designs’ section.
Now click on the thumbnail of the design on which you want to add your voiceover. The design will open in the Canva editor.
After opening your design in the Canva editor, click on the ‘ Uploads ’ button from the left sidebar.
Now from the new menu, click on the ‘ Upload Files’ button to select the pre-recorded audio from your computer.
Once the audio is successfully uploaded in Canva, it will appear under your upload library. Click on that uploaded voiceover to add it to your design.
After clicking on the uploaded voiceover, you will notice a ‘ Soundwave Timeline’ at the bottom of your screen.
To control the volume of your voiceover, click on the ‘ Soundwave Timeline’ from the bottom of your screen and then on the ‘Volume’ icon from the top toolbar.
Now drag the ‘ Volume ’ slider towards the left-hand side to decrease the volume of your uploaded voiceover.
Release the slider when you are satisfied with the volume.
2. Add an AI Voiceover
If you don’t want to spend time creating your voiceover and then uploading it on Canva.
Then you can also add an AI voiceover to your design. An AI voiceover not only sounds professional but also helps to save a lot of time.
To add an AI voiceover to your video, click on the ‘Apps’ button from the left side of the Canva homepage.
Now a new menu with various apps will open in front of you. Search for the ‘ Murf AI ’ app from the top search bar of the new menu.
- Note: Murf AI is a text-to-voice generator platform, it helps to create voiceovers from scripts. The platform streamlines the production process and helps to create professional voiceovers in just a few clicks.
From the search results, click on the ‘Murf AI’ app.
Now you will be given two options for adding a voiceover to your design:
- Use In Existing Design
- Use In New Design
If you want to add a voiceover to your existing design, click on the ‘ Use In Existing Design’ button and then on the ‘ Your Project’ button to open a list of all your previous designs.
Now click on the project that you want to continue editing and it will open in the Canva Editor.
Or if you want to add a voiceover to a new design, then click on the ‘Use In New Design’ button.
Type in your desired design type on the top search bar. Then from the search results, click on your desired design type to get redirected to the Canva editor.
Once you are on the Canva editor, click on the ‘ Open’ button to open the ‘Murf AI’ app on your editor.
After opening the ‘ Murf AI’ app, click on the ‘ Connect’ button to create an account with ‘ Murf AI’ .
Now under the ‘ Select A Voice’ section, click on the thumbnail of the voice to hear how it sounds. After listening to the voices, click on the one that you like most.
Now type the script of your voiceover under the ‘ Enter Your Text’ section. Then click on the ‘ Choose Style’ button to open a new drop-down menu.
From the drop-down menu, click on the style of your liking.
For example, I will click on the ‘Conversational’ style to add it to my voiceover.
To adjust the speed or pitch of the voiceover, drag the ‘Speed’ or ‘Pitch’ slider towards the left or right-hand side according to your liking.
After making all the adjustments, click on the ‘ Generate Voiceover’ button to generate your voiceover according to the input data.
Once you click on the ‘ Generate Voiceover’ button, Canva will process your data for a few seconds and then the generate voiceover will start playing in front of you.
If you are satisfied with the played voiceover, click on the ‘Add To Design’ button at the bottom.
If you are not satisfied with the played voiceover, make the necessary changes to the input data and then add it to your design.
Murf AI will then successfully add the generated voiceover to your design and you will be able to see the ‘ Soundwave Timeline’ at the bottom of your screen.
FAQ- How To Add Voice Over In Canva
Below are a few frequently asked questions:
How Do I Add Audio To Canva?
To add audio to the Canva design, click on the ‘ Apps ’ button from the left sidebar and then on the ‘Audio *’* button. Once the Canva library of stock audio opens in front of you, click on your desired audio to add it to your design.
If you want to upload your own audio to Canva, click on the ‘ Uploads’ button from the left side and then on the ‘ Upload Files’ button to upload the audio from your computer.
Can You Edit Audio In Canva?
Yes, you can easily edit the audio in Canva. After adding the audio to your design, you can trim, adjust the volume, set audio effects etc to your audio. Follow our How To Edit Audio In Canva blog post to know more in detail.
Wrapping Up
And there you have it – everything you need to know to add voiceovers and bring your Canva designs to life!
I hope this quick guide made it simple to locate Canva’s hidden Murf AI voice-over tool.
If you are going to use AI text to speech then It may take some trial and error to get the right AI voice and tone, but the impact is so worth it.
I still remember the first time I used AI voiceovers in Canva – it was for a video tutorial and I was shocked by how much more dynamic it made the content.
Now voiceovers are a staple in my Canva workflow.
So start small, experiment, and have fun with it!
Let me know if you have any other Canva-related questions.
And if you found this guide useful, please leave a comment below and share it with anyone who could benefit.
The more we share knowledge, the better we all get!
How to Add Your Own Audio to Canva
Home » Blog » How to Add Your Own Audio to Canva

Founder of CanvaTemplates.com & Professional Graphic Designer
Jake Tucker
Canva Templates is reader supported. When you buy through links on our site, we may earn an affiliate commission. Learn more
Adding audio to a design can significantly enhance its appeal and make it more engaging. Canva, a popular graphic design tool, allows users to add their own audio files to their designs. This feature is useful for businesses and individuals who want to create more dynamic content that stands out.
To add audio to a design in Canva, users can either upload their own audio files or select from Canva’s audio library. Uploading audio files is a straightforward process that involves navigating to the “Uploads” tab in the left-hand sidebar and selecting the “Audio” option. From there, users can drag and drop their audio files into the upload window. Canva allows users to upload a variety of audio formats, including MP3, WAV, and M4A.
In addition to uploading their own audio files, users can also record audio directly in Canva. This is a useful feature for those who want to add voiceovers or other custom audio to their designs. To record audio in Canva, users can click on the “Record” button in the “Audio” tab and start recording. Once the recording is complete, it can be added to the design just like any other audio file. With these simple steps, anyone can add their own audio to their Canva designs and take their content to the next level.
Understanding Canva
What is canva.
Canva is a graphic design platform that allows users to create a wide range of designs, including social media graphics, presentations, posters, and more. It was launched in 2013 and has since gained a large following due to its user-friendly interface and extensive library of design templates, graphics, and fonts.
Canva is available both as a web-based application and as a mobile app, making it easy for users to create and edit designs on the go. It is free to use, but users can also choose to upgrade to Canva Pro for additional features and design tools.
Features of Canva
Canva offers a wide range of features that make it a popular choice for graphic designers and non-designers alike. Some of the most notable features of Canva include:
Design templates: Canva provides users with access to thousands of pre-designed templates for a wide range of design projects. These templates can be customized to fit the user’s specific needs and preferences.
Graphics and illustrations: Canva offers a vast library of graphics, illustrations, and icons that users can use to enhance their designs.
Fonts: Canva provides users with access to a large selection of fonts, including both free and premium options.
Collaboration: Canva allows users to collaborate on designs with others by sharing a link to the design and allowing others to edit or comment on it.
Integration: Canva can be integrated with a wide range of other tools and platforms, including social media platforms, email marketing tools, and more.
Overall, Canva is a powerful and user-friendly design platform that offers a wide range of tools and features to help users create professional-looking designs quickly and easily.
Preparing Your Audio
Before adding your own audio to Canva, it’s important to prepare it properly to ensure the best results. This section will cover two sub-sections: Choosing the Right Audio and Formatting Your Audio.
Choosing the Right Audio
When selecting audio to add to your Canva design, it’s important to choose the right type of audio that fits the mood and tone of your design. Here are some tips to keep in mind when selecting audio:
- Consider the purpose of your design. Is it a promotional video, a social media post, or a presentation? The audio you choose should match the purpose of your design.
- Think about the audience you are targeting. What type of music or sound effects would appeal to them?
- Keep copyright laws in mind. Make sure you have the right to use the audio you select.
Formatting Your Audio
Once you have selected the right audio, it’s important to format it properly so that it works seamlessly with Canva. Here are some tips to keep in mind when formatting your audio:
- Choose the right file type. Canva supports MP3, M4A, and WAV files.
- Keep the file size in mind. Large audio files can slow down your design and take up valuable storage space. Consider compressing your audio file if it’s too large.
- Pay attention to the audio quality. Low-quality audio can negatively impact the overall quality of your design. Make sure your audio is clear and crisp.
By following these tips, you can ensure that your audio is ready to be added to your Canva design.
Uploading Audio to Canva
Adding audio to Canva is a great way to enhance your designs. Whether you’re creating a presentation or a video, audio can make your design more engaging and dynamic. Here’s how to upload your own audio to Canva.
Navigating to the Audio Section
To upload your own audio file, navigate to the left-hand menu on your design page and click on the “More” button. Scroll down until you see the “Audio” option. Click on it, and then click on the “Uploads” button at the top of the panel that opens. This will take you to the audio upload page.
Uploading Process
Once you’re on the audio upload page, you can drag and drop your audio files into the upload window. Canva supports a variety of audio file formats, including MP3, WAV, and M4A. You can also click on the “Upload Media” button to select files from your computer.
After you’ve selected your audio file, Canva will upload it and add it to your uploads library. From there, you can easily add it to your design by clicking on the audio file and dragging it onto your design.
It’s important to note that Canva has a file size limit of 25MB for audio files. If your file is larger than this, you may need to compress it or use an external file hosting service.
That’s it! With just a few clicks, you can add your own audio to Canva and take your designs to the next level.
Adding Audio to Your Design
Canva allows users to add audio tracks or sound effects to their designs. Users can choose from Canva’s library of audio tracks or upload their own files. Here are some steps to follow when adding audio to your design:
Selecting Your Audio
To add audio to your design, navigate to the left-hand menu on your design page and click on the “More” button. Scroll down until you see the “Audio” option. Click on it, and then click on the “Uploads” button at the top of the panel that opens. Here, you’ll find the “Upload media” button where you can upload your own audio file or choose from Canva’s library of royalty-free tracks.
Once you have selected your audio track, you can drag and drop it into your design. You can add and layer up to 50 audio tracks to your design.
Adjusting Audio Settings
After adding an audio track to your design, you can adjust its settings. Click on the audio track to open the audio settings panel. Here, you can adjust the volume, loop the track, and choose whether to play the audio automatically or on click.
You can also trim the audio track to a specific section by dragging the left and right edges of the audio waveform. This is useful if you only want to use a specific part of the audio track.
In conclusion, adding audio to your Canva design is a simple process. Users can choose from Canva’s library of audio tracks or upload their own files. Adjusting the audio settings is also easy and allows users to customize the audio track to fit their design.
Saving and Downloading Your Design
After adding your own audio to Canva, it’s time to save and download your design. This section will guide you through the steps to save and download your design.
Saving Your Design
Saving your design is important to ensure that you don’t lose any of your hard work. To save your design, follow these steps:
- Click on the “File” menu in the top left corner of the screen.
- Click on “Save” or “Save As” if you want to rename your design.
- Choose the location where you want to save your design.
- Click on the “Save” button.
Once you have saved your design, you can continue working on it or download it.
Downloading Your Design
To download your design with your own audio, follow these steps:
- Click on the “Download” button in the top right corner of the screen.
- Choose the file type you want to download your design as (e.g. MP4 video).
- Choose the quality you want to download your design in (e.g. 720p).
- Click on the “Download” button.
Once your design has finished downloading, you can use it for your project or share it with others.
Remember to save your design regularly while you work on it to avoid losing any changes. Also, make sure to choose the right file type and quality when downloading your design to ensure that it meets your needs.
That’s it! You now know how to save and download your design with your own audio in Canva.
How Do You Add Audio to Canva Presentation?
Last updated on May 11, 2023 @ 9:08 am
Adding audio to your Canva presentation is a great way to engage your audience and add some personality to your slides. There are a few different ways you can add audio to your presentation, and we’ll show you how to do it using the Canva editor.
To add audio to your presentation, first, click on the “ Elements ” tab in the left toolbar. This will open the media library, where you can choose from Canva’s library of free stock audio clips . Just search for your preferred audio clip and browse through the audio search results.
Once you’ve selected the audio file you want to use, just click on it to insert it into your presentation. The file will be added to your presentation and will start playing automatically when you click on it.
You can also control how the audio file plays by clicking on the audio itself in the presentation to open the Audio Settings at the top menu. Here you can choose to have some Audio Effects applied to your audio in the presentation. You can also set the volume of the audio file and delete it if you ever want to change the audio.
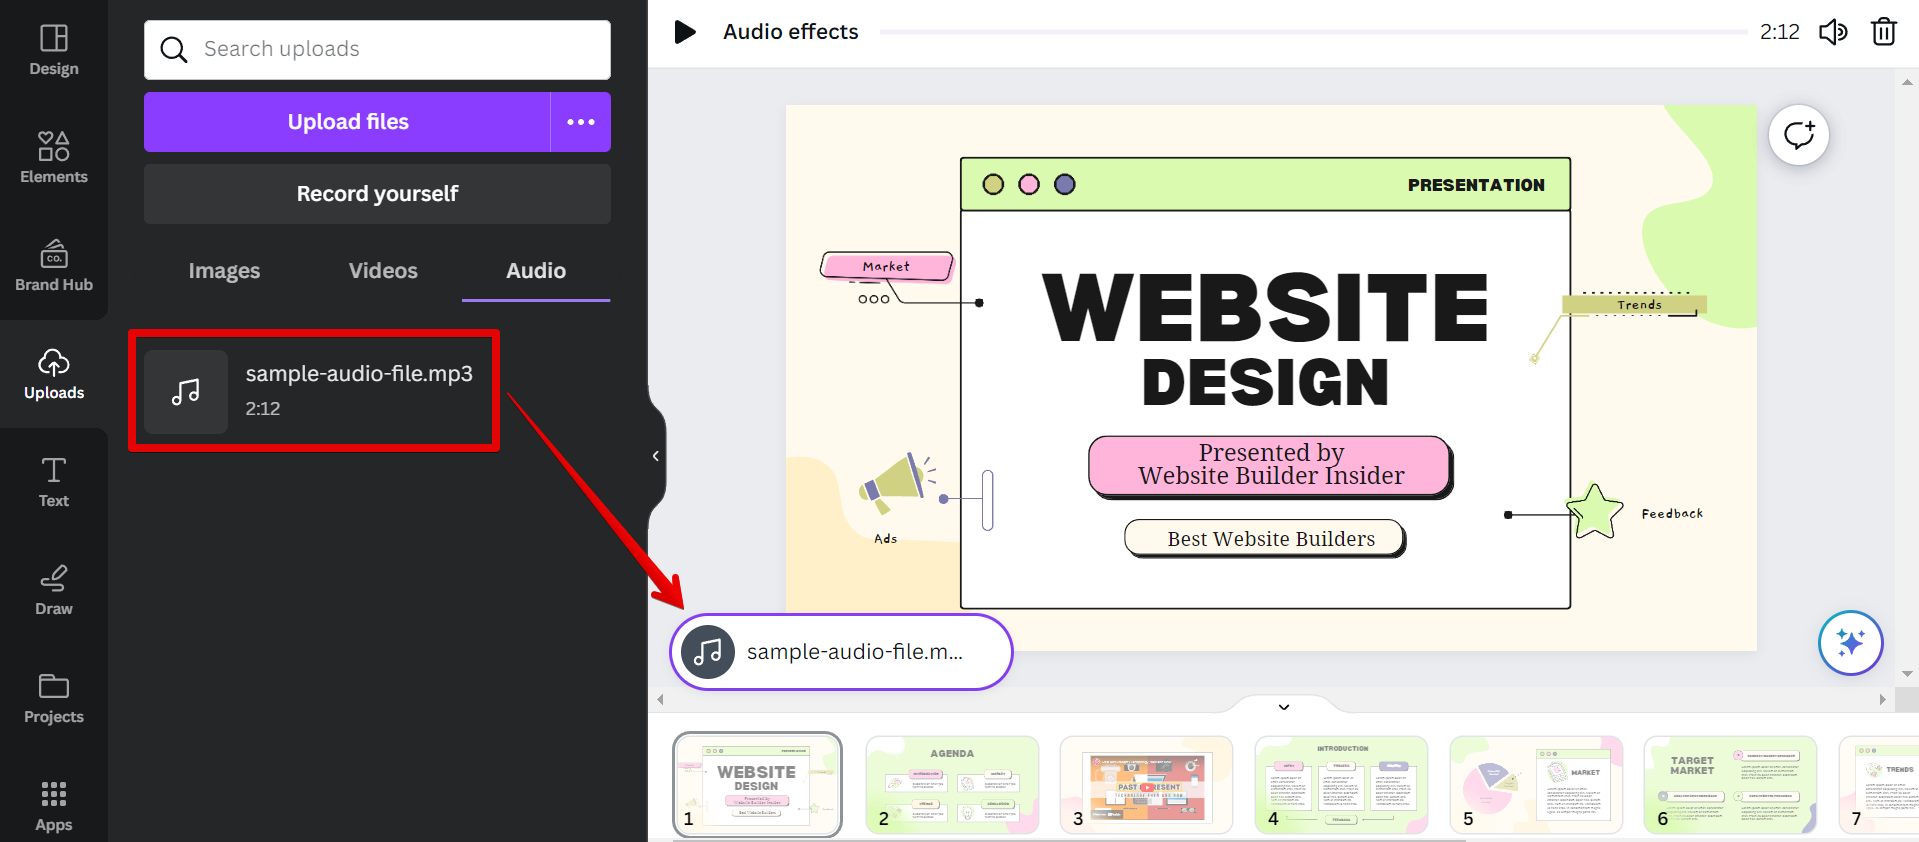
Another way that you can add audio to your presentation in Canva is to upload an audio file. To do this, simply go to the “ Uploads ” tab. This will open the media library where you can upload your own audio clips . From there, click on the “ Upload files ” button.
Select the audio file that you want to upload and click on the “ Open ” button.
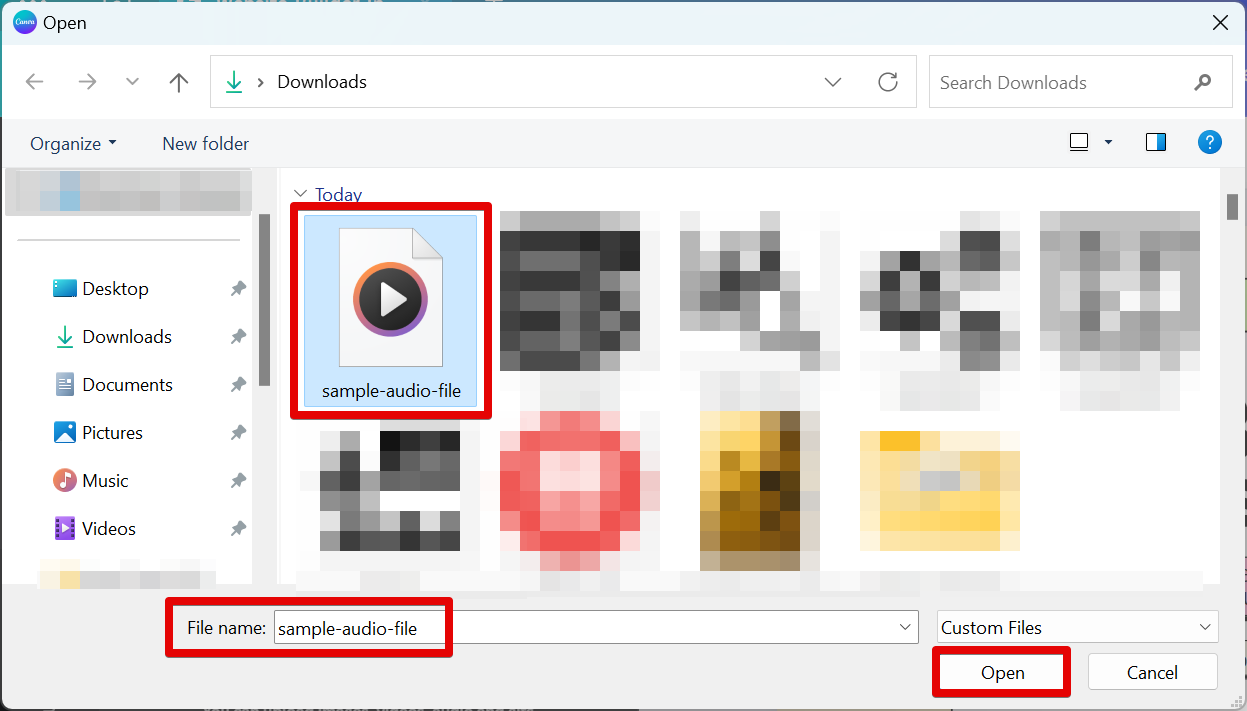
Once the audio file is uploaded in Canva, just click on it to add it to your presentation.
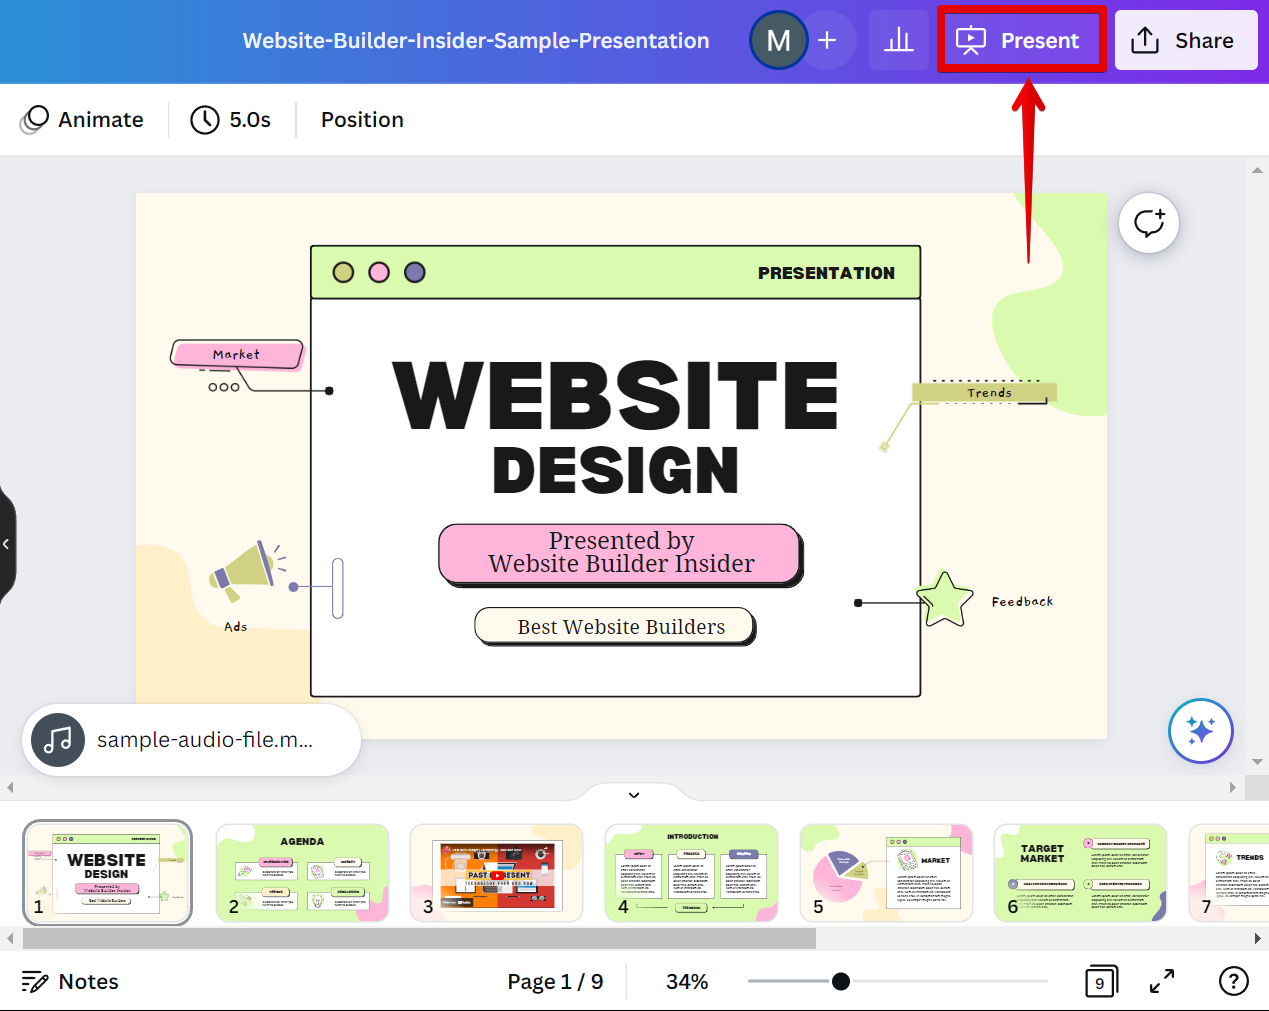
Once you’ve added the audio file, you can preview how it sounds by clicking on the “ Present ” button in the top toolbar. This will open your presentation in a new window so you can hear how the audio sounds with the rest of your slides.
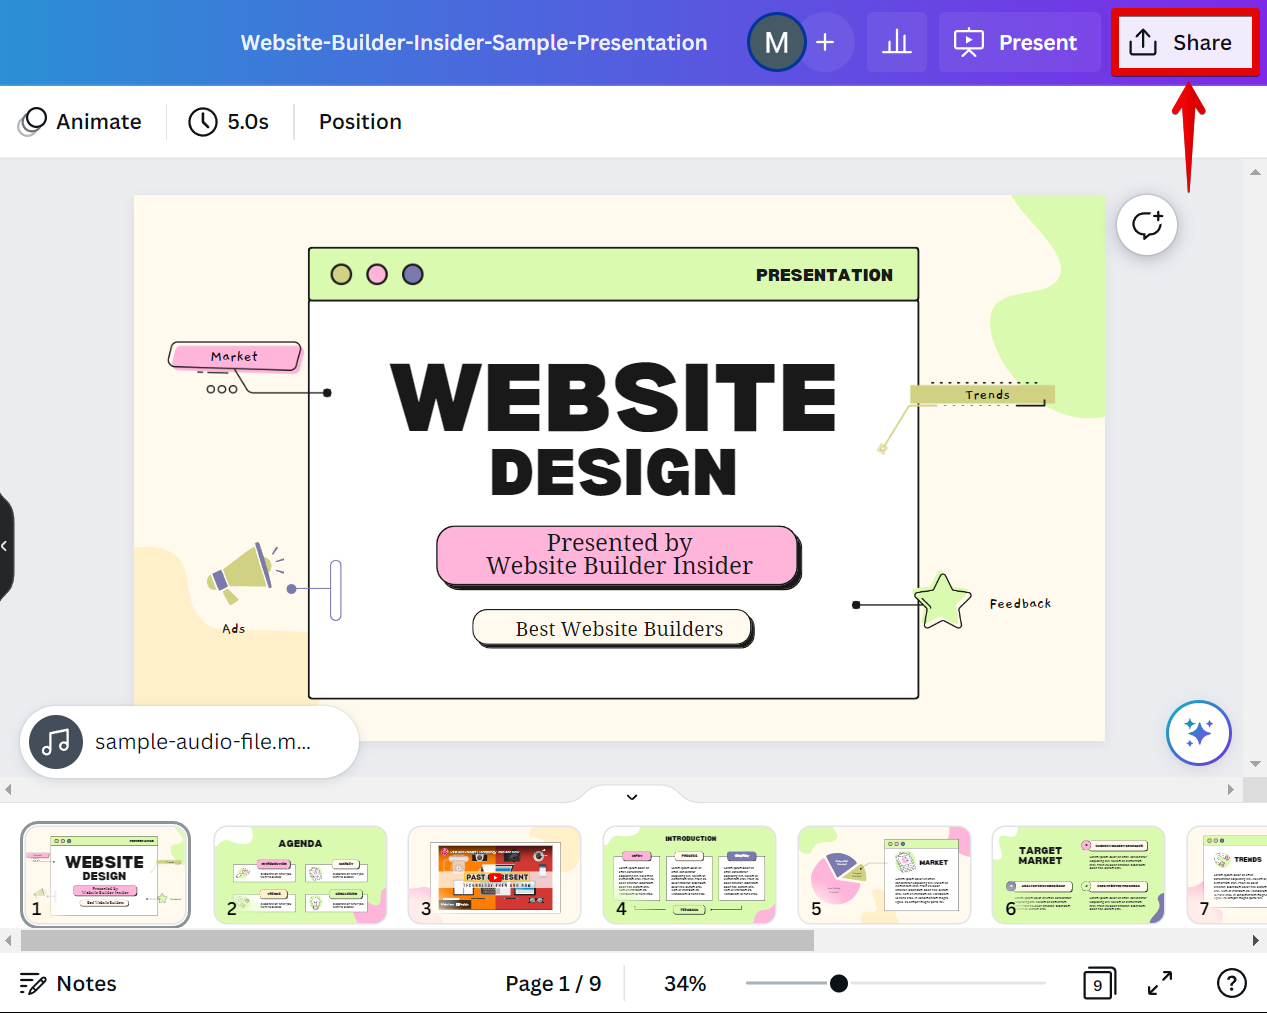
When you’re happy with how everything sounds, click on the “ Share ” button in the top toolbar to save your presentation as an MP4 video file or a presentation file. You can also share your presentation online or embed it on your website.
Conclusion:
Adding audio to your Canva presentation is a great way to engage your audience and add some personality to your slides. There are a few different ways you can add audio to your presentation, but the easiest way is to use the Canva editor.
9 Related Question Answers Found
How do you add music to a canva presentation, how do you add multiple audio to canva presentation, how do i add audio to canva, how do you add narration to canva presentation, can you add voice recording to canva presentation, how do you add audio to canva videos, how do i add a voice recording to canva presentation, how do i add audio to my canva video, how do i add audio and music to canva.

Madison Geldart
Cloud infrastructure engineer and tech mess solver.
How Do You Add Multiple Audio to Canva Presentation?
Adding multiple audio to a Canva presentation is a great way to bring more life and interest to your slideshow. With Canva, you can easily upload multiple audio files such as music, sound effects, and narration to your presentations. You can even add audio clips from popular streaming services like Spotify or YouTube. Here’s how you can add multiple audio files to your Canva presentation.
Open your Canva presentation. Click on the “Audio” tab located on the left-hand side of the screen. This will open up a list of all the available audio files in Canva.
Choose an audio file by clicking on it.
You can either upload your own or choose from one of the available audio options from streaming services like Spotify or YouTube. After you have chosen an audio file, select it and click “Add”.
Repeat this process until you have added all the desired audio files to your Canva presentation. Once all of your selected audio files are added, they will appear in the timeline at the bottom of the screen.
You can now customize your audio playback settings by clicking on each of the individual tracks in the timeline. Here you can adjust settings such as volume and start/end time for each individual clip.
Adding multiple audio clips to a Canva presentation is easy and straightforward. All you need to do is click on the “Audio” tab, select an audio file, hit “Add”, then customize playback settings for each clip if desired. With these simple steps, you can easily integrate multiple sounds into your next slideshow.
7 Related Question Answers Found
How do you add music to a canva presentation, how do i add multiple images to canva, how do i add multiple photos to canva, can you add more than one audio to canva, how do i add audio and video to canva, how do you add audio to canva videos, how do i add audio and music to canva.
IMAGES
VIDEO
COMMENTS
In this video, I show you how to add audio or sound to your Canva presentation, project, image, or video. I also show you the basic ways to edit the audio t...
Want to create captivating presentations or engaging videos with audio in Canva? You're in the right place! In this step-by-step tutorial, we'll show you how...
In this Canva tutorial, I will show you how to get your... Looking for a way to use audio in your presentations when you want to. Here is a work around for you.
Computer. Mobile. From the editor side panel, click the Audio tab. If it's not there, click Apps first to see it. Scroll through the categories or use the search bar. Click See all next to each to browse all the options. Click on a track to add it to your design. If you're using a video template, it'll go where your play head (timestamp ...
Canva supports various audio formats such as MP3 and WAV. Here's how you can do it: Step 1: Open Canva and navigate to the presentation where you want to add audio. Step 2: Click on the "Uploads" tab in the left sidebar. Step 3: Drag and drop your audio file into the designated area or click on "Upload Media" to browse and select the file from ...
To do this, click on the "Uploads" tab in the left-hand sidebar and select the "Audio" option. Then, you can drag and drop your audio files into the upload window. 2. Recording Audio. The second way to add audio or music to Canva is by recording your own audio. To do this, click on the "Record yourself" tab still from the "Uploads ...
If you created a Canva video project from the get-go, adding audio per slide is actually an easy feat. Here's how you do it: Step 1: Head over to the Audio tab in the left sidebar. Step 2: Add the audio clips of your choice (each audio track will be added on a separate audio track in the timeline) Step 3: Adjust the length of each audio clip ...
Step 1: Open the presentation and select the slide where you want to add the voice-over. Step 2: Click the Uploads section on the left and switch to the Audio tab to reveal all the audio files ...
To add background music to a Canva presentation, one must select the 'Audio' tab from the left-hand sidebar, choose a track from Canva's library, or upload their own audio file. The chosen track can then be dragged onto the canvas and repositioned as needed.
Step 3: Adding Audio to a Slide. Once you have uploaded or selected an audio file, it's time to add it to your slide. Select the desired slide where you want to place the audio by clicking on it. Under the "Audio" tab, click on the audio file you want to add. The audio will automatically be added to the selected slide.
Make sure to save files as MP3s. In Canva, click on the "Uploads" tab. Drag and drop your voiceover MP3 files into the uploads area. Go back to your presentation slides. Click and drag your uploaded MP3 file onto the timeline of the slide where you want that voiceover to play. Drag voiceover to timeline. Repeat for all other slides and ...
Then go to your slide, right-click, and select "Paste" to add the track. Insert from library - Click on the "+" icon on a slide, go to the Audio tab, select your track, and click "Insert" to add it to the slide. You can add multiple music tracks across different slides to create a complete soundtrack for your presentation!
I'll show you how to upload your own audio files or music to your designs, how to record your own voice in Canva, and also how to work with multiple-layer au...
Clipping audio tracks. Computer. Mobile. On the timeline, click to select the added track to edit it. Click the icon at the end of the audio, and select Adjust. Drag the audio waves into the colored section of the sound bar. The design will play the parts of the track inside this colored section.
To add audio to your Canva slide, you need to upload an audio file first. Here's how to do it: Click on the "Audio" tab in the left sidebar. Click the "Uploads" button at the bottom of the Audio tab. Select the audio file you want to upload from your computer. Wait for the file to upload. The time it takes will depend on the size of ...
Canva allows users to upload their own music to use in presentations. To upload music, follow these steps: Click on the "Uploads" tab in the left-hand sidebar. Select the "Audio" option. Drag and drop the audio file into the upload window. Once the audio file is uploaded, it will appear in the "Uploads" folder.
Then from the Canva homepage, Look for the ' Recent Designs' section. Now click on the thumbnail of the design on which you want to add your voiceover. The design will open in the Canva editor. After opening your design in the Canva editor, click on the ' Uploads ' button from the left sidebar. Now from the new menu, click on the ...
To upload your own audio file, navigate to the left-hand menu on your design page and click on the "More" button. Scroll down until you see the "Audio" option. Click on it, and then click on the "Uploads" button at the top of the panel that opens. This will take you to the audio upload page.
Watch this video to learn how to add narration to your Canva presentations. Learn more about Canva through this playlist: https://www.youtube.com/playlist?li...
To do this, simply go to the " Uploads " tab. This will open the media library where you can upload your own audio clips. From there, click on the " Upload files " button. Select the audio file that you want to upload and click on the " Open " button. Once the audio file is uploaded in Canva, just click on it to add it to your ...
Here's how you can add multiple audio files to your Canva presentation. Step 1: Open your Canva presentation. Click on the "Audio" tab located on the left-hand side of the screen. This will open up a list of all the available audio files in Canva. Step 2: Choose an audio file by clicking on it.
About Press Copyright Contact us Creators Advertise Developers Terms Privacy Policy & Safety How YouTube works Test new features NFL Sunday Ticket Press Copyright ...
Canva Pro's sound effects add a new dimension to your video, making it sound more calm or suspenseful or action-packed. Layer sounds to complement the movements or transitions in the clip. Get the right sense of emotion and use SFX to keep the audience on the edge of their seats. Find the right sound effects for any mood from our extensive ...