
Free Online Microsoft Training
Free tips and tricks for using Microsoft Office and Windows

How to use PowerPoint templates
- By Belinda Anderson
- 15 August 2014
- Updated: 10 August 2024
- No Comments

Ever wondered how to create a quick presentation using PowerPoint templates? Maybe you’re in a hurry and don’t have hours to spend playing with design, colours and slide layouts. Let me show you how to create an effective PowerPoint presentation using the built-in templates available through the Microsoft Office template gallery.
Using Microsoft PowerPoint Templates
The built-in PowerPoint template designs provide pre-defined formatting for different parts of a presentation including the background patterns, fonts, colours and general look-and-feel. There is no need to start from scratch. The templates cover specific audiences but also target various design styles. You can find a template for a “modern” presentation right through to a presentation suitable for high schoolers or even an architecture based slideshow. The templates are certainly worth 10 minutes of exploring while you enjoy a cup of coffee (or tea!).
One suggestion I provide to all people who attend one of my training courses is to be inquisitive. You don’t know what you don’t know , so have a sticky-beak around the programs to discover new options and resources.
There are many people who don’t like the template options. Some believe they are overused and that we should steer clear of them. I however am 100% for any feature of the Microsoft products which will save me time and so if a template is going to save me 3 hours of design time then I’m all for utilising them.
Microsoft 365 Create
The Microsoft Create website is designed to help users find and use a variety of creative tools and resources provided by Microsoft. You can access the PowerPoint templates directly online via the Microsoft Create website at https://create.microsoft.com/en-us/powerpoint-templates .
The PowerPoint templates are also accessible from within the PowerPoint app. So without further ado, let’s take a look at how to use a template to create a PowerPoint presentation.
Create a presentation using a template
To create a presentation based on a template, follow these steps:
- Open Microsoft PowerPoint .
- Choose New from the sidebar.
- The built-in templates will now be displayed:
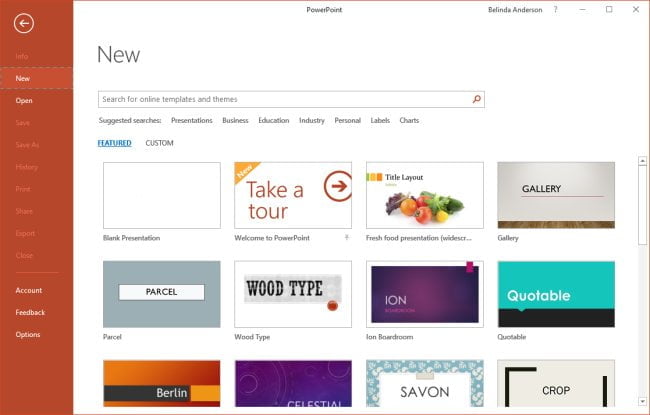
- At the top of the screen, you will see a search box which allows you to search by keywords related to a topic or design style.
- Underneath the search bar, you will see some suggested search terms.
- I always recommend that you spend about 10-15 minutes and have a good browse through the different categories – “you don’t know what you don’t know” and so this provides you with some exploration of what you could utilise.
- Let’s now look for business-related presentations, from the suggested search terms, click Business .
- Browse through the options and single click on a design you wish to use, you will see a preview appear:
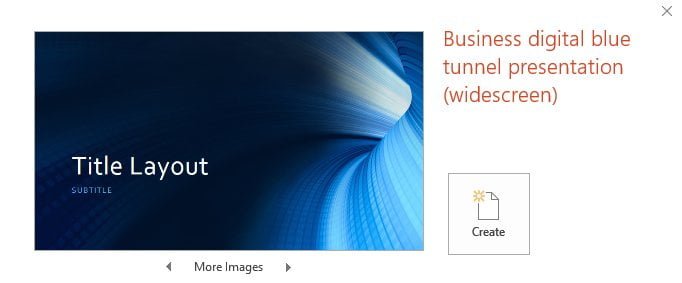
- If you would like to proceed and use the template, click Create , otherwise click the X and continue looking through the templates till you find one you like.
- Once you click Create , the template will be downloaded from the Office.com website and displayed in PowerPoint:
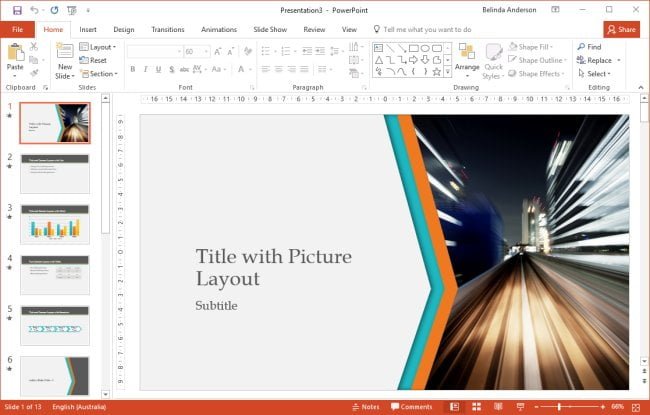
- Now that the template is open, you can spend a few moments exploring the different slide layouts plus the design elements such as images, SmartArt graphics, charts, and table which are included in the template.
You have the option of now creating your content directly within the presentation, or use the Reuse slides feature to import slide content from existing presentations where relevant.
Download more PowerPoint Templates
There are several great free resources online which provide even more template options. Be sure to check out:
- Slidesgo.com (download 5 FREE templates per month)
- SlidesCarnival.com
- PresentationGo.com
More PowerPoint articles
If you are new to using PowerPoint and are not yet comfortable with creating a presentation from scratch, the following posts will provide you with some guidance:
- Introducing the PowerPoint window
- Basics of using placeholders in PowerPoint
- Choosing a slide layout in PowerPoint – why it’s important
- Effective presentation design tips
- Create Speaker Notes in your presentation
- Preview a slide show in PowerPoint
That finishes up the steps on how to create a new presentation using PowerPoint templates. Comment below with any questions.
- PowerPoint , Slides
- Microsoft PowerPoint
Leave a Reply Cancel reply
Your email address will not be published. Required fields are marked *
Please enter an answer in digits: four × 4 =
This site uses Akismet to reduce spam. Learn how your comment data is processed .
Recent Posts

- Microsoft Excel (38)
- Microsoft Forms (10)
- Microsoft OneNote (11)
- Microsoft Outlook (34)
- Microsoft PowerPoint (32)
- Microsoft Sway (9)
- Microsoft Teams (10)
- Microsoft Windows (24)
- Microsoft Word (32)
PowerPoint 101: The Ultimate Guide for Beginners

Are you struggling with PowerPoint? You need a quick design in PowerPoint but don't know where to start? Don't worry, you have nothing to be ashamed of.
In this article, we're going to refresh the most important PowerPoint basics so you can take advantage of this Microsoft software and create high-impact presentations at any time!
Millions of users worldwide use Microsoft 365 services , making PowerPoint the presentation design software with the highest market share. And with good reason! PowerPoint's features stand out for its usability and originality . We can tell you that PowerPoint is pretty intuitive software, and it's a great option to choose when working with presentations on a daily basis. So, are you ready for a quick PowerPoint 101 class?
Let ' s see what you ' re going to learn today with this PowerPoint Guide :
What is PowerPoint?
What are the best uses of powerpoint, powerpoint basics: what are the components of powerpoint workspace, mastering powerpoint: what are the main features of powerpoint, what are powerpoint templates and where to find them, time to practice how to make a presentation in powerpoint.

Microsoft PowerPoint is a presentation design software that is part of Microsoft 365 . This software allows you to design presentations by combining text, images, graphics, video, and animation on slides in a simple and intuitive way.
Over time, PowerPoint has evolved and improved its accessibility to users. For this reason, it has been adapted to the main operating systems and modalities:
- PowerPoint Online
Additionally, you can use Word and Excel in this online version. That way, you'll be able to make real-time changes in the cloud without fearing losing your files. Sounds great, right?
PowerPoint has a versatile range of uses. Here's a list of the different tasks you can complete with this presentation design software:
- Business presentations or Pitch decks.
- Marketing, Sales and HR plans.
- Project briefs and timelines.
- Inductions to new employees.
- Seminars and educational classes.
- Professional portfolio of photos or designs.
- Presentations of a research summary.
- Presentations for special occasions.
These are just a few examples of the multiple possibilities this Microsoft software offers. Your imagination is the only limit!
Stay tuned as we continue with this PowerPoint 101 Guide...
In order to deeply understand this presentation design software, you need to recognize its main components. Now it's time to learn about the PowerPoint basics!
A quick note before going any further: when opening PowerPoint, some of the commands in the ribbons will look grayish and won't be highlighted when you hover the mouse over them.
This happens since some commands need to be selected in order to function. For example, if you want to change the color of a text, you first need to select it.
That being said, let's start with this Guide for PowerPoint beginners:
PowerPoint Main Window
The first aspect to learn is PowerPoint Main Window. To facilitate the explanation, we've organized its main elements with numbers from 1 to 10:
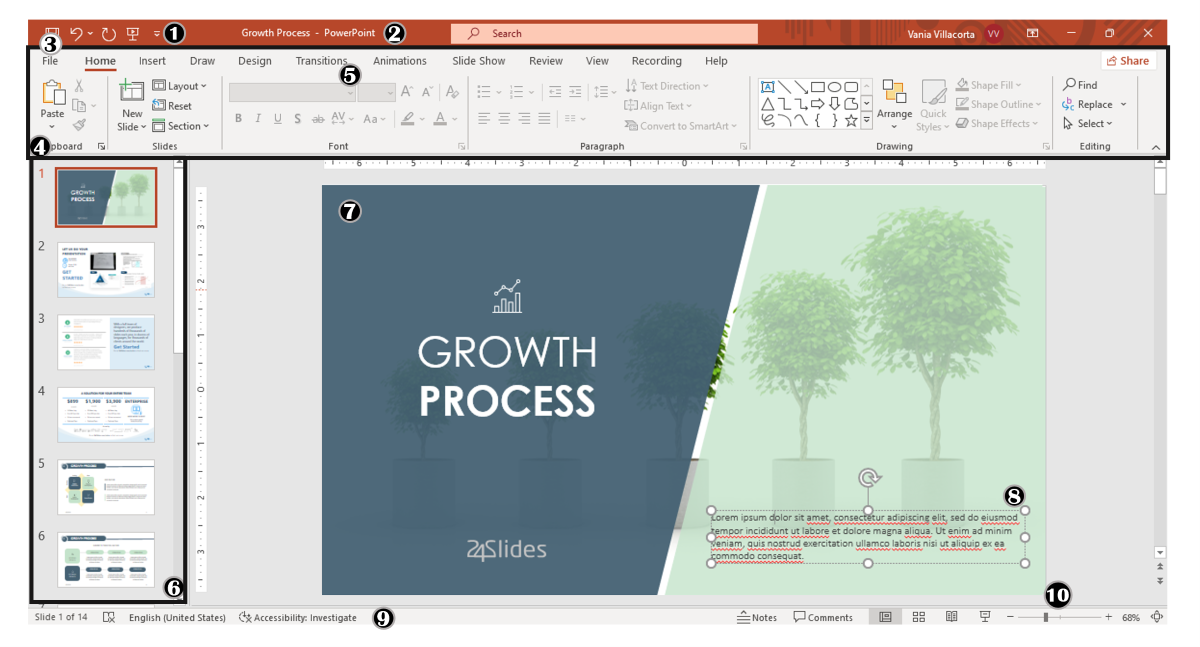
Based on that, the main components of PowerPoint window are the following:
1. Quick Access Toolbar: allows you to customize commands to have them at hand. You only have to select it and go to "More commands."
2. Title Bar: shows you the name of your file and other "Suggested options" like Slide Master View . These options will vary depending on the use you give to the commands.
3. File Tab: you will see the Home Menu (PowerPoint backstage) by selecting it. There, you can create a new presentation, save it, print it, export it, and many other options.
4. The Ribbon: it's where PowerPoint tabs and tools are. These tools can also be called "commands" or “features.”
5. More Button or Down Arrow: these arrows allow you to view more tools or layout options in PowerPoint.
6. Slides Pane: shows your slides in thumbnail size. By right-clicking, you can access additional options for customizing each slide. Perfect for PowerPoint beginners!
7. Slide: PowerPoint's blank canvas and the frame to be seen when presenting the file.
8. Placeholders: they are dotted boxes that will store your content.
9. Status Bar: allows you to view the slide number, grammatical errors, speaker notes, and the comments on your file.
10. Zoom: allows you to enlarge or minimize your PowerPoint workspace. The range goes from 10 to 400%.
PowerPoint Tabs
The PowerPoint tabs are the control desk of your presentation . Since PowerPoint's features are too many, they're organized in tabs.
You can come and go between tabs as you need. Once you click on a tab, it will open its ribbon, and there, you'll be able to see all the tools related to that particular category.
This PowerPoint tutorial for beginners will give you an overview of all PowerPoint tabs . Pay attention to the following list:
- Transitions Tab
- Animations Tab
- Slide Show Tab
- Recording Tab
1. Home Tab
The Home tab is the most common tab of PowerPoint. This is the tab you'll probably use the most if you're designing a presentation deck from scratch.

It allows you to add new slides and change the text characteristics : font, size, boldness, underlining, alignment, etc. If you've ever used Microsoft Word, these features will be familiar to you.
Also, you will find commands to edit the characteristics of the geometric shapes you insert. This includes: fill color, line color, sharpe effects, among others.
2. Insert Tab
The Insert tab is exactly what its name says it is. In this ribbon, you'll find all the options concerning adding a new element to your PowerPoint presentation .

You can insert a picture, some geometric shapes, icons, WordArt graphics, among others. We can tell you that this tab is really helpful for PowerPoint beginners!
For example, if you have a lot of data in PowerPoint , you could add a chart or diagram to show your information in a more visual way. Also, you can embed videos or music into PowerPoint really easily.
- PowerPoint tip for beginners: To be able to write text on your slides, you need a text box. So, if you're designing your presentation from scratch, remember to go first to the Insert tab and add a text box to start writing.
3. Design Tab
If you are one of those people who enjoy choosing the design of a PowerPoint presentation, this tab will be your favorite.

The Design tab offers a wide range of premade designs , allowing you to get more polished slides. Even better, if you explore its ribbon, you can adjust the color palette and change the overall style of your PowerPoint deck.
The PowerPoint interface, as this basic PowerPoint Tutorial, is really intuitive. We believe that you won't have any problem with this tab!
4. Transitions Tab
Using transitions in PowerPoint is a dynamic way to move from one slide to the next during a presentation. This feature is PowerPoint's stamp, so don ' t miss it!

Some PowerPoint transitions are really classic, like wiping the old slide to present the new one. Others are somewhat over the top, like the “Vortex” or the “Airplane” effect.
If you click on each kind of transition, you'll see a preview on how it would look when presenting. Really cool, right?
5. Animations Tab
In case you want to add special effects for certain elements in your slides , the Animations tab in PowerPoint will interest you.

Like the Transitions tab, you will find various animation effects in this ribbon. It's a matter of trying and choosing the best one according to your needs!
6. Slide Show Tab
As its name says, the Slide Show tab is about presenting your slides . We really like that it gives you several options to show up your presentation!

Considering that you're a PowerPoint beginner, you're not likely to use the Slide Show tab very much.
But if you're curious about this command, you must read our article: How to Make a PowerPoint Slideshow that Runs Automatically?
7. Review Tab
The Review tab is not often used by PowerPoint beginners either.
However, if your job is related to writing or if you work at an international company, this tool can be extremely useful!

With this tab, you can check the slide's spelling, translate the text in real-time, and add comments to your slides . This last function can be helpful to give feedback to a colleague.
8. View Tab
This View tab allows you to change the view of your PowerPoint slides and make handouts from them, among other things.

As you can see, the majority of its commands are really specific. So you won't have any issues while designing, test and see!
In this section, our favorite command for PowerPoint beginners is Slide Master . Explore more about this tool in our guide!
9. Recording Tab
In the last versions of this design presentation software, PowerPoint added the Recording tab. As its name says, it allows you to record all your presentation slides .

This ribbon has advanced commands, so the most common action for a PowerPoint beginner is to take a screenshot or record the screen sequentially .
10. Help Tab
Finally, there is the Help tab. If you have any problem or question concerning how to use PowerPoint, you may go here to look for a solution.
In the latest versions, Windows has added a “Show Training” option. You can click this command to practice the PowerPoint basics since it will download training templates.

As a beginner in PowerPoint, you must recognize the objective of each PowerPoint tab to be able to master the software . But, in order to conduct an outstanding presentation deck, you also need to dominate its most important features. Let's see some of them in the next section!
If you feel ready to delve deeper into PowerPoint's tools, this section is for you.
As you may know , 24Slides specializes in creating outstanding presentations for any Design Project . So, we asked one of our experts about her favorite PowerPoint features, and we want to share them all with you!
Carmen Navarrete , Graphic Designer at 24Slides, highlighted the following features that will make your presentations stand out from the crowd:
PowerPoint Feature #1: Crop to Shape
This first PowerPoint feature is simple but effective!
Let's see how to use it:
- First, choose an image you want to cut and insert it into your workspace.
- Once inserted, select it with the mouse.
- Go to the "Picture Format" tab.
- Press the arrow of the "Crop" button (right side of the screen).
- Select "Crop to Shape."
- Choose your favorite shape and customize your PowerPoint presentation!

PowerPoint Feature #2: Merge Shapes
If you don't like any figure enough, you can create one from scratch!
This is possible thanks to the "Merge Shapes" option. Follow these steps to unleash your creativity:
- First choose an image you want to cut.
- Check the list of PowerPoint shapes (Insert tab > Shapes).
- Choose two or three figures you want to merge (they can be the same figure).
- Select the figures you are going to merge (see the image).
- Once selected, go to the "Shape Format" tab.
- Press the "Merge Shapes" option and the type of merge you want (test and choose!).
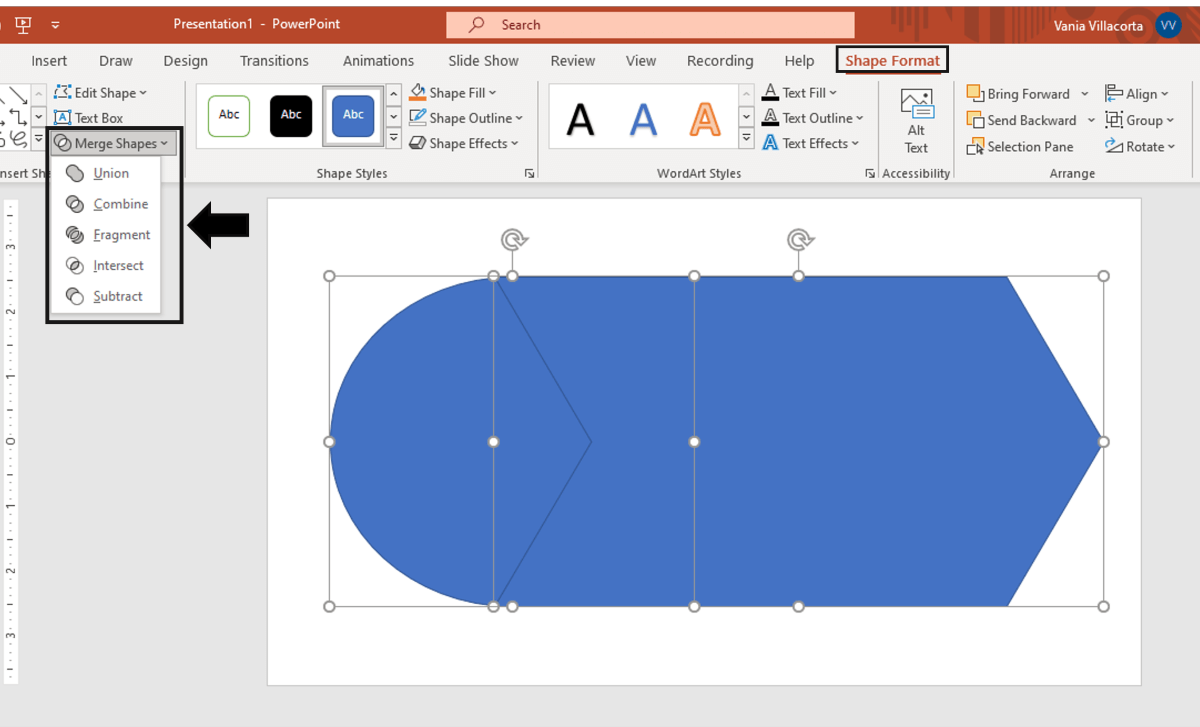
- A new figure will appear, and you must fill it with the image from the first step.
- Stay on the Shape Format tab and go to "Shape Fill" (button in the middle of the ribbon).
- Select "Picture Fill" and browse for your image.
- Select the image to fill your new figure, and that's it!

- PowerPoint tip for beginners: When your merged figure is ready, paste the image to the background of your slide to achieve a better result. This way, you can use your image as a canvas and see if both elements fit well.
PowerPoint Feature #3: Insert Icons
This PowerPoint feature is quite easy to follow for PowerPoint beginners!
Just follow these steps:
- Go to the Insert tab.
- Select the "Icons" option.
- A Microsoft 365 library will open, where you can search for the required icon.
- Now, you must insert it into your presentation and adapt it to your design.
- If you have an active Microsoft 365 subscription, you'll have access to a larger number of icons in PowerPoint.
- PowerPoint tip for beginners: If you want to learn more about icons in PowerPoint, read our article on How to Use Icons to Make Amazing PowerPoint Presentations .
PowerPoint Feature #4: Insert SmartArt
PowerPoint's SmartArt is one of the most popular and accessible tools to dominate while learning about PowerPoint basics.
To use it in your slide deck, you must:
- Select SmartArt.
- See all SmartArt categories and choose your favorite based on your needs.
- Add the text you have prepared and adapt it to your presentation.
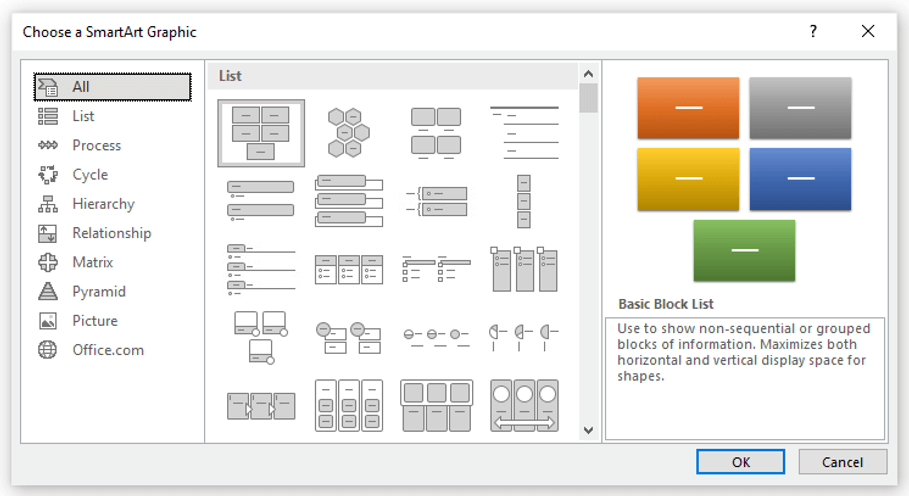
We want to give you some ideas to master this SmartArt tool in PowerPoint: you can make timelines , flowcharts , and even a Venn diagram in just a few seconds. Try and see!
PowerPoint Feature #5: Remove Background
If you don't know how to use Photoshop and want to remove the background from an image, in this PowerPoint 101 Guide, we show you how:
- First choose the image you want to remove the background from.
- Insert the image in the PowerPoint workspace.
- Select the image and go to the "Picture Format" tab.
- Select "Remove Background" (first option on the left).
- You can keep and remove parts of the image with the first two tools of the ribbon (see image).
- Keep in mind that all the sections highlighted in purple will be deleted.
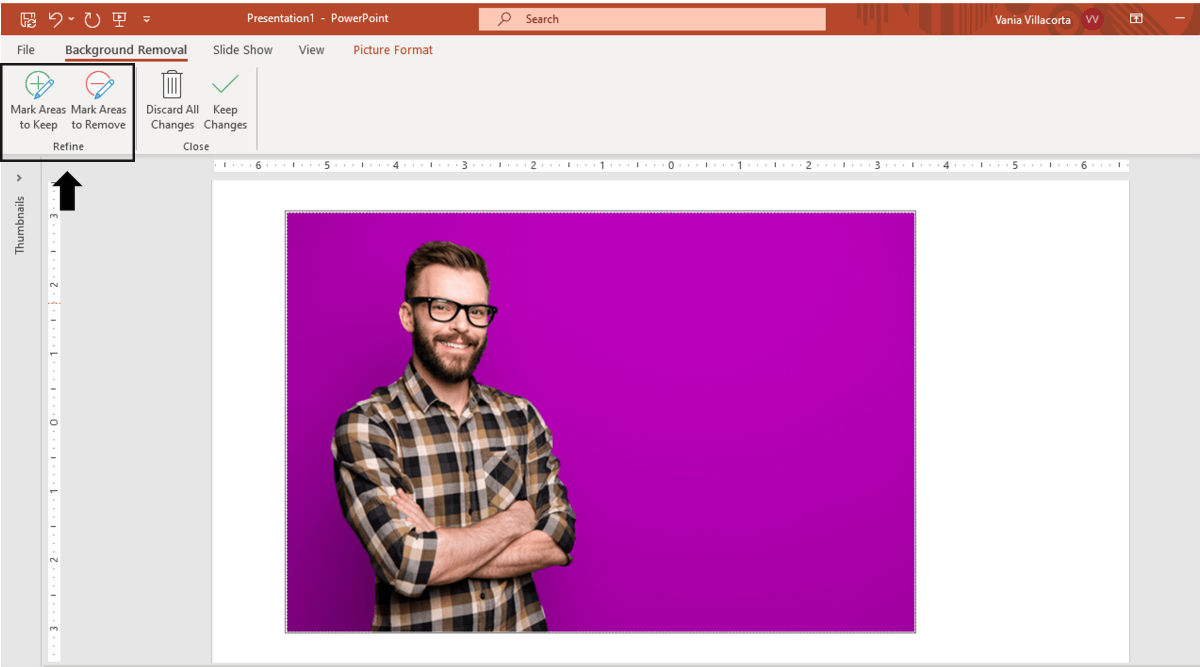
- We recommend zooming in to keep or remove parts of the image with more detail.
- Once you're done, press the "Keep Changes" button.
- Finally, adapt the new image to your PowerPoint presentation.

- PowerPoint tip for beginners: Choose a high-contrast photo or image for best results. In other words, the outline of the person or object you want to cut out must have clear edges and cannot blend with the image's background color.
PowerPoint Feature #6: Add Speaker Notes
The latest PowerPoint feature is a command you can use to prepare your speech before presenting to an audience.
Learning how to add speaker notes in PowerPoint is simple:
- Select the slide that needs some notes.
- Usually, there is a footer below the slide, but if not, you will have to activate it.
- Go to the View tab and select "Notes."
- The Speaker Notes section will appear, and you can add whatever you want!
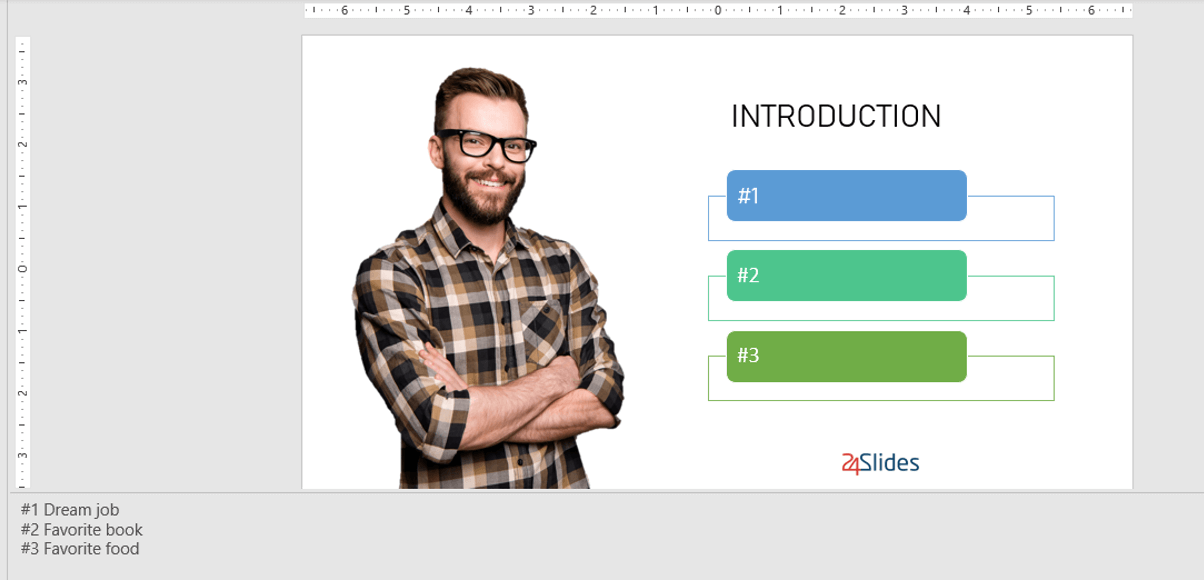
- PowerPoint tip for beginners: In case you want to practice your entire presentation and have a lot of notes, go to the View tab and select "Notes Page" (fourth command). You'll be able to see all your Speaker Notes faster!
PowerPoint Feature #7: PowerPoint Translator
If you've ever wondered how to translate your PowerPoint Slides, we'll explain the step by step here:
- Go to the Review tab.
- Select the text you want to translate.
- Press the “Translate” button.
- A panel will open on the right side of the screen.
- Choose the language you need and you'll see the translation in real-time.
- If you press Insert, the text will change to the new translation!
PowerPoint Feature #8: Screen Recording
The process of recording your screen in PowerPoint is straightforward and intuitive. Let's see:
- Go to the “Record” or “Recording” tab.
- Press the "Record Slide Show" button or the “From Beginning” button (depending on your PPT version).
- A new window will open.
- Select the red record button and start recording!
- When you're done, select “Export.”
- By default, the video will be 1080p. If you want to lower the video quality, go to "Customize export."
- Name the video, save it to a folder and that's it!
As you may have noticed, this software has endless PowerPoint design options for beginners. We encourage you to try and test each functionality!
However, we're clear that PowerPoint has different features, so it can be hard to know where to start. That's why understanding PowerPoint basics is crucial if you truly want to master this software!
Our PowerPoint 101 Guide continues; stay tuned to discover more great stuff about this Microsoft software. Keep reading!
A PowerPoint template is a pre-made design that you can use for your own means, and that will save you a lot of time!
Templates in PowerPoint are a great resource for designing since all the structure is already done, and you only have to update the content . We can tell you they're the perfect resource for PowerPoint beginners!
They can be incredibly specific. For example, there are templates for a SWOT analysis or a complete Marketing report. Otherwise, templates can also be very general, with several slides with a similar design.
If you struggle with the artistic part of designing presentations, downloading PowerPoint templates will be a life changer!
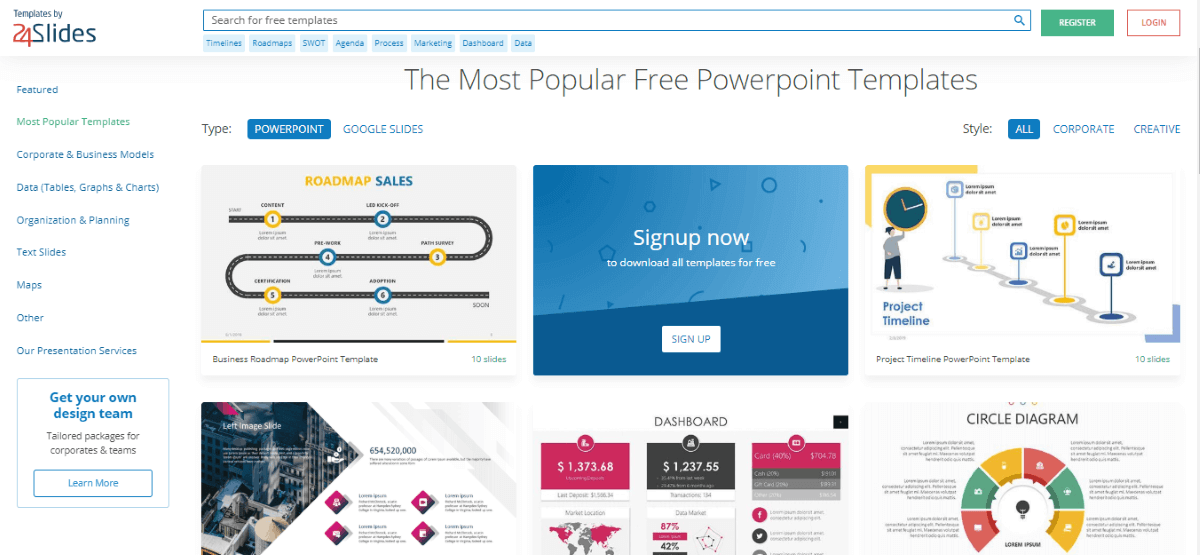
How to download PowerPoint templates for free?
If you didn't know, 24Slides has an extensive repository of PowerPoint templates. But how to obtain them? It's really simple:
- First, create an account on our Free Templates Website with the button “Register” (that way, you can download everything without problems!).
- Think about the graphics you need and the ideal structure for your presentation deck (you can also change the color palette later!).
- Download it in PowerPoint format (if you prefer it in Google Slides format, you'll also find this type in our repository).
- Edit and change everything you need for your PowerPoint presentation!
24Slides Designers specialize in business and corporate PowerPoints, but you'll also find other types of templates on our website: Data templates, Timelines, Roadmaps, Matrixes, Diagrams, and more.
Keep in mind that a well-designed PowerPoint deck helps you communicate stronger messages to your audience . Don't waste this opportunity to make your presentation shine!
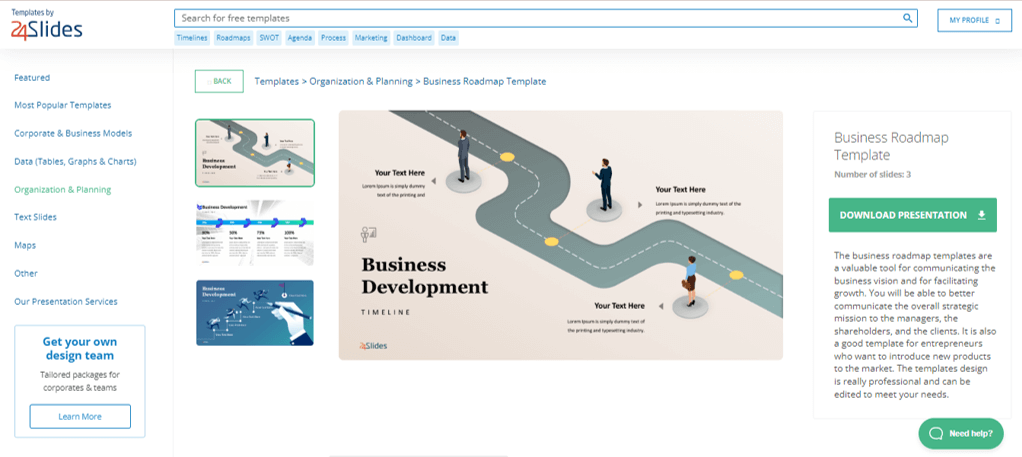
If you want to learn more about how to master PowerPoint, do not miss the last section. We'll show you some PowerPoint basics from the software itself!
A PowerPoint 101 Guide wouldn't be that useful with no examples. So, if you enjoy the step-by-step guides, this section is for you.
Below, we'll show you how to make a simple PowerPoint presentation. But first, here are some tips to be more efficient in the process:
- Be clear about what type of presentation you're going to create (is it corporate, playful, or more creative?).
- Make a draft with the most important information you need to add and, thus, generate a good structure in your presentation .
- Get inspired by examples on the internet , but adapt them to your needs and audience.
- If you will create a business presentation, keep in mind your brand identity .
- Make sure your PowerPoint works , you may need to update to the latest version or pay for the subscription.
Step 1: Make a draft to structure your presentation
As we said before, writing a draft or script of your content will be vital to start on the right foot as a PowerPoint beginner.
This advice is so important that we choose it as the first step to learning how to make a PowerPoint presentation. Remember: Planning is key!
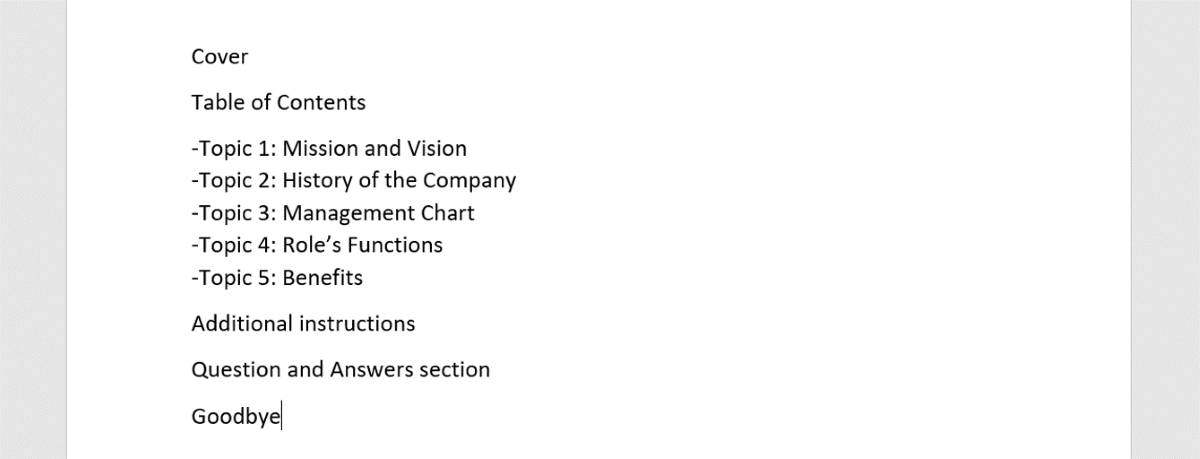
Regarding the process of planning, we share some good practices:
- If your presentation will be very long , write down all subtitles and content in a Word document. This will help you organize your ideas and give a correct sequence to your narrative. In addition to avoiding redundancies in the message you want to communicate.
- If your presentation will use many visual resources , we recommend choosing high-quality images. This will help you have a starting graphic base. Some good free image repositories are Freepick , Unsplash , and Adobe Stock .
- If your presentation is based on data , have all your results summarized or your most relevant conclusions at hand. The idea of making a PowerPoint presentation is to show your information in the simplest way possible for your audience.
Step 2: Create a new document in PowerPoint
Once you check that all the functions are working fine with the software, please open it and go to the File tab. If you've ever used Word or Excel, you'll probably find this Home Menu familiar.
In short, this is the main page of PowerPoint, where you can create a new presentation or open an older one. Let's see:
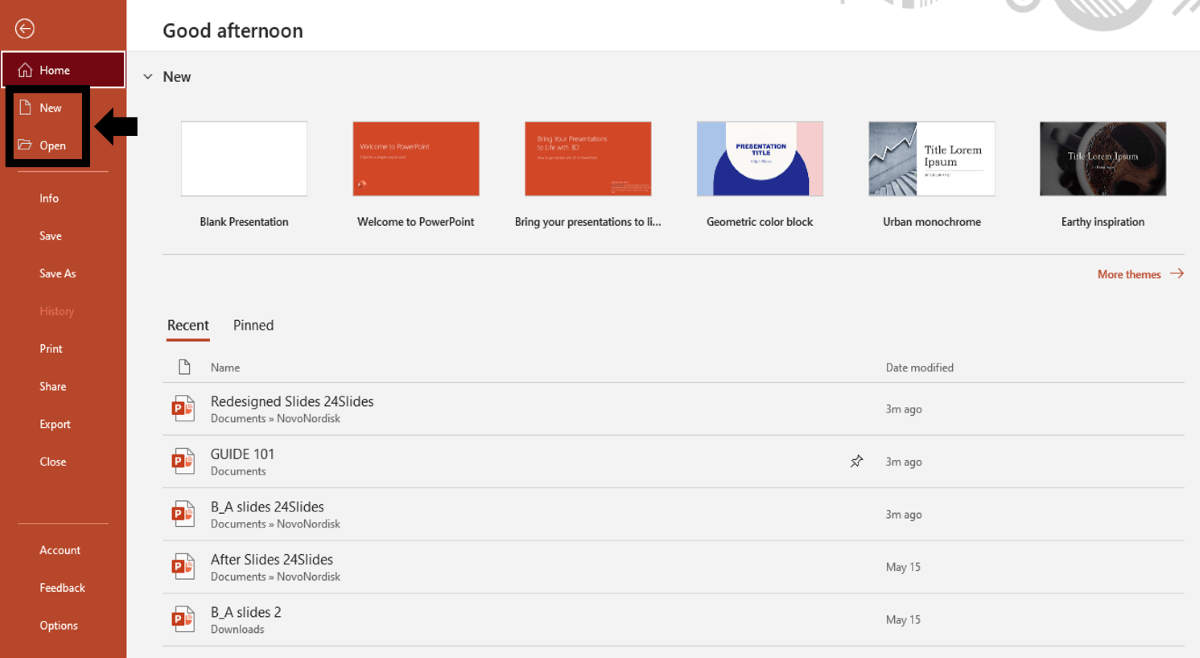
In order to follow this part of our PowerPoint Tutorial correctly, take into consideration the following points:
- On the lower side of the screen, you'll find your recently opened PowerPoint files. This option is great for saving some time.
- If you don't find the presentation you're looking for, click on the “Open” option at the left bar and find older files.
- Don't forget to save your presentation with a relatable name so you won't lose sight of it!
Step 3: Choose the perfect design for your presentation
With your information ready in a draft, it's time to choose the design of your PowerPoint slide deck. You must imagine that the available design options are endless!
For practical reasons, you have three options regarding the design:
- Start a design from scratch (very difficult for a PowerPoint beginner).
- Choose an established PowerPoint design or layout.
- Download a PowerPoint template and modify some details.
Don't worry if you don't know how to continue! In this PowerPoint 101 class, we're going to explain step by step the second option:
How do you set a default design in PowerPoint?
- First, go to the Design tab.
- Open the list of options by clicking on the third arrow.
- Choose the design you like the most for your PowerPoint presentation.
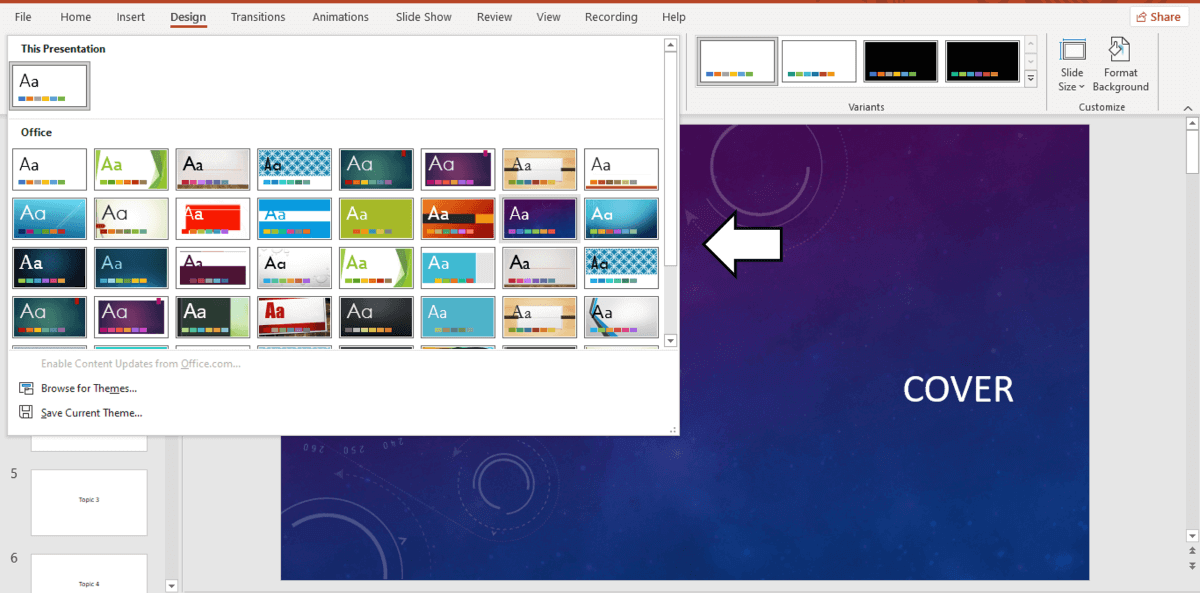
If you want to explore more PowerPoint designs, there is a way to research online. For that, you only need to:
- Go to the File tab (first tab, next to the Home tab).
- Select "More themes" (see image).
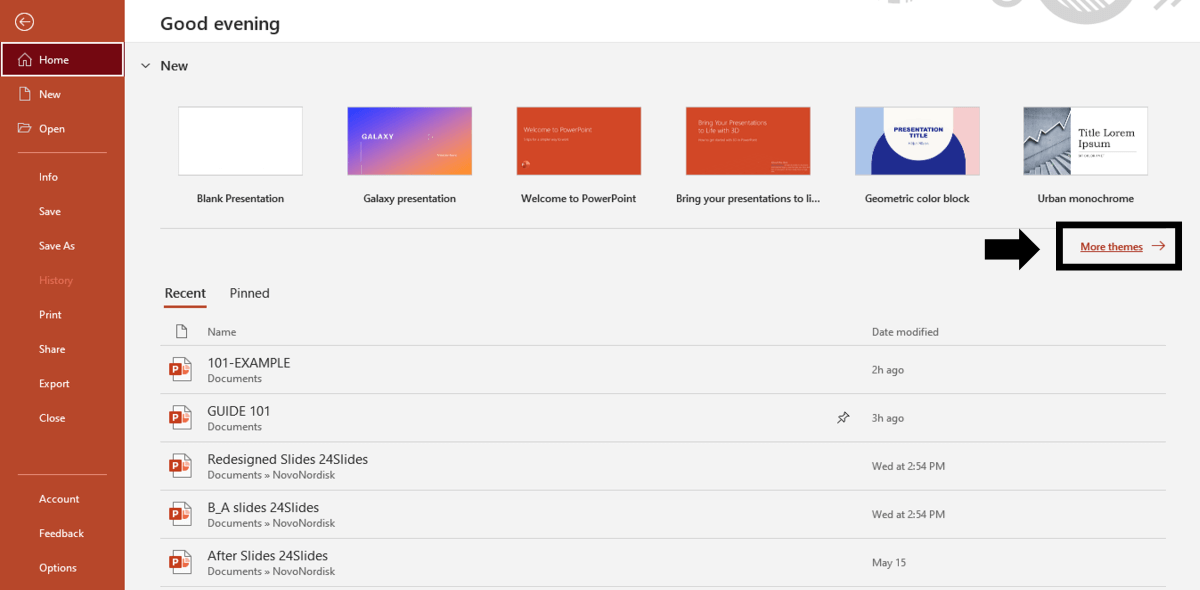
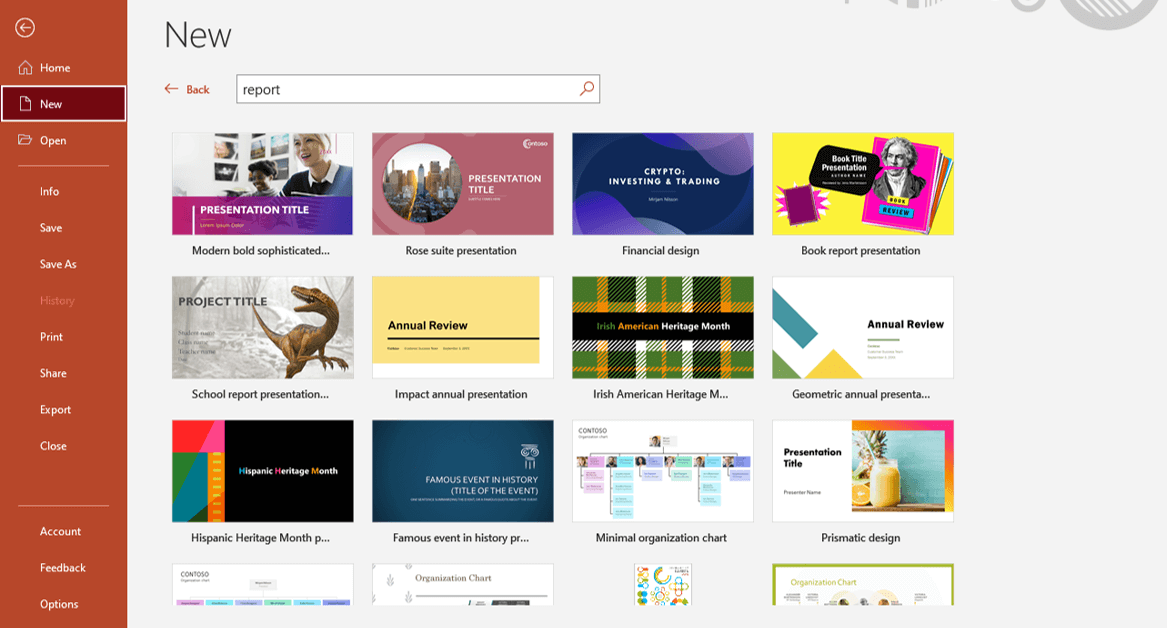
- Use the search engine and write the keyword you want (it can be related to your business or it can be a color).
- Check the list of PowerPoint themes and choose your favorite.
- Wait a few minutes while it loads and keep designing in PowerPoint!
How do you change the layout of one slide in PowerPoint?
In this PowerPoint 101 Guide, you will also learn how to configure the layout of each slide.
Keep in mind that to have a high-impact presentation, you must adapt your slides' design to the type of content you'll add. And using layouts is perfect for this purpose.
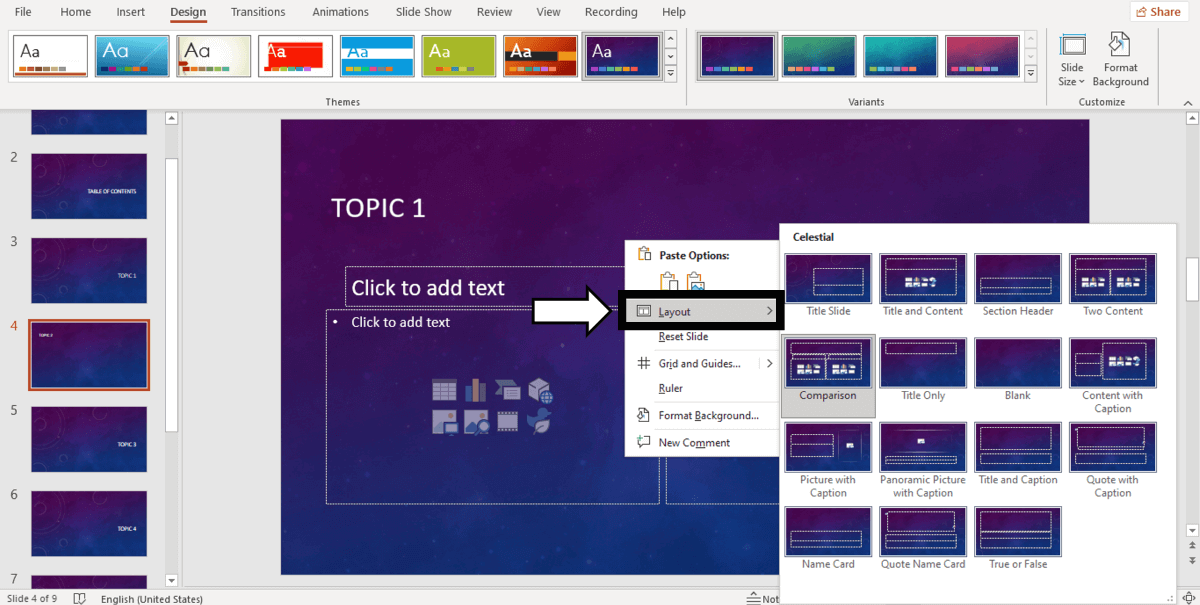
To change the layout type in PowerPoint, follow these steps:
- Right-click on the slide you want to change.
- Select the "Layout" option.
- You will find more than ten layout models.
- Choose the one that best suits your content.
- Repeat these steps for each slide (if you wish or require).
How do you customize your slides in PowerPoint?
The design process in this PowerPoint 101 Guide doesn't stop there.
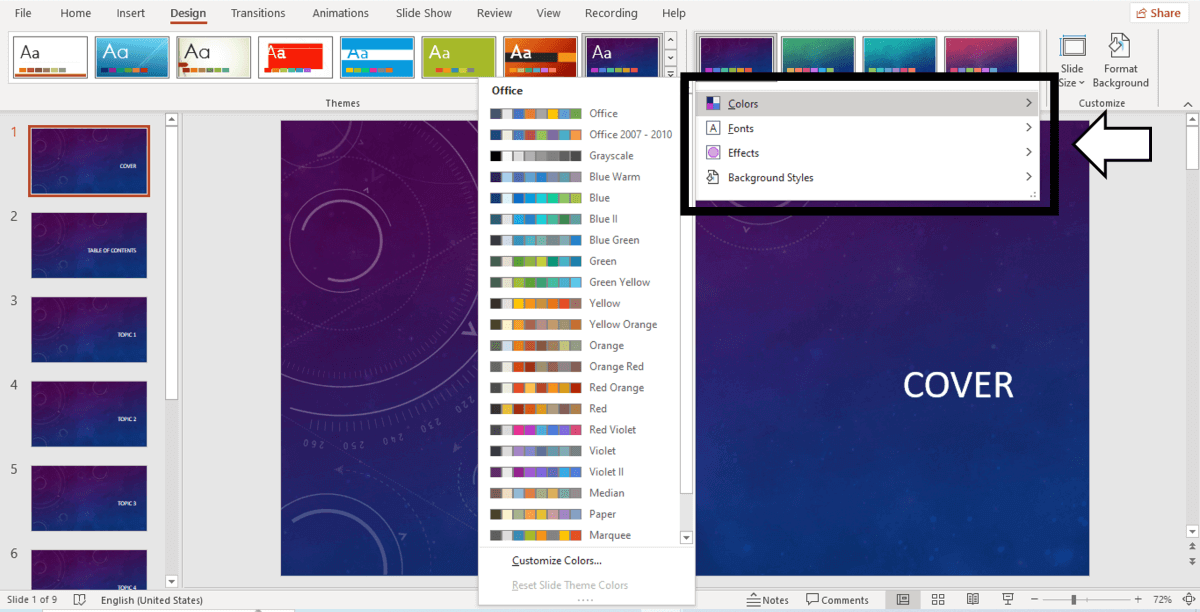
You also can customize your presentation's color palette , font style, background format , and graphics effects .
Just go to:
- Design tab > Variants.
- Select Colors, Fonts, Effects or Background Styles (as you need).
- If you're inspired and want to create your own background in PowerPoint, select Background Styles > Format Background.
- Finally, custom your slides as you want!
Step 4: Add all your information to your presentation
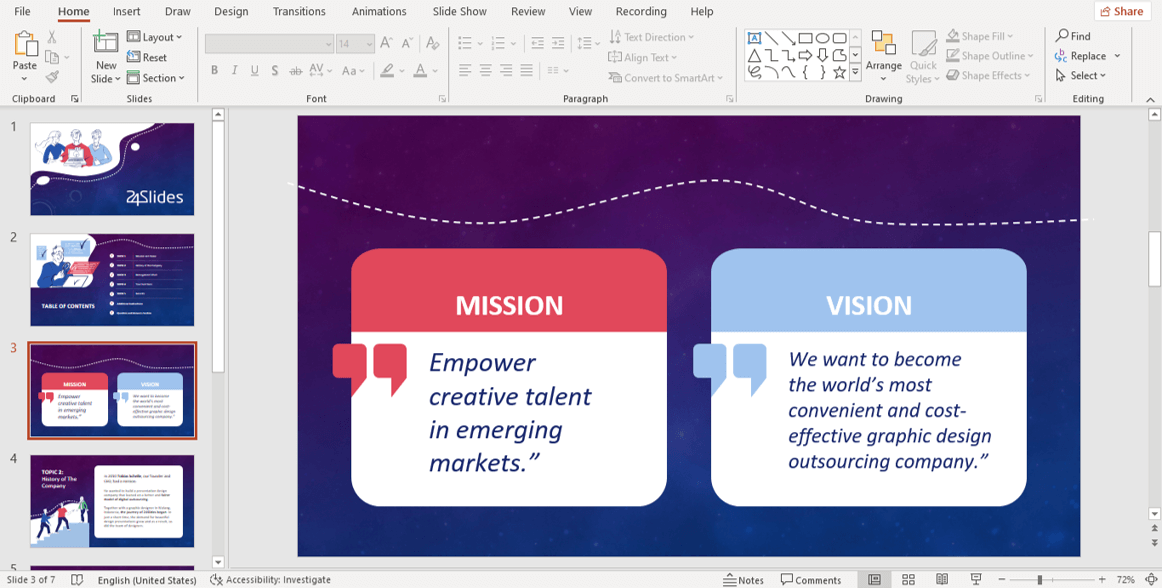
Now, it's time to add all your information to your slides. If your script is long, take your time to copy each part of it.
In this PowerPoint Tutorial, we're going to show how our design is going so far. We design at your side!
Step 5: Add transitions or animations to your presentation
The stamp of PowerPoint is its transitions and animations! Naturally, our PowerPoint 101 has considered these essential commands.
If you want to add them to your presentation and make your speech more fluid, follow these steps:
- Go to the tabs section of PowerPoint.
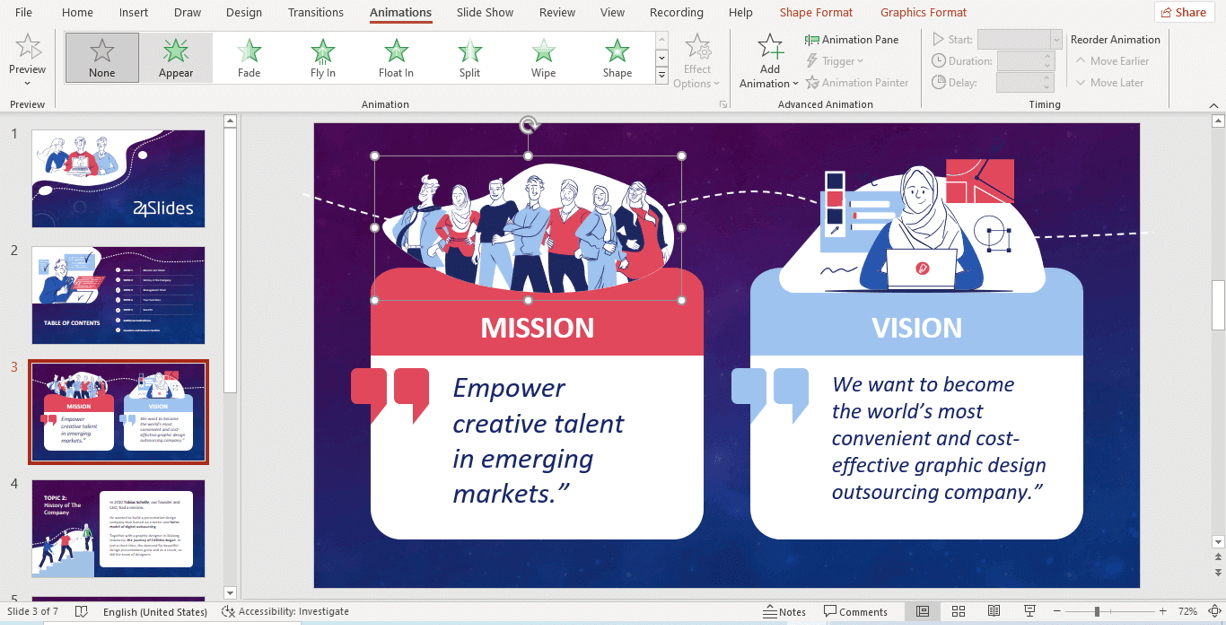
- Select "Transitions" or "Animations" and try your favorite effects.
- Remember that if you select Transitions, these will modify the entire slide, while Animations can be added to each element individually.
When choosing one Animation, you can eliminate it if you aren't 100% convinced. You only need to:
- Select the Animation number that appears on the corner.
- Press the "Delete" or "Backspace" button on your keyboard.
- Choose another Animation in PowerPoint if you want!
This “PowerPoint for dummies” is full of tips and tricks! So here is one more: Don't overuse transitions or animations in PowerPoint ; they can make your presentation slower and unprofessional . Use this tool in a subtle way!
Step 6: Refine the final details
As always, every final product must be reviewed. Especially if you're learning the PowerPoint fundamentals with us.
We recommend reviewing each slide of your PowerPoint presentation one final time. In this process, you will be able to:
- Add icons if your presentation requires it.
- Change any image or illustration if they don't convince you.
- Change transitions or animations.
- Customize your presentation's color palette .
- Proofread your slides' text or add more information.
- Add speaker notes to your presentation.
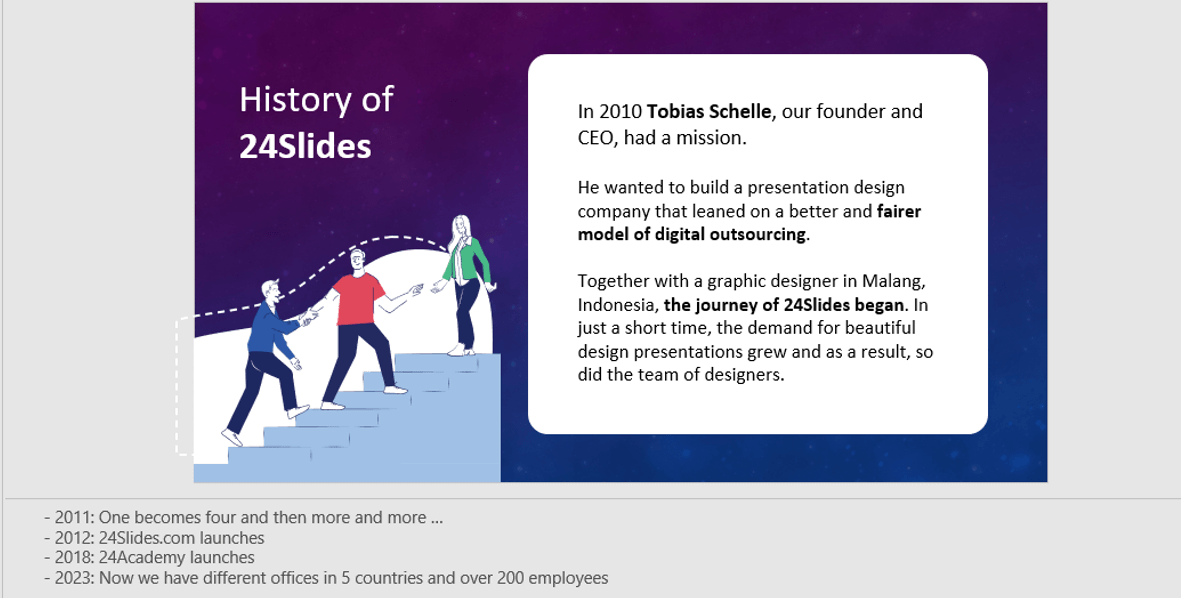
Step 7: Slideshow your presentation
When your presentation is finished, it's essential to know how to make a PowerPoint slideshow. This way, you can see your slides from the exact same perspective your audience will see them.
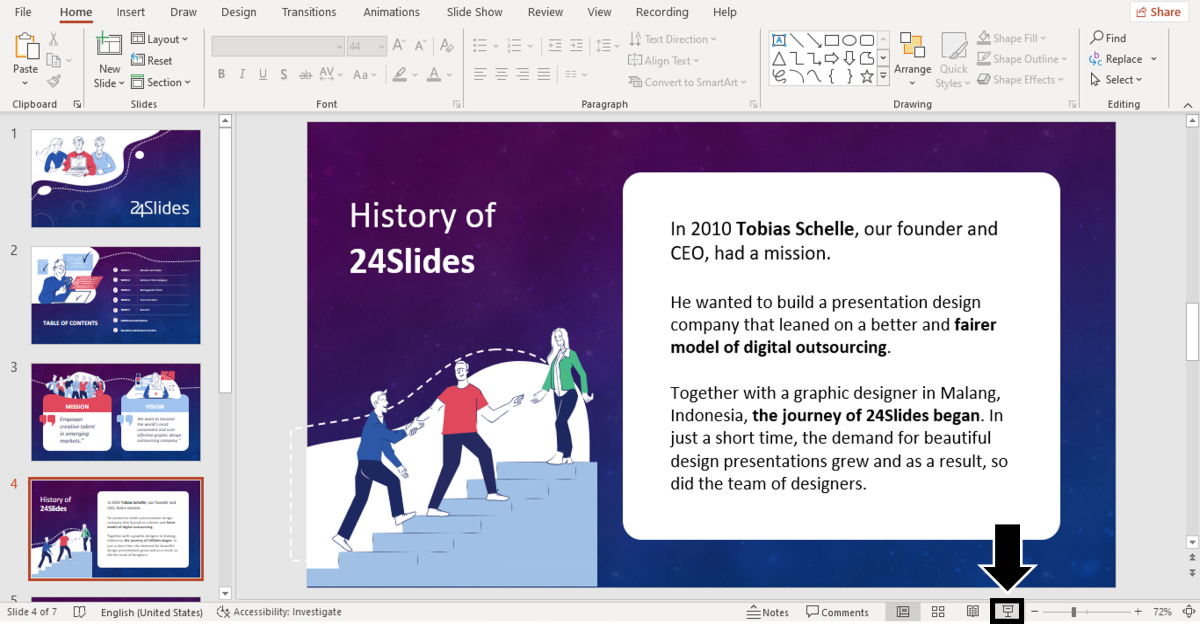
To slideshow your presentation in PowerPoint, follow these simple steps for PowerPoint beginners:
- Position yourself on your first slide.
- Go to the bottom right of the software.
- Select the "Slide Show" button (see image).
- Have a look of your presentation by clicking on each slide or pressing the right arrow on your keyboard.
- To go out from the Slide Show mode, you have to press the ESC key.
Now you can present your slides like an expert!
When you master this presentation design software, you'll be able to create amazing things in PowerPoint : infographics, diagrams, charts, pitch decks, business cards, calendars, you name it!
This was our PowerPoint Guide for beginners. We hope that our compilation today will be useful for conducting more professional presentations in the future and, why not, achieve all your goals!
Don't forget to share this PowerPoint 101 Guide with your co-workers or whoever you want!
Want to boost your beginner PowerPoint skills? Check out this content:
- How to Work with Multiple Images in PowerPoint
- How to Add a Timer to Your Powerpoint Presentations
- PowerPoint Charts, Graphs, & Tables Made Easy | Tips & Tricks
- How To Use PowerPoint Design Ideas - All Questions Answered!
- 36 Fun Icebreakers for Your Next Presentation
- The Cost of PowerPoint Presentations: Discover the hidden expenses you might overlook!
Create professional presentations online
Other people also read

Tutorial: Save your PowerPoint as a Video

How To Convert Google Slides To PowerPoint and Vice Versa

How To Add Animations To PowerPoint
A step-by-step guide to captivating PowerPoint presentation design
november 20, 2023
by Corporate PowerPoint Girl
Do you often find yourself stuck with a lackluster PowerPoint presentation, desperately seeking ways to make it more engaging and visually appealing? If your boss has ever told you to "please fix" a presentation and you didn't know where to start, you're not alone. In this article, we'll walk you through a straightforward method to transform your PowerPoint slides into a visually captivating masterpiece.
Let's dive right in!
Clean up your slides
The first step in this journey to presentation excellence is all about decluttering your slides and elevating their impact. Say goodbye to those uninspiring bullet points that often dominate presentations. Instead, focus on what truly matters – the key call-out numbers. By increasing the font size of these numbers, you ensure they take center stage, immediately drawing your audience's attention.
To make those numbers pop, consider breaking the text after the numbers into the next line and adding a touch of color. The contrast created by pairing a dark color with a lighter shade, like dark teal and light teal or burnt orange with peach, can work wonders. This simple adjustment makes your data more engaging , enhancing the overall impact of your presentation.
Add dimension with boxes
Now, let's introduce an element of depth and organization to your slides. By adding boxes, you'll create a visually pleasing structure that guides your audience through the content. In the "Insert" menu, select "Table" and opt for a one-by-one table. Change the table color to a light gray shade, elongate it, and position it neatly to the left of your text.
To improve readability and aesthetics, increase the spacing between text phrases. A small adjustment in the before spacing setting (setting it to 48) significantly enhances the visual appeal of your slides.
Insert circles
To further enhance the visual appeal and engagement of your slides, let's introduce circles. In the Insert menu, navigate to Shapes and choose the circle. Adjust the circle's height and width to 1.2, ensuring it complements your content seamlessly. Match the circle's shape fill color with the corresponding text color for a harmonious look.
Avoid using colored outlines for the circles, as they may distract from the overall aesthetic. This simple addition of circles adds an element of visual interest to your presentation, making it more captivating.
Choose icons
Now, it's time for a touch of creativity. Selecting icons to complement your text can elevate the clarity and appeal of your slides. In the "Insert" menu, you can search for relevant keywords to find the perfect icon from PowerPoint's extensive library .
For instance, if your text discusses investment portfolio yield, search for "growth" and choose an upward arrow growth icon. These icons add an extra layer of visual appeal and clarity to your content, making it more engaging and informative.
Final touches
To wrap up the transformation process, we come to the final touches that give your presentation a polished, professional finish. Align your icons with their corresponding circles and change the shape fill color to white. This simple adjustment creates a crisp, cohesive look that ties everything together seamlessly.
In conclusion, by following these steps, you've embarked on a journey to enhance your PowerPoint presentation . These initial steps are just the beginning of your exploration into the world of design elements and styles that can cater to your specific presentation needs. The key to a stunning PowerPoint presentation lies in the details. By following these steps, you can turn a lackluster set of slides into a visually engaging and dynamic presentation that will captivate your audience. So, the next time your boss says, "Please fix," you'll know exactly where to start. Happy presenting!
Related topics
- PRO Courses Guides New Tech Help Pro Expert Videos About wikiHow Pro Upgrade Sign In
- EDIT Edit this Article
- EXPLORE Tech Help Pro About Us Random Article Quizzes Request a New Article Community Dashboard This Or That Game Happiness Hub Popular Categories Arts and Entertainment Artwork Books Movies Computers and Electronics Computers Phone Skills Technology Hacks Health Men's Health Mental Health Women's Health Relationships Dating Love Relationship Issues Hobbies and Crafts Crafts Drawing Games Education & Communication Communication Skills Personal Development Studying Personal Care and Style Fashion Hair Care Personal Hygiene Youth Personal Care School Stuff Dating All Categories Arts and Entertainment Finance and Business Home and Garden Relationship Quizzes Cars & Other Vehicles Food and Entertaining Personal Care and Style Sports and Fitness Computers and Electronics Health Pets and Animals Travel Education & Communication Hobbies and Crafts Philosophy and Religion Work World Family Life Holidays and Traditions Relationships Youth
- Browse Articles
- Learn Something New
- Quizzes Hot
- Happiness Hub
- This Or That Game
- Train Your Brain
- Explore More
- Support wikiHow
- About wikiHow
- Log in / Sign up
- Computers and Electronics
- Presentation Software
- PowerPoint Presentations
Simple Steps to Make a PowerPoint Presentation
Last Updated: July 23, 2024 Fact Checked
Creating a New PowerPoint
Creating the title slide, adding a new slide, adding content to slides, adding transitions, testing and saving your presentation.
This article was co-authored by wikiHow staff writer, Darlene Antonelli, MA . Darlene Antonelli is a Technology Writer and Editor for wikiHow. Darlene has experience teaching college courses, writing technology-related articles, and working hands-on in the technology field. She earned an MA in Writing from Rowan University in 2012 and wrote her thesis on online communities and the personalities curated in such communities. This article has been fact-checked, ensuring the accuracy of any cited facts and confirming the authority of its sources. This article has been viewed 4,343,539 times. Learn more...
Do you want to have your data in a slide show? If you have Microsoft 365, you can use PowerPoint! PowerPoint is a program that's part of the Microsoft Office suite (which you have to pay for) and is available for both Windows and Mac computers. This wikiHow teaches you how to create your own Microsoft PowerPoint presentation on a computer.
How to Make a PowerPoint Presentation
- Open the PowerPoint app, select a template and theme, then like “Create.”
- Click the text box to add your title and subtitle to create your title slide.
- Click the “Insert” tab, then “New Slide” to add another slide.
- Choose the type of slide you want to add, then add text and pictures.
- Rearrange slides by dragging them up or down in the preview box.
Things You Should Know
- Templates make it easy to create vibrant presentations no matter your skill level.
- When adding photos, you can adjust their sizes by clicking and dragging in or out from their corners.
- You can add animated transitions between slides or to individual elements like bullet points and blocks of text.

- If you don't have a Microsoft Office 365 subscription, you can use the website instead of the desktop app. Go to https://powerpoint.office.com/ to use the website version.
- You can also use the mobile app to make presentations, though it's easier to do this on a computer, which has a larger screen, a mouse, and a keyboard.

- If you don't want to use a template, just click the Blank option in the upper-left side of the page and skip to the next part.

- Skip this step if your selected template has no themes available.

- If you're creating a PowerPoint presentation for which an elaborate title slide has been requested, ignore this step.

- You can change the font and size of text used from the Home tab that's in the orange ribbon at the top of the window.

- You can also just leave this box blank if you like.

- You can also click and drag in or out one of a text box's corners to shrink or enlarge the text box.

- On a Mac, you'll click the Home tab instead. [1] X Research source

- Clicking the white slide-shaped box above this option will result in a new text slide being inserted.

- Title Slide
- Title and Content
- Section Header
- Two Content
- Content with Caption
- Picture with Caption

- Naturally, the title slide should be the first slide in your presentation, meaning that it should be the top slide in the left-hand column.

- Skip this step and the next two steps if your selected slide uses a template that doesn't have text boxes in it.

- Text boxes in PowerPoint will automatically format the bulk of your text for you (e.g., adding bullet points) based on the context of the content itself.
- You can add notes that the Presentation will not include (but you'll still be able to see them on your screen) by clicking Notes at the bottom of the slide.

- You can change the font of the selected text by clicking the current font's name and then clicking your preferred font.
- If you want to change the size of the text, click the numbered drop-down box and then click a larger or smaller number based on whether you want to enlarge or shrink the text.
- You can also change the color, bolding, italicization, underlining, and so on from here.

- Photos in particular can be enlarged or shrunk by clicking and dragging out or in one of their corners.

- Remember to keep slides uncluttered and relatively free of distractions. It's best to keep the amount of text per slide to around 33 words or less. [2] X Research source

- Slide content will animate in the order in which you assign transitions. For example, if you animate a photo on the slide and then animate the title, the photo will appear before the title.
- Make your slideshow progress automatically by setting the speed of every transition to align with your speech as well as setting each slide to Advance . [3] X Trustworthy Source Microsoft Support Technical support and product information from Microsoft. Go to source

- If you need to exit the presentation, press Esc .

- Windows - Click File , click Save , double-click This PC , select a save location, enter a name for your presentation, and click Save .
- Mac - Click File , click Save As... , enter the presentation's name in the "Save As" field, select a save location by clicking the "Where" box and clicking a folder, and click Save .
Community Q&A
- If you save your PowerPoint presentation in .pps format instead of the default .ppt format, double-clicking your PowerPoint presentation file will prompt the presentation to open directly into the slideshow view. Thanks Helpful 6 Not Helpful 0
- If you don't have Microsoft Office, you can still use Apple's Keynote program or Google Slides to create a PowerPoint presentation. Thanks Helpful 0 Not Helpful 0

- Your PowerPoint presentation (or some features in it) may not open in significantly older versions of PowerPoint. Thanks Helpful 1 Not Helpful 2
- Great PowerPoint presentations avoid placing too much text on one slide. Thanks Helpful 0 Not Helpful 0
You Might Also Like

- ↑ https://onedrive.live.com/view.aspx?resid=DBDCE00C929AA5D8!252&ithint=file%2cpptx&app=PowerPoint&authkey=!AH4O9NxcbehqzIg
- ↑ https://www.virtualsalt.com/powerpoint.htm
- ↑ https://support.microsoft.com/en-us/office/set-the-timing-and-speed-of-a-transition-c3c3c66f-4cca-4821-b8b9-7de0f3f6ead1#:~:text=To%20make%20the%20slide%20advance,effect%20on%20the%20slide%20finishes .
About This Article

- Send fan mail to authors
Reader Success Stories
Artis Holland
Sep 22, 2016
Is this article up to date?
Oct 18, 2016
Jul 23, 2016
Margery Niyi
Sep 25, 2017
Jul 21, 2016

Featured Articles

Trending Articles

Watch Articles

- Terms of Use
- Privacy Policy
- Do Not Sell or Share My Info
- Not Selling Info
wikiHow Tech Help Pro:
Level up your tech skills and stay ahead of the curve
We use essential cookies to make Venngage work. By clicking “Accept All Cookies”, you agree to the storing of cookies on your device to enhance site navigation, analyze site usage, and assist in our marketing efforts.
Manage Cookies
Cookies and similar technologies collect certain information about how you’re using our website. Some of them are essential, and without them you wouldn’t be able to use Venngage. But others are optional, and you get to choose whether we use them or not.
Strictly Necessary Cookies
These cookies are always on, as they’re essential for making Venngage work, and making it safe. Without these cookies, services you’ve asked for can’t be provided.
Show cookie providers
- Google Login
Functionality Cookies
These cookies help us provide enhanced functionality and personalisation, and remember your settings. They may be set by us or by third party providers.
Performance Cookies
These cookies help us analyze how many people are using Venngage, where they come from and how they're using it. If you opt out of these cookies, we can’t get feedback to make Venngage better for you and all our users.
- Google Analytics
Targeting Cookies
These cookies are set by our advertising partners to track your activity and show you relevant Venngage ads on other sites as you browse the internet.
- Google Tag Manager
- Infographics
- Daily Infographics
- Popular Templates
- Accessibility
- Graphic Design
- Graphs and Charts
- Data Visualization
- Human Resources
- Beginner Guides
Blog Beginner Guides How To Make a Good Presentation [A Complete Guide]
How To Make a Good Presentation [A Complete Guide]
Written by: Krystle Wong Jul 20, 2023

A top-notch presentation possesses the power to drive action. From winning stakeholders over and conveying a powerful message to securing funding — your secret weapon lies within the realm of creating an effective presentation .
Being an excellent presenter isn’t confined to the boardroom. Whether you’re delivering a presentation at work, pursuing an academic career, involved in a non-profit organization or even a student, nailing the presentation game is a game-changer.
In this article, I’ll cover the top qualities of compelling presentations and walk you through a step-by-step guide on how to give a good presentation. Here’s a little tip to kick things off: for a headstart, check out Venngage’s collection of free presentation templates . They are fully customizable, and the best part is you don’t need professional design skills to make them shine!
These valuable presentation tips cater to individuals from diverse professional backgrounds, encompassing business professionals, sales and marketing teams, educators, trainers, students, researchers, non-profit organizations, public speakers and presenters.
No matter your field or role, these tips for presenting will equip you with the skills to deliver effective presentations that leave a lasting impression on any audience.
Click to jump ahead:
What are the 10 qualities of a good presentation?
Step-by-step guide on how to prepare an effective presentation, 9 effective techniques to deliver a memorable presentation, faqs on making a good presentation, how to create a presentation with venngage in 5 steps.
When it comes to giving an engaging presentation that leaves a lasting impression, it’s not just about the content — it’s also about how you deliver it. Wondering what makes a good presentation? Well, the best presentations I’ve seen consistently exhibit these 10 qualities:
1. Clear structure
No one likes to get lost in a maze of information. Organize your thoughts into a logical flow, complete with an introduction, main points and a solid conclusion. A structured presentation helps your audience follow along effortlessly, leaving them with a sense of satisfaction at the end.
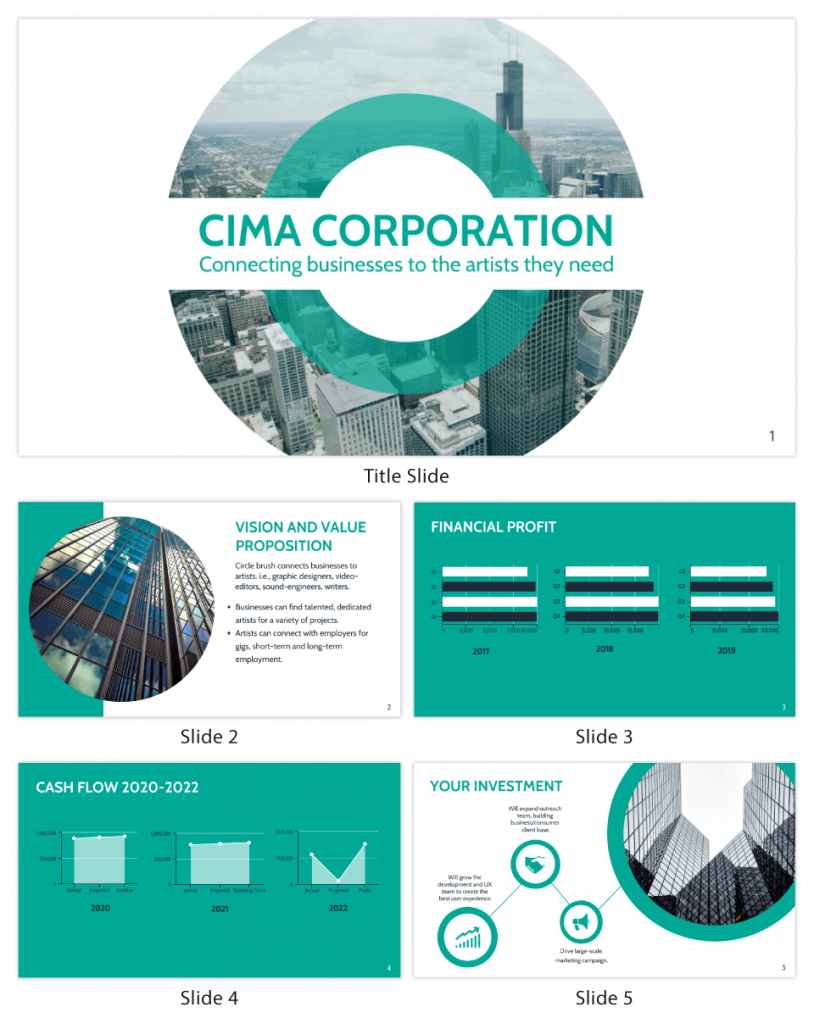
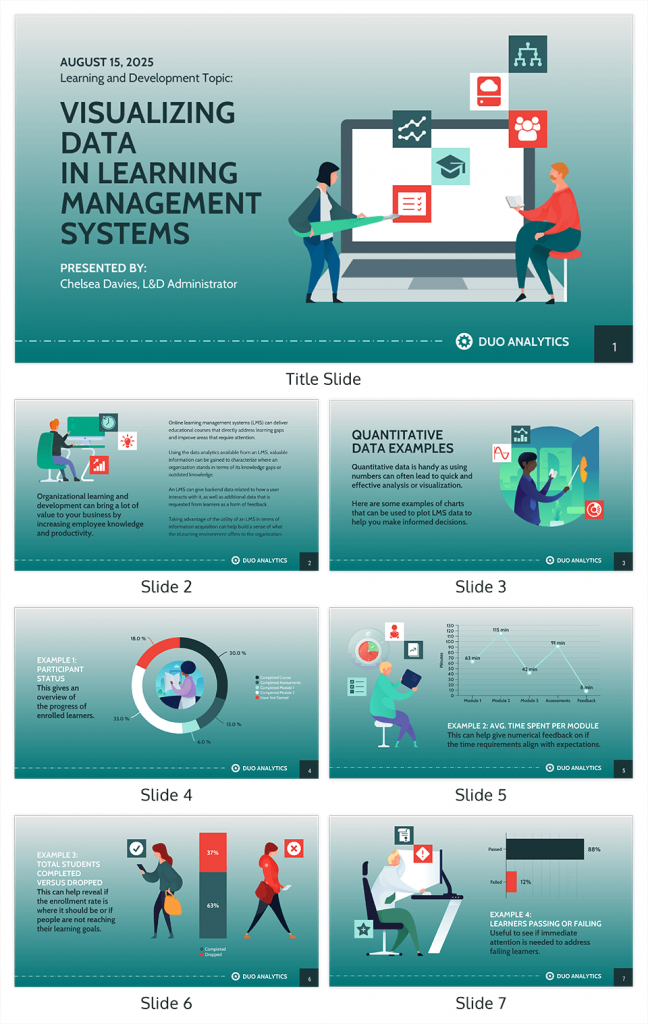
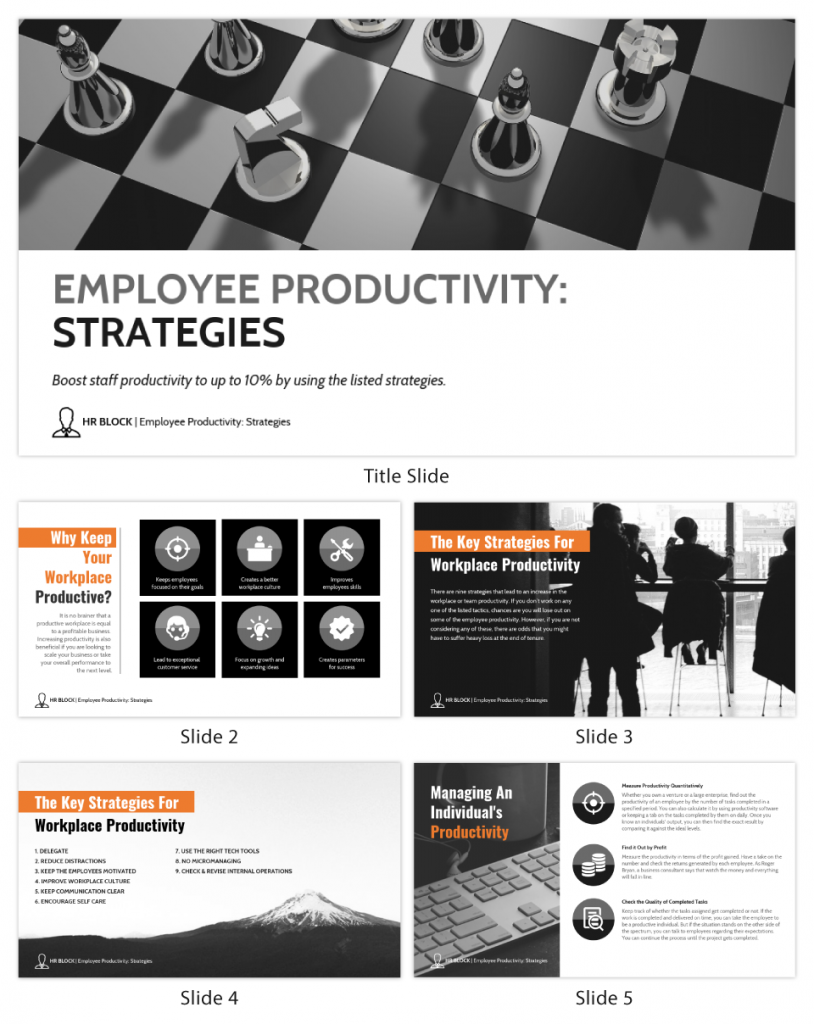
Regardless of your presentation style , a quality presentation starts with a clear roadmap. Browse through Venngage’s template library and select a presentation template that aligns with your content and presentation goals. Here’s a good presentation example template with a logical layout that includes sections for the introduction, main points, supporting information and a conclusion:

2. Engaging opening
Hook your audience right from the start with an attention-grabbing statement, a fascinating question or maybe even a captivating anecdote. Set the stage for a killer presentation!
The opening moments of your presentation hold immense power – check out these 15 ways to start a presentation to set the stage and captivate your audience.
3. Relevant content
Make sure your content aligns with their interests and needs. Your audience is there for a reason, and that’s to get valuable insights. Avoid fluff and get straight to the point, your audience will be genuinely excited.
4. Effective visual aids
Picture this: a slide with walls of text and tiny charts, yawn! Visual aids should be just that—aiding your presentation. Opt for clear and visually appealing slides, engaging images and informative charts that add value and help reinforce your message.
With Venngage, visualizing data takes no effort at all. You can import data from CSV or Google Sheets seamlessly and create stunning charts, graphs and icon stories effortlessly to showcase your data in a captivating and impactful way.
5. Clear and concise communication
Keep your language simple, and avoid jargon or complicated terms. Communicate your ideas clearly, so your audience can easily grasp and retain the information being conveyed. This can prevent confusion and enhance the overall effectiveness of the message.
6. Engaging delivery
Spice up your presentation with a sprinkle of enthusiasm! Maintain eye contact, use expressive gestures and vary your tone of voice to keep your audience glued to the edge of their seats. A touch of charisma goes a long way!
7. Interaction and audience engagement
Turn your presentation into an interactive experience — encourage questions, foster discussions and maybe even throw in a fun activity. Engaged audiences are more likely to remember and embrace your message.
Transform your slides into an interactive presentation with Venngage’s dynamic features like pop-ups, clickable icons and animated elements. Engage your audience with interactive content that lets them explore and interact with your presentation for a truly immersive experience.
8. Effective storytelling
Who doesn’t love a good story? Weaving relevant anecdotes, case studies or even a personal story into your presentation can captivate your audience and create a lasting impact. Stories build connections and make your message memorable.
A great presentation background is also essential as it sets the tone, creates visual interest and reinforces your message. Enhance the overall aesthetics of your presentation with these 15 presentation background examples and captivate your audience’s attention.
9. Well-timed pacing
Pace your presentation thoughtfully with well-designed presentation slides, neither rushing through nor dragging it out. Respect your audience’s time and ensure you cover all the essential points without losing their interest.
10. Strong conclusion
Last impressions linger! Summarize your main points and leave your audience with a clear takeaway. End your presentation with a bang , a call to action or an inspiring thought that resonates long after the conclusion.
In-person presentations aside, acing a virtual presentation is of paramount importance in today’s digital world. Check out this guide to learn how you can adapt your in-person presentations into virtual presentations .
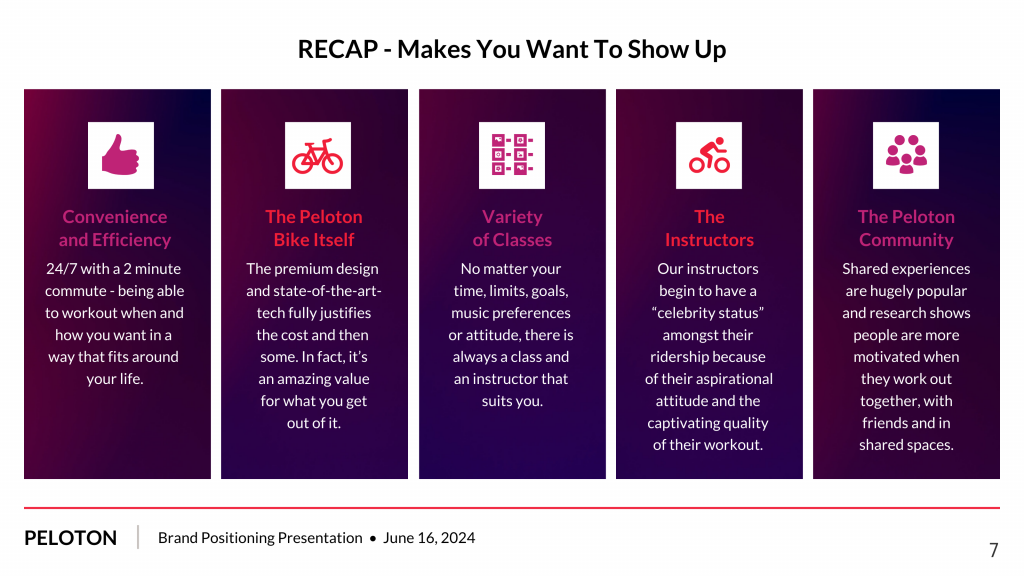
Preparing an effective presentation starts with laying a strong foundation that goes beyond just creating slides and notes. One of the quickest and best ways to make a presentation would be with the help of a good presentation software .
Otherwise, let me walk you to how to prepare for a presentation step by step and unlock the secrets of crafting a professional presentation that sets you apart.
1. Understand the audience and their needs
Before you dive into preparing your masterpiece, take a moment to get to know your target audience. Tailor your presentation to meet their needs and expectations , and you’ll have them hooked from the start!
2. Conduct thorough research on the topic
Time to hit the books (or the internet)! Don’t skimp on the research with your presentation materials — dive deep into the subject matter and gather valuable insights . The more you know, the more confident you’ll feel in delivering your presentation.
3. Organize the content with a clear structure
No one wants to stumble through a chaotic mess of information. Outline your presentation with a clear and logical flow. Start with a captivating introduction, follow up with main points that build on each other and wrap it up with a powerful conclusion that leaves a lasting impression.
Delivering an effective business presentation hinges on captivating your audience, and Venngage’s professionally designed business presentation templates are tailor-made for this purpose. With thoughtfully structured layouts, these templates enhance your message’s clarity and coherence, ensuring a memorable and engaging experience for your audience members.
Don’t want to build your presentation layout from scratch? pick from these 5 foolproof presentation layout ideas that won’t go wrong.
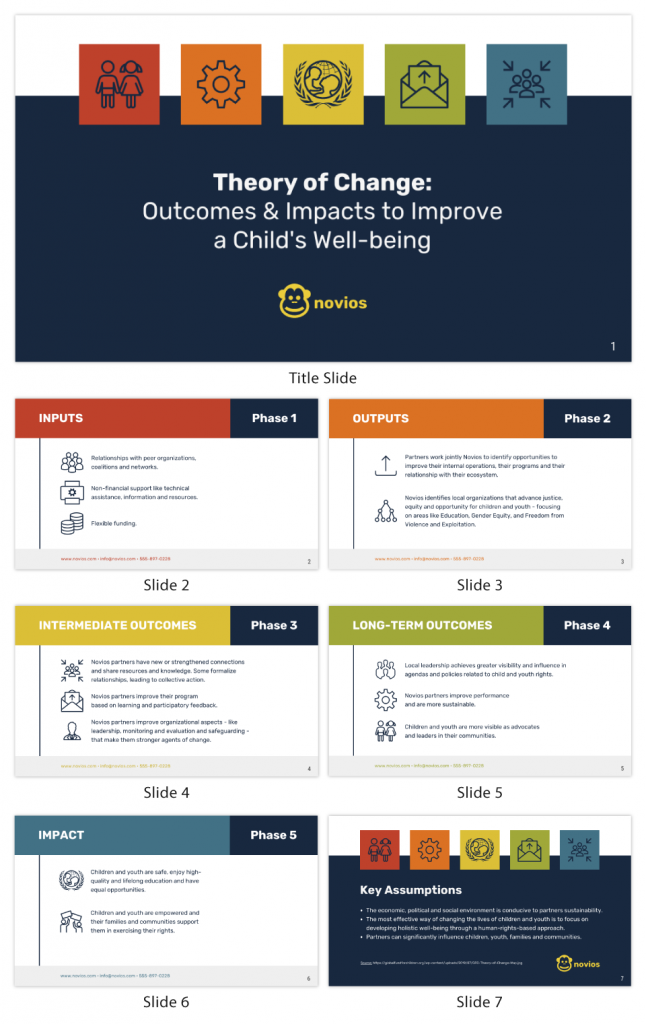
4. Develop visually appealing and supportive visual aids
Spice up your presentation with eye-catching visuals! Create slides that complement your message, not overshadow it. Remember, a picture is worth a thousand words, but that doesn’t mean you need to overload your slides with text.
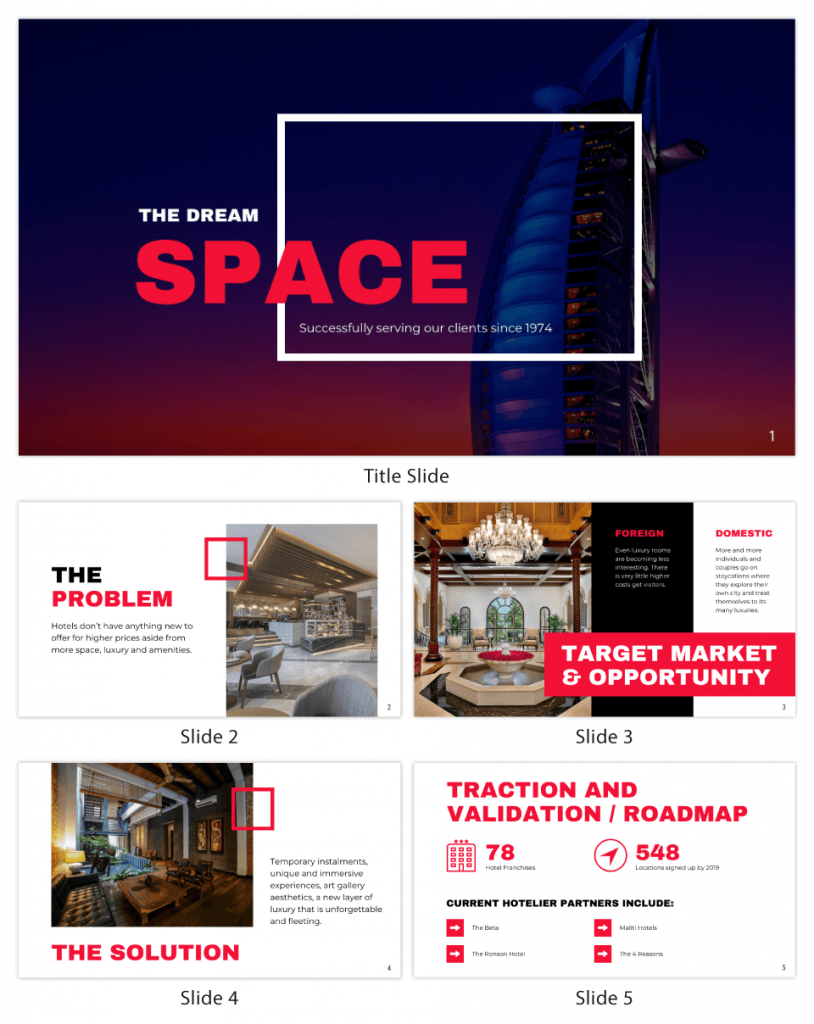
Well-chosen designs create a cohesive and professional look, capturing your audience’s attention and enhancing the overall effectiveness of your message. Here’s a list of carefully curated PowerPoint presentation templates and great background graphics that will significantly influence the visual appeal and engagement of your presentation.
5. Practice, practice and practice
Practice makes perfect — rehearse your presentation and arrive early to your presentation to help overcome stage fright. Familiarity with your material will boost your presentation skills and help you handle curveballs with ease.
6. Seek feedback and make necessary adjustments
Don’t be afraid to ask for help and seek feedback from friends and colleagues. Constructive criticism can help you identify blind spots and fine-tune your presentation to perfection.
With Venngage’s real-time collaboration feature , receiving feedback and editing your presentation is a seamless process. Group members can access and work on the presentation simultaneously and edit content side by side in real-time. Changes will be reflected immediately to the entire team, promoting seamless teamwork.

7. Prepare for potential technical or logistical issues
Prepare for the unexpected by checking your equipment, internet connection and any other potential hiccups. If you’re worried that you’ll miss out on any important points, you could always have note cards prepared. Remember to remain focused and rehearse potential answers to anticipated questions.
8. Fine-tune and polish your presentation
As the big day approaches, give your presentation one last shine. Review your talking points, practice how to present a presentation and make any final tweaks. Deep breaths — you’re on the brink of delivering a successful presentation!
In competitive environments, persuasive presentations set individuals and organizations apart. To brush up on your presentation skills, read these guides on how to make a persuasive presentation and tips to presenting effectively .
Whether you’re an experienced presenter or a novice, the right techniques will let your presentation skills soar to new heights!
From public speaking hacks to interactive elements and storytelling prowess, these 9 effective presentation techniques will empower you to leave a lasting impression on your audience and make your presentations unforgettable.
1. Confidence and positive body language
Positive body language instantly captivates your audience, making them believe in your message as much as you do. Strengthen your stage presence and own that stage like it’s your second home! Stand tall, shoulders back and exude confidence.
2. Eye contact with the audience
Break down that invisible barrier and connect with your audience through their eyes. Maintaining eye contact when giving a presentation builds trust and shows that you’re present and engaged with them.
3. Effective use of hand gestures and movement
A little movement goes a long way! Emphasize key points with purposeful gestures and don’t be afraid to walk around the stage. Your energy will be contagious!
4. Utilize storytelling techniques
Weave the magic of storytelling into your presentation. Share relatable anecdotes, inspiring success stories or even personal experiences that tug at the heartstrings of your audience. Adjust your pitch, pace and volume to match the emotions and intensity of the story. Varying your speaking voice adds depth and enhances your stage presence.
5. Incorporate multimedia elements
Spice up your presentation with a dash of visual pizzazz! Use slides, images and video clips to add depth and clarity to your message. Just remember, less is more—don’t overwhelm them with information overload.
Turn your presentations into an interactive party! Involve your audience with questions, polls or group activities. When they actively participate, they become invested in your presentation’s success. Bring your design to life with animated elements. Venngage allows you to apply animations to icons, images and text to create dynamic and engaging visual content.
6. Utilize humor strategically
Laughter is the best medicine—and a fantastic presentation enhancer! A well-placed joke or lighthearted moment can break the ice and create a warm atmosphere , making your audience more receptive to your message.
7. Practice active listening and respond to feedback
Be attentive to your audience’s reactions and feedback. If they have questions or concerns, address them with genuine interest and respect. Your responsiveness builds rapport and shows that you genuinely care about their experience.
8. Apply the 10-20-30 rule
Apply the 10-20-30 presentation rule and keep it short, sweet and impactful! Stick to ten slides, deliver your presentation within 20 minutes and use a 30-point font to ensure clarity and focus. Less is more, and your audience will thank you for it!
9. Implement the 5-5-5 rule
Simplicity is key. Limit each slide to five bullet points, with only five words per bullet point and allow each slide to remain visible for about five seconds. This rule keeps your presentation concise and prevents information overload.
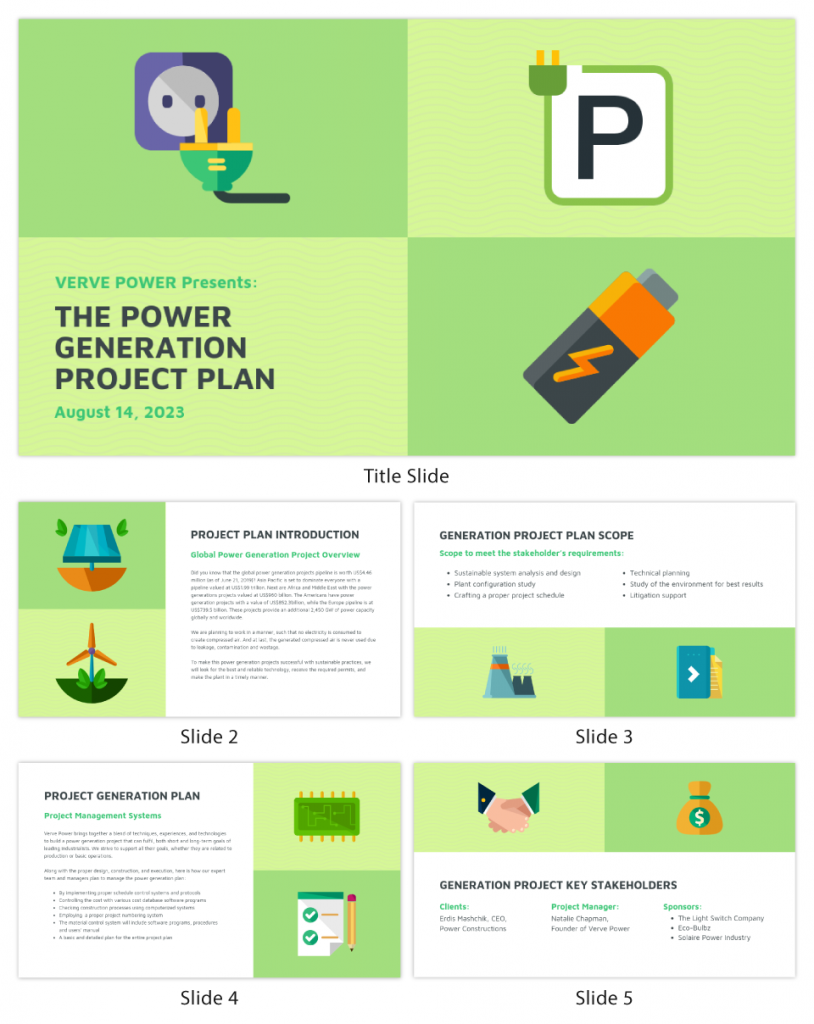
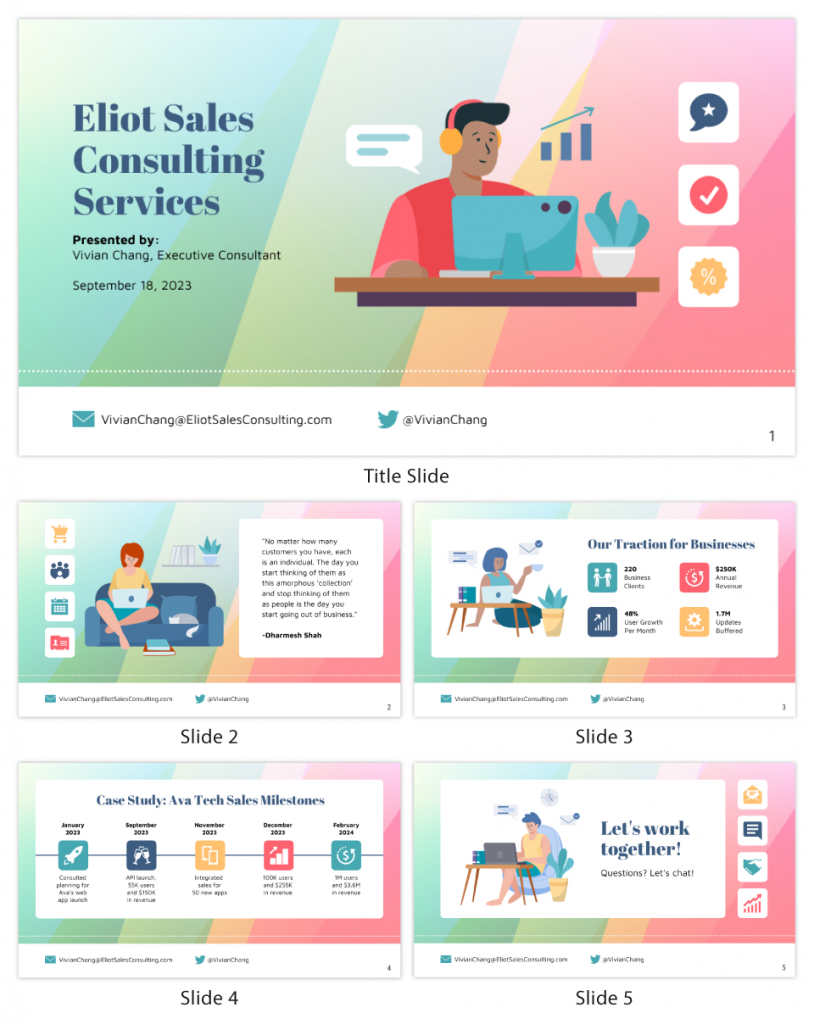
Simple presentations are more engaging because they are easier to follow. Summarize your presentations and keep them simple with Venngage’s gallery of simple presentation templates and ensure that your message is delivered effectively across your audience.
1. How to start a presentation?
To kick off your presentation effectively, begin with an attention-grabbing statement or a powerful quote. Introduce yourself, establish credibility and clearly state the purpose and relevance of your presentation.
2. How to end a presentation?
For a strong conclusion, summarize your talking points and key takeaways. End with a compelling call to action or a thought-provoking question and remember to thank your audience and invite any final questions or interactions.
3. How to make a presentation interactive?
To make your presentation interactive, encourage questions and discussion throughout your talk. Utilize multimedia elements like videos or images and consider including polls, quizzes or group activities to actively involve your audience.
In need of inspiration for your next presentation? I’ve got your back! Pick from these 120+ presentation ideas, topics and examples to get started.
Creating a stunning presentation with Venngage is a breeze with our user-friendly drag-and-drop editor and professionally designed templates for all your communication needs.
Here’s how to make a presentation in just 5 simple steps with the help of Venngage:
Step 1: Sign up for Venngage for free using your email, Gmail or Facebook account or simply log in to access your account.
Step 2: Pick a design from our selection of free presentation templates (they’re all created by our expert in-house designers).
Step 3: Make the template your own by customizing it to fit your content and branding. With Venngage’s intuitive drag-and-drop editor, you can easily modify text, change colors and adjust the layout to create a unique and eye-catching design.
Step 4: Elevate your presentation by incorporating captivating visuals. You can upload your images or choose from Venngage’s vast library of high-quality photos, icons and illustrations.
Step 5: Upgrade to a premium or business account to export your presentation in PDF and print it for in-person presentations or share it digitally for free!
By following these five simple steps, you’ll have a professionally designed and visually engaging presentation ready in no time. With Venngage’s user-friendly platform, your presentation is sure to make a lasting impression. So, let your creativity flow and get ready to shine in your next presentation!
Discover popular designs

Infographic maker

Brochure maker

White paper online

Newsletter creator

Flyer maker

Timeline maker

Letterhead maker

Mind map maker

Ebook maker
- Video Editing
- Animation Tips
- Website Tips
How to Make a Good Presentation [Templates, Tips & More]

Renderforest Staff
05 Jan 2024
12 min read
![steps to create a presentation using templates How to Make a Good Presentation [Templates, Tips & More]](https://cdn.renderforest.com/website/blog-media/65aa63fd238f465aa63fd238f5.jpg)
Did you know that the average attention span of an audience during a presentation is just 10 minutes? This statistic highlights the importance of creating an engaging, compelling presentation. The days of capturing a viewer’s attention with a straightforward slide presentation are long gone.
Now, making a good presentation requires more than just interesting content – it demands an equally captivating delivery method. In this guide, we’ll introduce you to innovative techniques and tools, especially exploring the capabilities of Renderforest’s presentation-making tools . By the end of this article, you’ll be equipped with the knowledge to craft presentations that not only inform but also captivate your audience.
- In a world where the average attention span is less than 10 minutes, creating a compelling presentation requires a captivating blend of content and delivery.
- Presentations that are effective must be well-prepared and involve more than simply pictures. Essential pre-production tasks include researching your target, determining important messaging, organizing content structure, and clearly defining your audience.
- The process is made easier by Renderforest’s design tools and templates , which guarantee clear slides, uniform branding, and the addition of interactive components. Infographics, data, and visuals improve comprehension and increase the impact of presentations.
- The art of presentation requires planning a compelling hook at the beginning, audience connection, and planning time for post-presentation interaction. It’s important to develop continuously through feedback, and Renderforest’s tools help with this process by offering adjustable templates and interactive features for professional and interesting presentations.

How to Make a Good Presentation: Step-by-Step with Renderforest
Renderforest offers a variety of tools that will revolutionize the way you create presentations. It’s not just about displaying information but about telling a story in a visually appealing, memorable way. This step-by-step guide will walk you through the process of using it. Now, you may ask how to make a presentation with Renderforest? Its presentation-making tools provide tips and techniques to transform your presentation from ordinary to extraordinary. Let’s jump in and discover how Renderforest can elevate your content delivery.
Step 1: Log In to Your Renderforest Account
Before you can start creating your presentation, you’ll need to log in to your Renderforest account. If you don’t have an account yet, it’s easy and free to create one. Simply go to renderforest.com and click on the “Sign Up” button at the top right corner of the page. You can sign up with your email address or use your existing Google or Facebook account for a quick and seamless login process.
Step 2: Select the Presentation Template
EXPLORE MORE!
The second step in creating a presentation with Renderforest is selecting the perfect template for your content. With over hundreds of customizable templates, you’ll find one that suits your specific needs and goals. These slideshow templates are designed by professionals to ensure high-quality visuals and easy customization options.
Step 3: Customize Your Slides

Once you’ve selected your template and logged in to your Renderforest account, it’s time to personalize your presentation. This includes adding your own content, such as text, images, videos, and audio, and customizing the overall design of your presentation. With Renderforest’s user-friendly interface, you can easily drag and drop elements onto your slides and adjust them to fit your desired look.
Step 4: Add Transitions

Visual effects are what makes a presentation stand out from the rest. With Renderforest’s presentation-making tools, you can add animations, transitions, icons and various elements to make your presentation more dynamic and engaging. These features are especially useful for keeping your audience’s attention and emphasizing important points in your content.
Step 5: Preview and Download Your Presentation

Once you have personalized your presentation to your liking, it’s important to preview it before downloading. This will allow you to catch any errors or make any last-minute changes. Once you’re satisfied with the final product, you can easily download it in various formats, such as MP4, GIF, or HTML5, for online presentations. You also have the option to share a link to your presentation or directly embed it on a website.
Effective Presentation Tips to Beat the Game
A good presentation is not merely a compilation of facts and figures. Instead, it’s a well-rounded narrative that resonates with its audience, communicates the intended message clearly, and leaves a lasting impression. A captivating presentation blends compelling content with a visually stimulating design, imbued with the personality and passion of the presenter. This article will provide you with a comprehensive guide on how to achieve this. It will be divided into three main sections: tips for the preparation stage, advice on creating and designing your presentation, and pointers for delivering a memorable presentation.
Let’s explore the art of effective presentation-making.
Before you even begin creating your presentation, it’s crucial to understand the goal and purpose of your presentation. This will help guide your content selection and design choices.
- Clearly define your audience: Knowing who you are presenting to will help you tailor your content and delivery accordingly.
- Identify the key message: What is the main point or takeaway you want your audience to remember from your presentation?
- Do thorough research: Make sure you have reliable and accurate information to back up your key message.
- Plan and structure your content: Organize your ideas in a logical flow to maintain the audience’s attention and avoid confusion.
Renderforest not only provides valuable insights but also extends the following tips in the video below to offer you more practical tricks for making your presentations truly exceptional. Join us on this journey, and remember, every tip we share can seamlessly come to life with Renderforest’s powerful tools.
Let’s dive in and explore how to make a good presentation together!
The Preparation Stage
Know your target audience.
What is the first step in designing an effective presentation? Understanding your audience is a critical first step in creating a quality presentation. This step involves defining who your audience is, what their interests and expectations are, and how they may perceive your topic. By gathering this information, you can tailor your presentation to meet their needs and capture their attention. You can use demographic data, surveys, and direct interaction to learn more about your audience. How to make a good presentation that resonates with the audience? It is more likely to be engaging and memorable if you use the insights gained to drive your presentation content, style, tone, and even the visual aids you choose. With Renderforest’s range of templates and design tools, you can create a presentation that speaks directly to your audience.
Research to Choose a Compelling Topic
Choosing the right topic for your presentation is pivotal in creating a compelling narrative that will grip your audience. Engage in thorough research to find a topic that is not only relevant to your audience but also one that you are passionate about. Your enthusiasm for the subject will shine through in your delivery, making your presentation even more engaging. Be sure to look for fresh angles and unique insights that can make your presentation stand out. For more inspiration, check out these creative presentation ideas .

Clear goals can guide your presentation from start to finish. What is it that you want your audience to understand, learn, or do after listening to your presentation? Is it to inform, persuade, motivate, or inspire? Once you have a clear goal in mind, you can structure your presentation to achieve this aim. Each slide, each point, and each visual element should work towards this unified objective. With a defined goal, you can maintain focus, keep your audience engaged, and ensure your key message resonates. Renderforest’s presentation-making tools can assist you in crafting a presentation that effectively communicates your goal and drives your audience to action.
Creating and Designing Your Presentation
Creating and designing a presentation is an art that combines knowledge, creativity, and understanding of the audience’s needs. A well-crafted presentation can make complex topics understandable, boring data exciting and can turn an idea into a movement. Here are some helpful tips to guide you in this stage.
Save Time with Templates
Time is a precious commodity, especially when creating a presentation. To streamline your design process, consider using Renderforest templates . These professionally designed templates offer a variety of layouts and designs that can be easily customized to suit your needs. You can alter color schemes, insert images, adjust fonts, and even add in animated transitions to make your presentation dynamic and engaging. Plus, by utilizing templates, you can ensure consistency in design and layout across all slides. Watch this video to see how easily you can create video presentations with Renderforest:
Have Consistent Branding
Creating a presentation from scratch without a design team can be daunting, but Renderforest can ease the process. Using our templates, you can ensure consistent branding throughout your presentation. The templates offer various design styles and predefined color palettes, allowing you to seamlessly blend your company’s branding into your presentation. This uniformity in design and color adds a level of professional aesthetic and makes your presentation visually appealing.
Keep It Concise
A common mistake in presentation creation is overloading slides with too much information. It’s essential to keep your slides concise, with each slide focusing on a single key point or concept. This will help maintain your audience’s attention and ensure your key message is communicated effectively. Renderforest’s design tools can help you strike the perfect balance between text and visuals.
Incorporate Interactive Elements
Interactive elements can greatly enhance the engagement and informative nature of your presentation. Renderforest’s graphic library offers a plethora of interactive elements like graphs, charts, and icons to make your pres entation more engaging. By incorporating these elements, you can present complex information in an understandable and appealing format.
Remember: Visuals Speak Louder Than Words
Visuals can greatly enhance the understanding and retention of information. Infographics, statistics, and graphic charts can represent complex data in an easy-to-digest manner, making your presentation more effective. Make sure to use visuals that align with your brand and message for a more impactful presentation.
Check out these Renderforest templates for inspiration:
Fact-Check Everything
Ensuring the accuracy of your content is of paramount importance. Always double-check your data, quotes, and references to maintain the credibility of your presentation. An error, no matter how small, can undermine your presentation’s effectiveness and harm your reputation. Renderforest’s presentation tools can assist in formatting and organizing your references, ensuring each point in your presentation is backed by accurate and reliable information.
Giving a Killer Presentation
Delivering your presentation is where all your hard work pays off. Your message comes alive, your design captivates the audience, and your interactive elements inspire engagement. In this section, we will discuss tips for nailing the presentation delivery and maximizing the impact of your work, from practicing your delivery to seeking constructive feedback.
Practice, Practice, Practice
Getting comfortable with your presentation takes time and practice. Familiarize yourself with the flow of your slides and the key points of each. Rehearse your presentation multiple times, making sure you can articulate your ideas clearly and confidently. Renderforest’s user-friendly interface allows you to easily navigate through your presentation during your practice runs, helping you get comfortable with the transition and flow.
Start With a Strong Hook
The opening slide of your presentation sets the tone for everything that follows. It should grab your audience’s attention and make them want to hear more. With Renderforest templates, creating a strong hook is easy. The templates are professionally designed to help you create concise and straight-to-the-point opening slides that captivate your audience right from the start.
Connect With Your Audience
An effective presentation is one that resonates with the audience. Strive to understand your audience’s needs and tailor your presentation to meet them. Use language and examples they can relate to and build a connection. Renderforest’s variety of slide designs and interactive elements can help you create a presentation that truly speaks to your audience.
Allocate Time for Post-Presentation Engagement
Don’t rush off the stage (or the webinar) once you’ve finished your presentation. Allocate time for questions and discussions. This not only clarifies any doubts your audience may have but also provides an opportunity to engage and connect with them on a deeper level.
Seek Feedback
Continuous improvement is key to mastering the art of presentation. Always seek feedback post-presentation. Use the feedback to identify areas of strength and areas that need improvement. Renderforest’s “Contact Us” slides can facilitate this process, making it easy for your audience to provide their feedback.
Key Takeaways
In conclusion, creating and presenting effectively requires careful planning, designing, and delivering. With the advancements in technology, outdated methods of creating presentations are no longer applicable. Renderforest offers a wide range of presentation-making tools that can help you stand out from the crowd and deliver a killer presentation. From customizable templates to interactive elements, in this article we have examined how to make a presentation with Renderforest .
Renderforest has everything you need to create professional and inspiring presentations.
It can help you start improving your presentation skills today!
Dive into our Forestblog of exclusive interviews, handy tutorials and interesting articles published every week!
Create Professional
Presentations, Graphics, Videos, and more
with Renderforest All-In-One Branding Platform.

How to make an AI animation in 4 steps
13 min read
05 Sep 2024

11 best examples of product videos
13 great examples of corporate videos

👀 Turn any prompt into captivating visuals in seconds with our AI-powered design generator ✨ Try Piktochart AI!
How to Make a Presentation (Guide With Tips & Templates)

Whether you’re a trained graphic designer, familiar with common tools like PowerPoint or new to the notion entirely, creating presentations (for all purposes) is typically a time-consuming and challenging process.
From personal use, academic purposes, and a wide range of business needs, this content format is one of the most commonly employed visual devices, relying on a multitude of factors.
Piktochart is a presentation software that offers professionally-designed templates and an intuitive editor for easy personalization according to your brand guidelines and collaboration remotely. Get started for free .
Presentation Design Factors
Design factors can include incorporating your respective branding guidelines to ensure your content is accurate and brief.
This is to create a visually appealing presentation to keep your target audience interested.
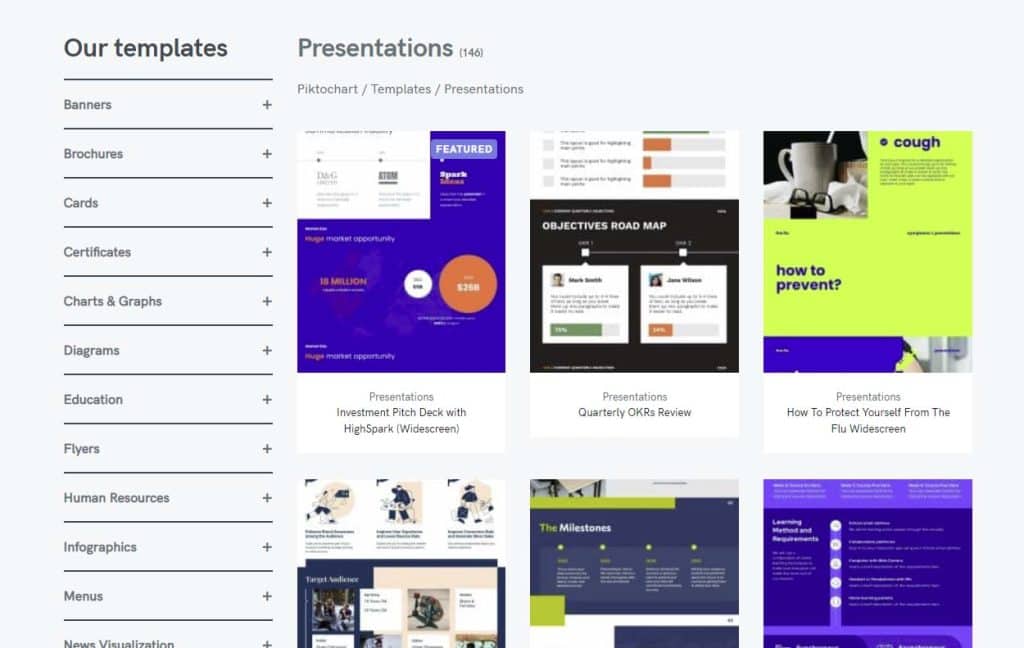
Why Is the Ability to Make a Presentation Useful Today?
Presenting slides (from comprehensive PowerPoint presentations with numerous PowerPoint slides to basic or simplistic presentations with minimal slides) is a common practice and a key skill for everyone to have.
This can be a helpful skill for several reasons:
- Communication: Presenting slides is a powerful communication tool that allows you to convey your ideas, opinions, and recommendations to others in a clear, concise, and engaging manner.
- Persuasion : A well-made presentation with multiple slides can persuade and influence people to support your ideas, proposals, or solutions.
- Collaboration : Creating a holistic presentation and even a new slide often involve collaborating with others, such as team members or stakeholders.
- Organization : Creating a slide deck requires planning, organizing, and structuring information logically and meaningfully.
- Confidence : Making slides can help you build confidence in public speaking, which is a valuable skill in many aspects of life.
Overall, making an effective presentation and slides has many benefits.
It can improve communication, persuasion, collaboration, organization, and confidence.
With all of these associated benefits, it’s no wonder this visual medium has become more popular in recent years.
The Rise of Professional Presentation Templates, Slides, and Their Use
Presentations (from the original PowerPoint presentations to new and improved slide deck formats) have increased in recent years due to several factors:
- Advancements in technology: With the rise of technology, slides have become easier to create and share. Software programs like Microsoft PowerPoint Slides, Google Slides, and Prezi have made creating and sharing presentations easier.
- Remote work: The COVID-19 pandemic has forced many people to work from home, increasing virtual meetings and presentations. As a result, people are relying more on digital tools to communicate ideas.
- The increased importance of visual communication: Visual communication is becoming increasingly important as people seek to simplify complex ideas and convey information quickly.
Slides, and the creation process of these slides, have become more important in recent years due to these factors.

Slides and decks are powerful tools for communication and are likely to continue to increase in popularity as technology continues to advance.
So how can you get started creating your own presentation slides?
How to Make a Presentation With a Blank Deck or a Professionally Designed Template
Making a presentation can be a straightforward process if you follow these seven general steps:
- Define your goal: Start by identifying your objective or goal. What do you want to accomplish? Who is your target audience?
- Plan Your Content & Presentation’s Purpose: Once you have defined your objective, you should begin to plan out the content for your deck. Determine what points you want to make and what information you want to convey. Make sure your content is organized and flows logically.
- Choose your format: Consider what format you want your presentation to take. Do you want to use slides, a video, or a live demonstration? Each format has its advantages and disadvantages, so think about what will work best for your message.
- Create your slides: Once your content and format are selected, it’s time to start creating your presentation. Use templates and design tools to create an eye-catching, professional-looking presentation. Ensure that your content is clear and concise.
- Practice your entire presentation: Practice your presentation several times before you deliver it. This will help you become more familiar with your content and improve your delivery.
- Deliver your presentation: On the day of your presentation, take deep breaths and calm your nerves. Speak slowly and clearly, and make eye contact with your audience. Use visual aids to illustrate your points, and be prepared to answer any questions that may arise.
- Evaluate your great presentation: After your presentation, take some time to evaluate your performance. Consider what worked well and what could have been improved. Use this feedback to refine your future presentations.
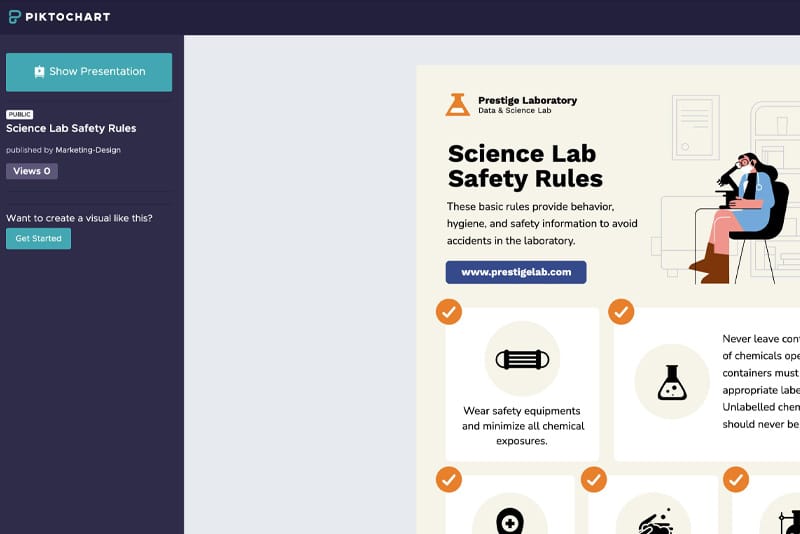
Step 1: Define Your Presentation Goal
To define the goal of your presentation, you should consider the following questions:
- What is the purpose of your presentation? Are you trying to inform, persuade, or entertain your audience?
- Who is your audience? What are their needs, interests, and expectations? What do they already know about your topic?
- What is the main message or idea that you want to convey? What are the key takeaways that you want your audience to remember?
- What action do you want your audience to take after the presentation? Do you want them to make a decision, change their behavior, or take a specific action?
Once you have answered these questions, you can define the goal of your presentation.
This entails creating a clear and concise statement summarizing your main message and the action you want your audience to take.
For example, suppose your presentation is about promoting a new product.
In that case, your goal statement could be:
“To convince the audience to try our new product and make a purchase by showcasing its unique features, benefits, and value proposition.”
Remember, the goal of your presentation should be specific, measurable, achievable, relevant, and time-bound.
By defining a clear goal for your presentation, you can ensure that your content is focused, relevant, and effective in achieving your desired outcome.
Step 2: Plan Your Content & Presentation’s Purpose
Here are some key content factors to include in a slide deck:
- Clear message: Your deck should have a clear and concise message that is easy to understand. Ensure your message is well-defined and your audience can easily grasp what you are trying to communicate.
- Engaging visuals: Use engaging and relevant visuals, such as images, charts, graphs, and videos, to enhance your slides and help your audience better understand your message.
- Relevant content: Your deck should contain relevant and valuable informative, insightful and engaging content.
- Effective storytelling: Use effective storytelling techniques, such as anecdotes, examples, and case studies, to make your presentation more engaging and memorable.
- Engaging delivery : Deliver your presentation in an engaging, confident, and enthusiastic way. Use body language, vocal variety, and eye contact to connect with your audience and convey your message effectively.
- Interactivity: Incorporate interactive elements, such as Q&A sessions and polls, add animations, and even encourage group discussions to keep your audience engaged and involved in the presentation.
- Call to action: End your presentation with a clear call to action that encourages your audience to take a specific action, such as purchasing, signing up for a service, or changing their behavior.
By including these key factors in your deck, you can create a memorable and impactful experience for your audience that effectively communicates your message and achieves your desired outcome.

What should your killer presentation aim to achieve?
A presentation aims to clearly, concisely, and engagingly communicate information, ideas, or a message to an audience.
Presentations can have various purposes, such as:
- Informing : Presentations can be used to convey factual information about a topic or subject.
- Persuading : Presentations can be used to persuade the audience to support a particular idea, product, or service.
- Entertaining : Presentations can be used to entertain the crowd and create a positive and enjoyable experience.
- Motivating : Presentations can be used to motivate the audience to take action or achieve a particular goal.
The success of a presentation is measured by how well the message is received and how effectively it influences the audience to take action or change their behavior.
Step 3: Choose Your Presentation Format
Choosing a presentation format depends on a number of factors.
These can include the topic, audience, purpose, and available resources.
Here are some common presentation formats and when they might be appropriate:
- Slide presentation: This is a popular format for delivering information and visuals. This format is often used for business meetings, conferences, and academic presentations. Slides can be created using software such as PowerPoint or Google Slides.
- Poster presentation: This is a visual display of information, typically on a large poster board. This format is often used in academic and scientific conferences, where presenters display research findings, data, or other information.
- Oral presentation: This involves a presenter delivering information verbally to a target segment, often supported by visual aids such as slides. This format is commonly used in business settings, academic presentations, and conferences.
- Video presentation: This involves creating a video to present information. This format is useful when the presenter cannot physically be present, or when the information lends itself well to a video format.
- Interactive presentation: This engages the targeted segment and encourages participation through activities, discussions, or interactive technology.
When choosing a presentation format, consider the goals and objectives of the presentation, the audience, the setting, and the available resources.
The chosen format should be appropriate for the content and effectively engage the viewers.
Piktochart’s Presentation Templates
Choose one of Piktochart’s professionally designed presentation templates to get started. Take a look at some of our examples below:
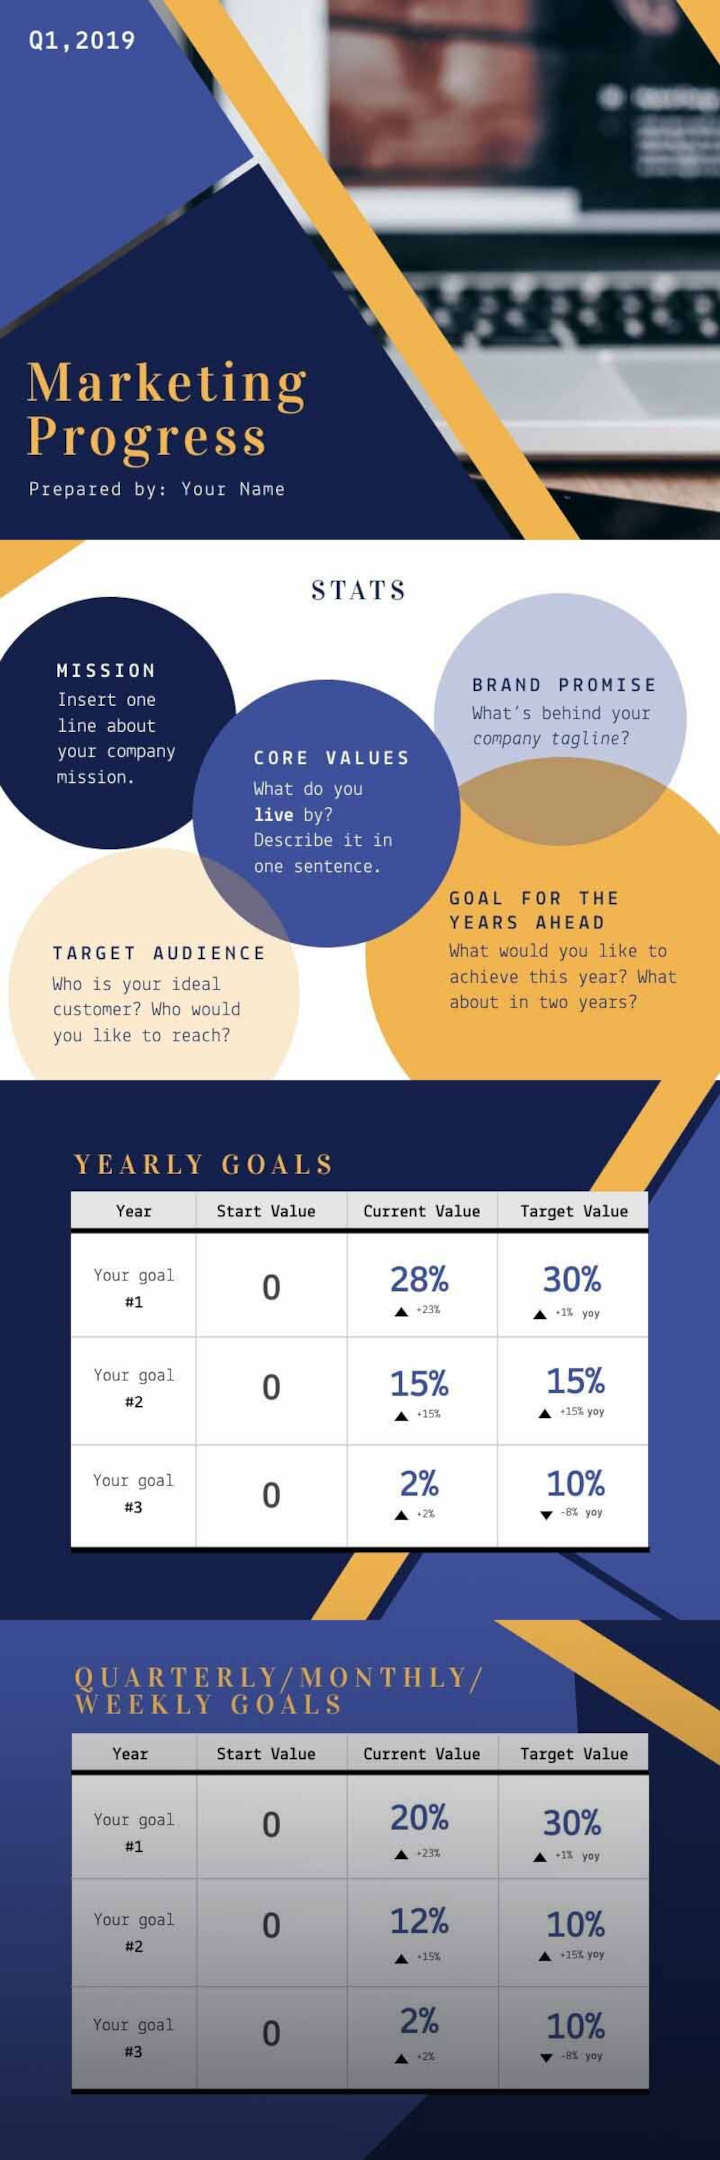
The Progress Report Presentation template from Piktochart gives you the opportunity to customize slides, import your brand kit guidelines, choose insert information, choose pictures, and finalize your design.
Download your final product in PDF or PPT format to share with your team.

Creating an engaging presentation is very important.
The Company Culture Presentation template from Piktochart is here to solve this problem for you.
Use this customizable example and create an all-new unique design by adding graphics or changing the dimensions of the slides.

When you have a newly launched app, try the App Product Presentation template .
It comprises segments that help you deliver the app’s overall details.
Using stats and graphs helps summarize your market data.
Try this customizable example by adding your own information, content, and data.
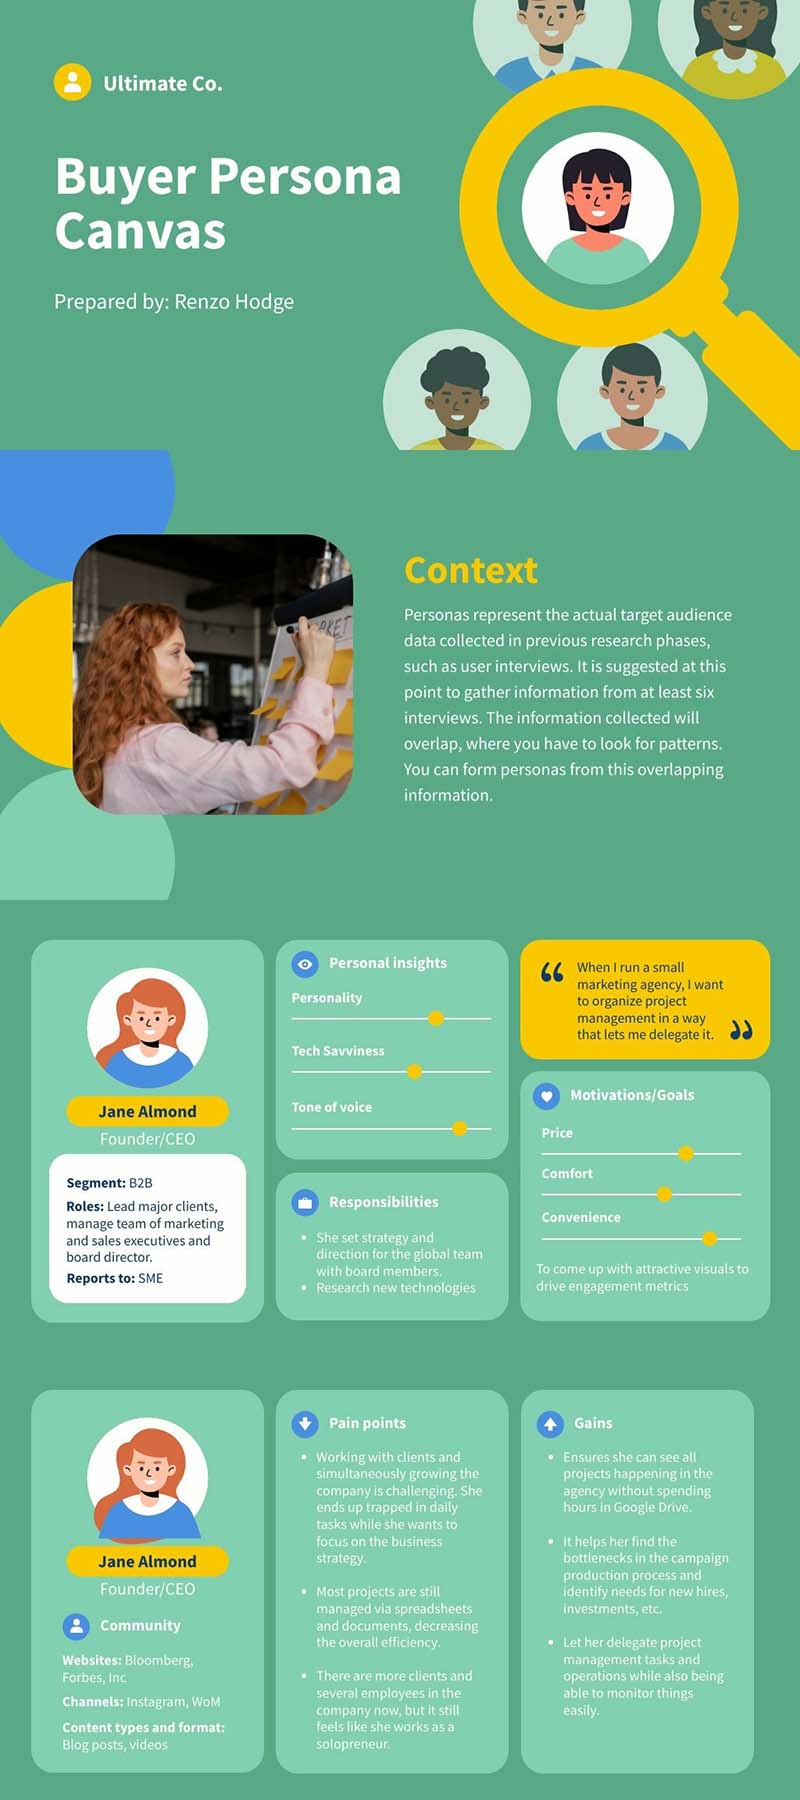
Buyer persona canvases are great representations of your target customers.
Use this editable buyer persona canvas by Piktochart, so you don’t have to make user personas from scratch.
Customize this buyer persona presentation example in minutes.
You can repurpose this for various industries, from finance to healthcare.
Edit the content and customize the design to your brand to make it yours.
Once ready, download it as a PDF, PNG, or directly present it within the platform.
Step 4: Create Your Presentation Slides
Including clear, concise, and visually engaging information is important when creating a slide. You can also create a free account to pick a preset template, which can make customization very convenient for you.
Here are some tips for what to include in a presentation slide:
- Headline : Include a clear and concise headline summarizing the slide’s main point.
- Visuals : Use visuals such as images, charts, or graphs to help illustrate your points and make the slide more engaging.
- Bulleted points: Use bullet points to break down information into key points that are easy to read and digest.
- Supporting text: Include supporting text that expands on the points and provides additional context and information.
- Simple design: Use a simple and clean design that is easy to read and does not distract from the content.
- Consistent style: Use a consistent style throughout the presentation to maintain a cohesive and professional look.
- Citing sources: If you are using data or information from another source, make sure to cite your sources on the slide.
- Contact information: Include contact information such as your name, email, or website at the end of the slide in case the viewers have any questions or need further information.
Remember to keep the slide content concise and focused on the main point (think of how it will look in different formats from a mobile device, a monitor or a computer screen).
Additionally, provide enough information to support your message.
Also, try to limit the amount of text on each slide and use visuals to convey information whenever possible.
Step 5: Practice Your Whole Presentation
Practicing your presentation is essential to ensure you deliver a confident and effective exposition.
Consider recording yourself, practicing in front of a mirror, practicing with a friend or colleage, timing yourself on pace and delivery, and writing note cards or an outline.
Remember to practice your slides multiple times to ensure you are confident and comfortable with the material.
Practice with a variety of methods to improve your delivery and content.
The more you practice, the more confident and polished you will be on the day.
Step 6: Deliver Your Killer Slides
Before presenting, take deep breaths and calm your nerves.
When delivering your pitch, communicate slowly and clearly, and make eye contact.
As aforementioned, here are our top tips to help you deliver a successful slide deck:
Know your audience: This will help you tailor your content to their needs and expectations.
Keep it simple: Your slides should be easy to read and understand.
Practice your delivery: This will help you become familiar with your material and help you avoid stumbling over your words.
Engage your audience: Ask questions, encourage participation, and use anecdotes or stories to illustrate your points.
Use body language: Use appropriate body language, such as making eye contact, gesturing, and moving around the stage, to help engage your audience and emphasize key points.
End with a strong conclusion: This will help your viewers remember your key takeaways and leave a lasting impression.

Step 7: Evaluate Your Great Presentation Slides
After your project is completed, take some time to assess your performance.
Evaluating your final presentation involves assessing its effectiveness in terms of communication, engagement, and content delivery.
What worked well, and what could be improved?
Allow this reflection to inform refinement, iterations, and future projects.

Here are some key factors to consider when evaluating:
- Content : Evaluate the information’s quality, relevance, and accuracy. Is it well-organized and easy to follow? Does it effectively communicate the main points and ideas? Make sure to add context.
- Delivery : Can you hold the audience’s attention when presenting each slide? Did you choose engaging pictures, include pop-ups, or add animations to keep the viewers on their toes?
- Visual aids: Evaluate the effectiveness of any visual aids used and their visual medium. Do they enhance the presentation and help to illustrate the key points or coincide with noted points? Are they well-designed and easy to read to keep the viewers interested?
- Engagement : Will you involve the audience in the presentation by asking questions, enabling real-time collaboration, encouraging discussion, or using interactive elements? Not every presentation needs this element; however, it is important to consider it as a general rule.
- Overall impact : Evaluate the overall impact of your presenting skills and presentation from your presenter view. Can it leave a lasting impression? Can it prove to be memorable and thought-provoking?
Considering these factors, you can thoroughly evaluate your presentation, which will help you improve and refine your skills for future presentations.
How to Make a Presentation & Get the Most From Our Templates
The benefit of using cloud-based presentation software and our range of free and premium templates is that once you create your unique slide deck, you can reuse it and the visual elements involved repeatedly.
Gone are the days of starting from a blank canvas!
While the key things like written content, chosen pictures, color variations, specific graphics or other elements will change, you can click, create, and reuse your original, eye-catching design ideas, brand colors, own images, layout options, and more, cutting task time in half!
This is useful when you use professionally designed templates to create most presentations or slide design graphics that must be updated regularly.
If you want to give our easy-to-use software a go yourself, create a free Piktochart account .
Play around with some of the presentation software templates below, or start from a blank canvas.
Play to Win Canvas Example
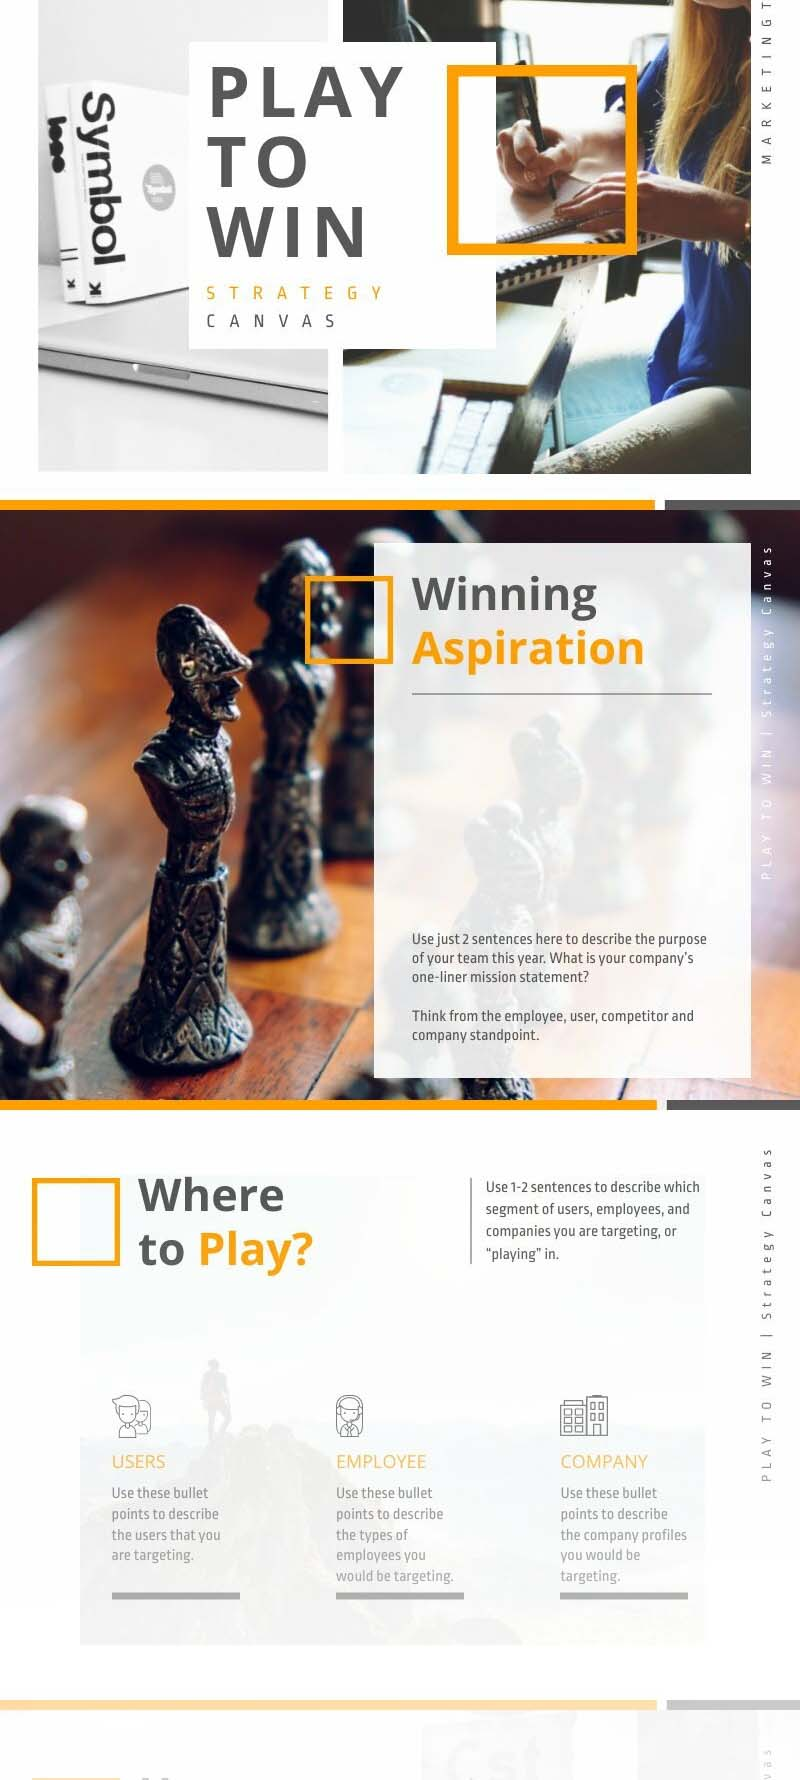
Marketing Plan Example
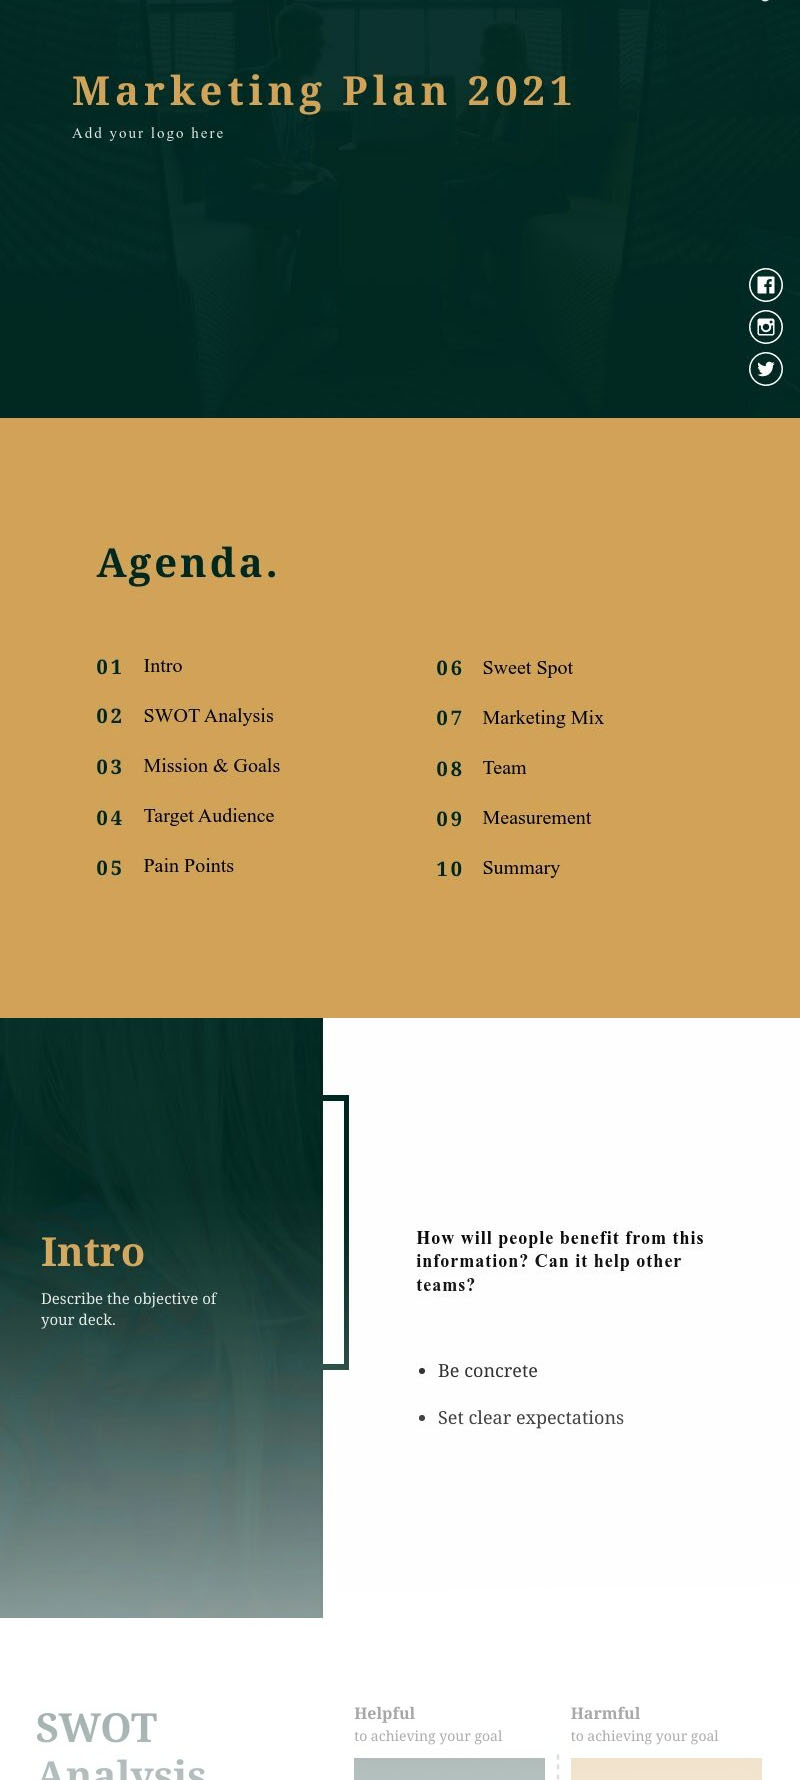

Startup Pitch Deck Example
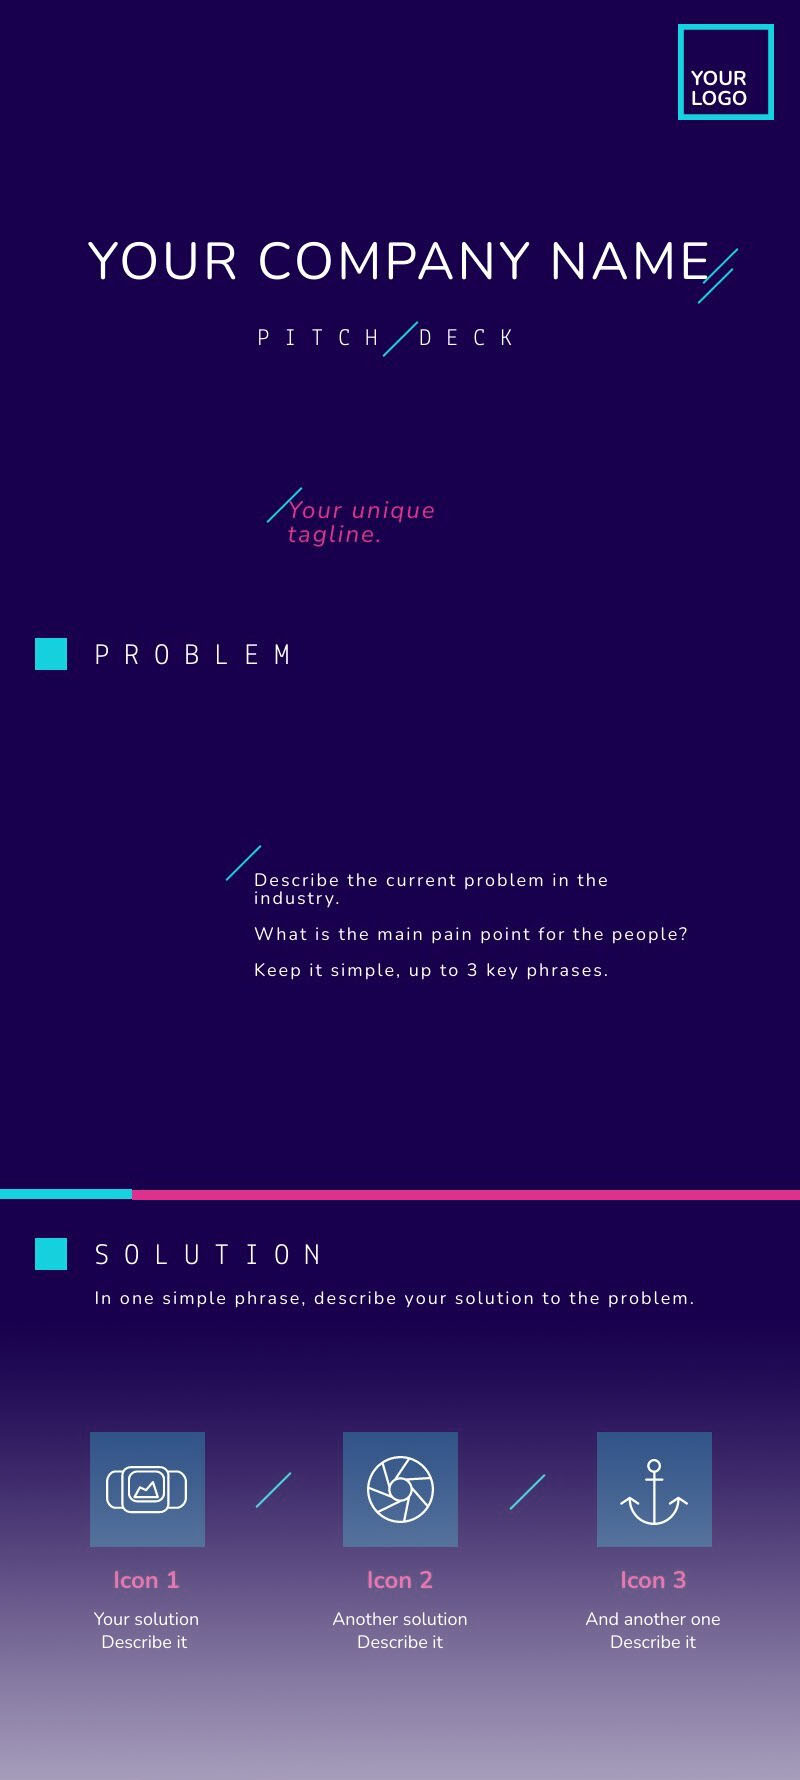
Team Planning Template Example
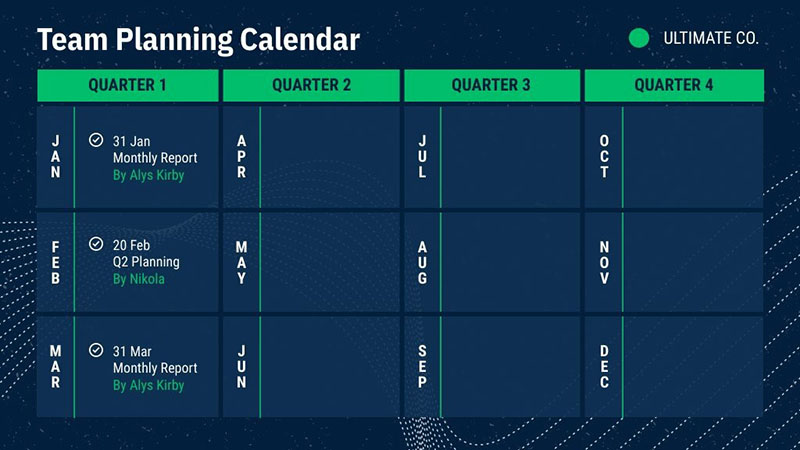
Tech Pitch Deck Example
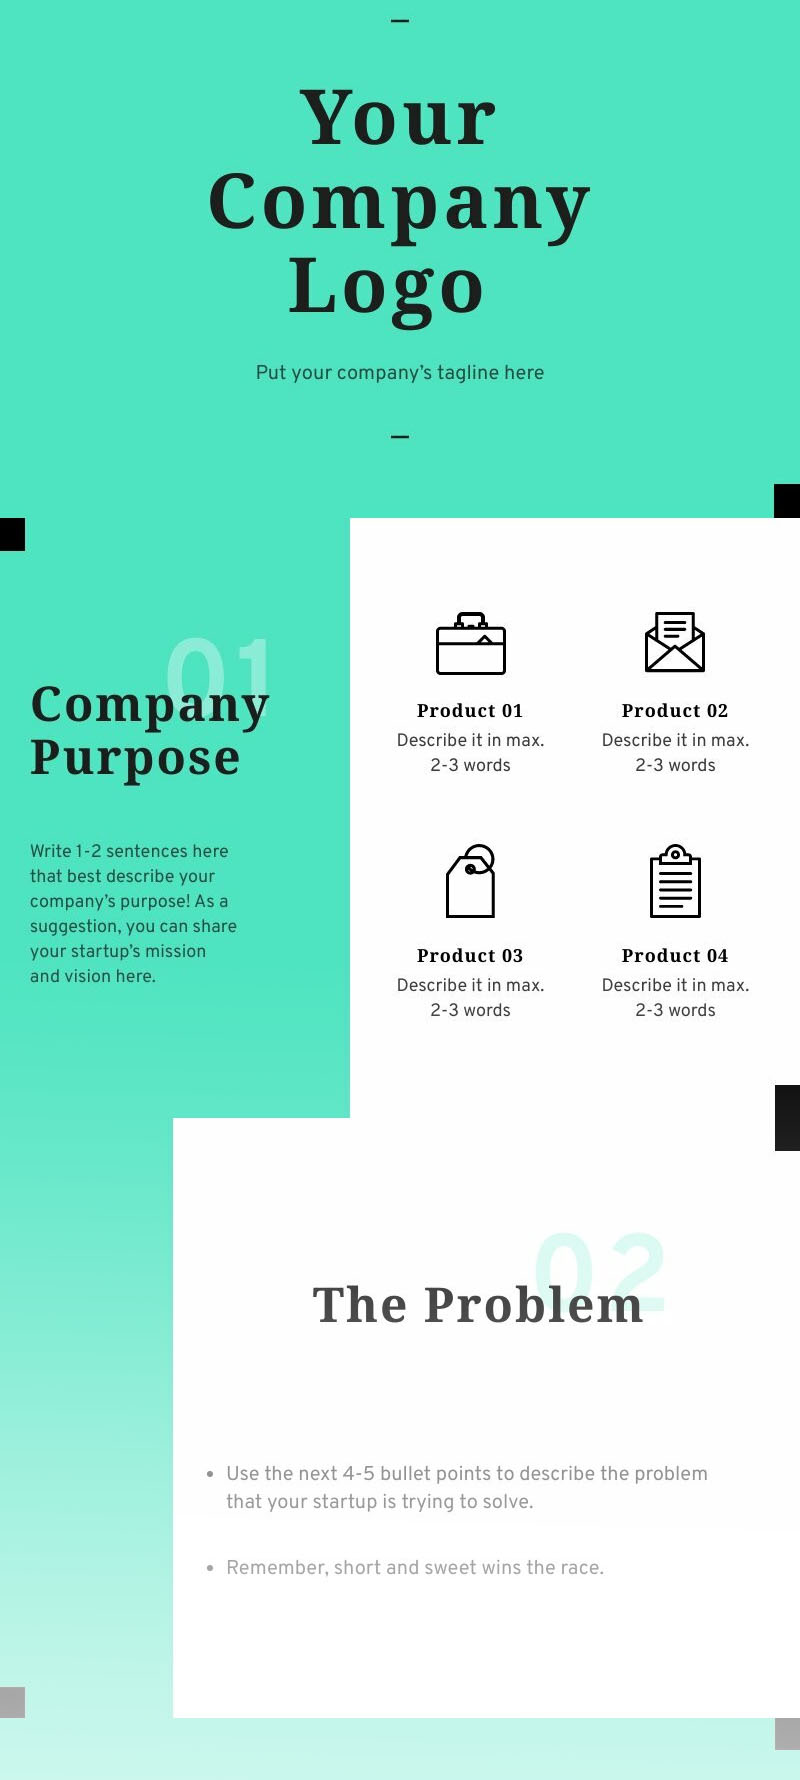
Business Keynote Slides Example
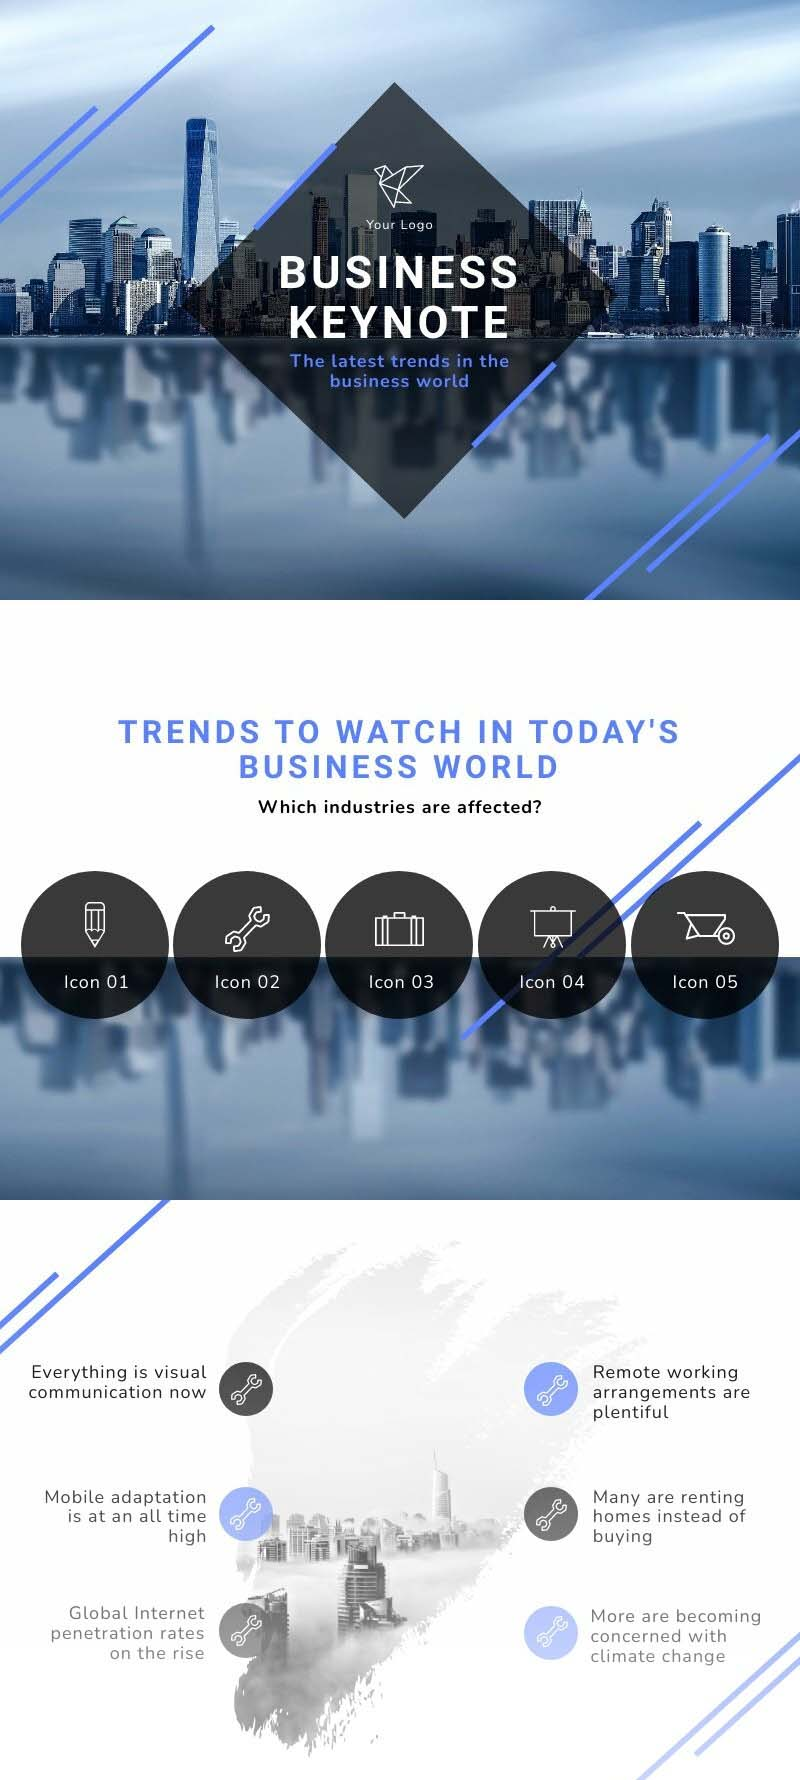
User Persona Example
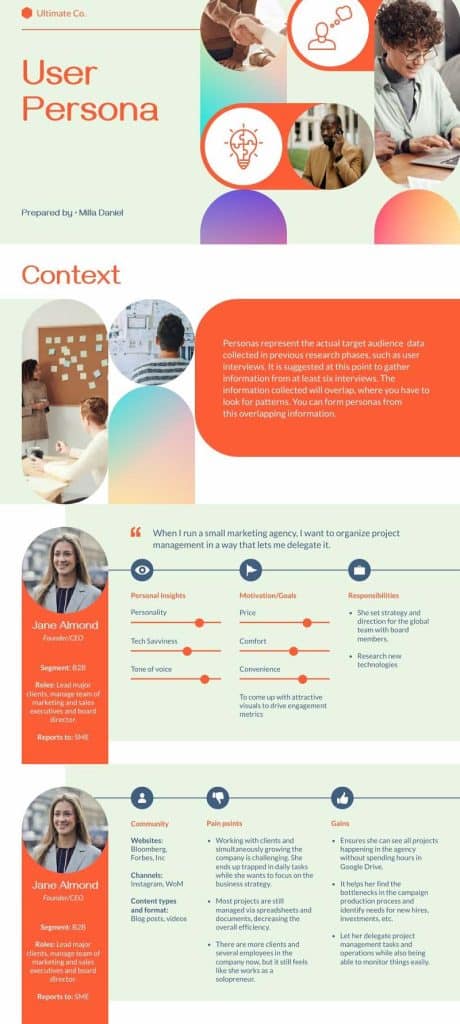
Own Product Deck

Project Roadmap Example
Presentations With Piktochart
With Piktochart, we can guarantee every visual you create and present will stand out from the normal PowerPoint presentation or Google slides and grab the audience’s attention.
Create bold, original, and unique slides with Piktochart.
Piktochart offers professionally designed templates for all your visual communication needs. It is your one-stop shop for presentations , posters , logos , email signatures , infographics , and more. Customize all templates according to your brand assets in seconds. Get started for free today.

Other Posts

7 Best Practices to a Standout Research Presentation
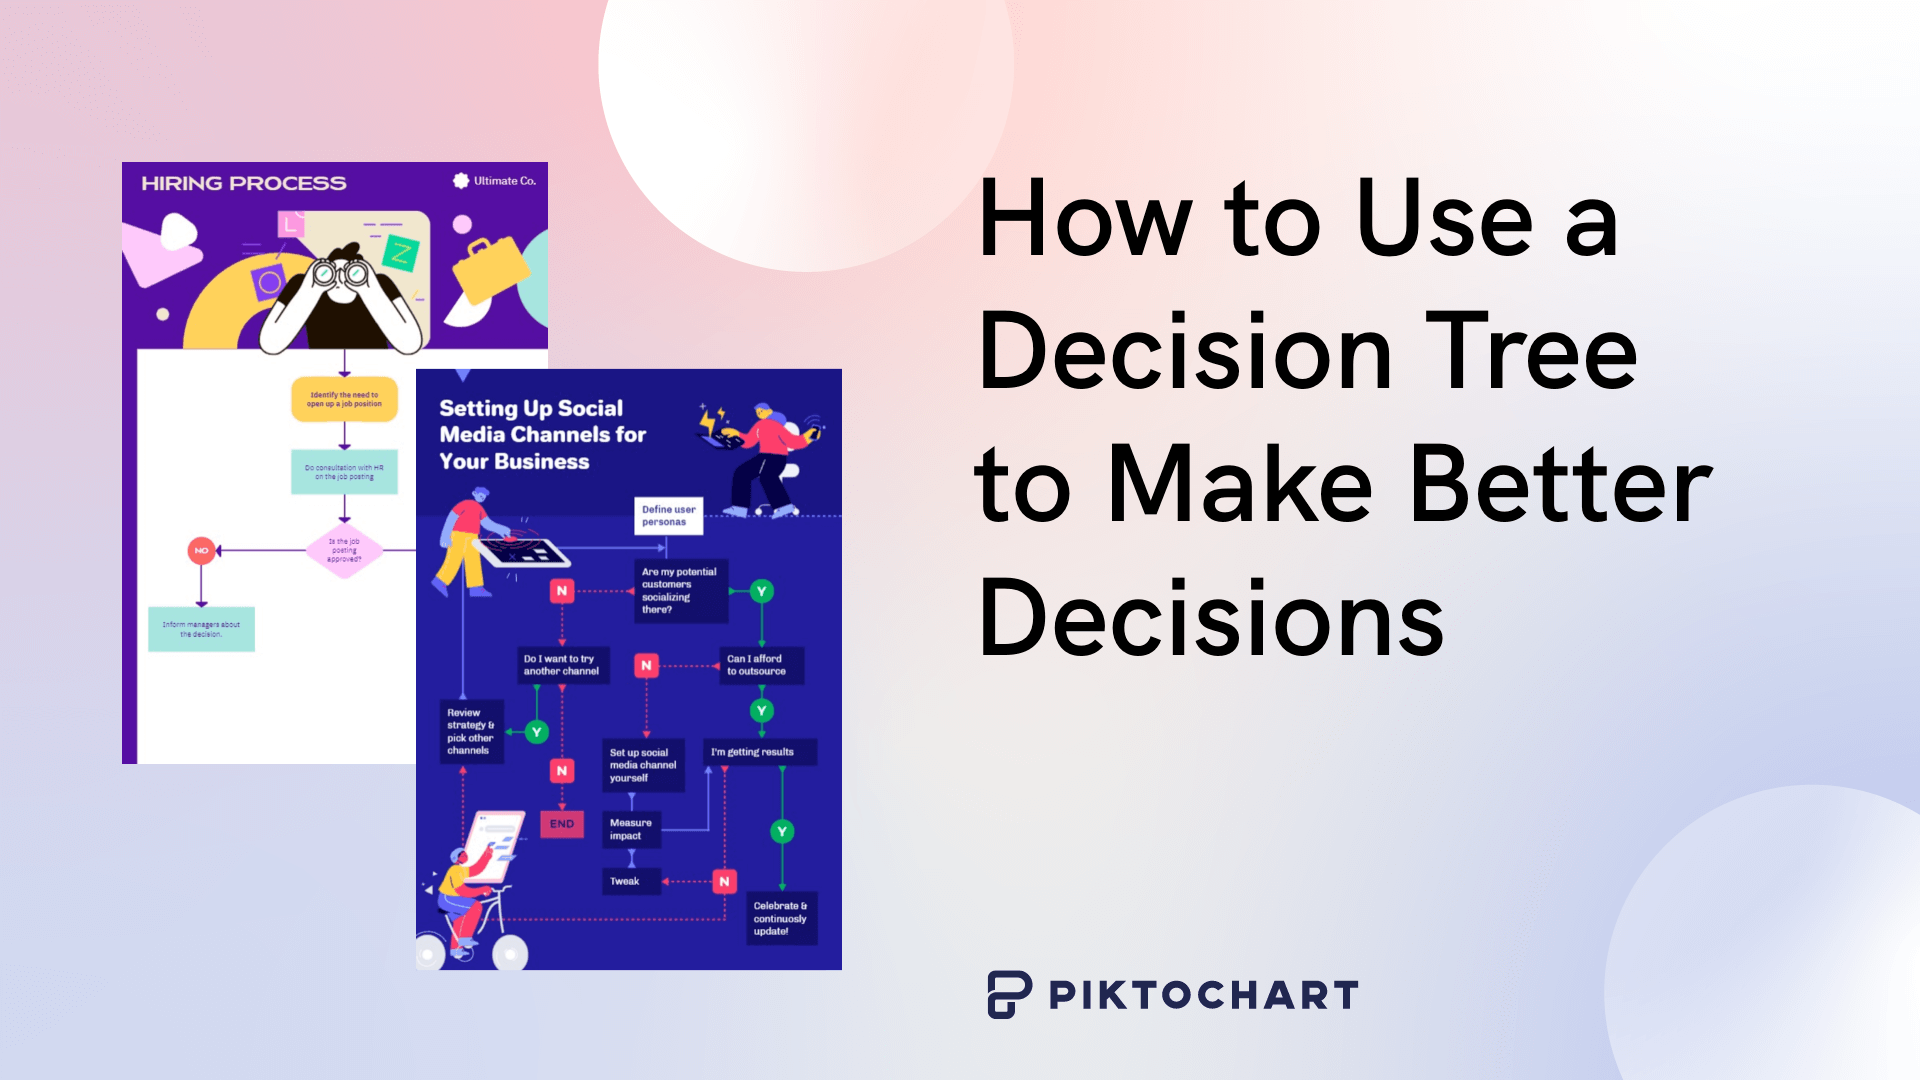
How to Use a Decision Tree to Make Better Decisions (with Examples)

11 Stunning Travel Brochure Examples Plus Tips to Help You Stand Out

12 Easy Steps to Make a Presentation Creative (+ Examples)
Learn how to make a presentation creative without PowerPoint, and draw inspiration from creative presentation examples by industry and use case.

Dominika Krukowska
9 minute read

Short answer
How can I make a presentation more creative?
- Start with captivating cover videos
- Add chapters for smooth navigation
- Weave in personalization using dynamic variables
- Enhance storytelling with animations
- Highlight key points using subtle visual cues
- Engage with interactive elements
- Showcase ideas using vibrant images
- Sprinkle in video narrations
- Wrap up with a smart CTA
Boring presentations can damage your brand’s image
Boring presentations can feel like those endless meetings where one person monopolizes the conversation. You know, the ones where you’re zoning out, doodling on the side of your notes, just waiting for it to end so you could move on to something more engaging.
That's the disconnect your audience experiences when faced with a boring presentation.
What’s even worse is that when your presentation is dull, it doesn't just bore your audience—it subtly suggests that you or your brand might be, well, kind of boring too .
The good thing is that with the right tweaks and insights, every presentation holds the potential to be memorable.
In this post, we're diving deep into the heart of what makes a presentation creative. We'll explore the mistakes that lead to forgettable slides and the strategies to elevate your content.
By the end, you’ll have all it takes to transform your presentation from mundane to magnetic and have your audience engage with it from the first click to the last.
Let’s go!
What makes a presentation boring?
A boring presentation is a mix of repetitive designs and long chunks of text without a human touch. When slides come off as too generic or overly complex, or they swing between being too predictable or hard to grasp, they lose their spark.
Add in a lack of visuals, real stories, or interaction, and you've got a recipe for audience disinterest.
To truly engage, a presentation should blend interaction, emotion, and content that is relevant to the audience.
How to make a presentation creative step-by-step
Modern presentations are more than just slides—they're experiences. Gone are the days of static bullet points; today's audience craves engagement, interactivity, and a touch of the unexpected.
Let's explore how to make your presentation more creative step-by-step:
1) Add videos to break up text
Videos can set the tone, explain complex ideas, or simply entertain. By strategically placing them at key moments where you feel energy might dip, you make sure your audience remains engaged, and your message is reinforced.
Whether it's a real-life testimonial, a product demo, or a fun animation, videos can breathe life into abstract concepts, making them tangible and relatable.
And, there’s science behind it too: presentations with a video on the cover slide see 32% more engagement . But the magic of videos doesn't stop at the cover. Presentations sprinkled with videos throughout held people's attention 37% longer and even boosted the click-through rate on calls-to-action by 17%.
2) Create a non-linear flow
Who said presentations have to be a straight line? Let's mix it up! By linking slides, you're handing the remote to your audience. It's like those 'choose your own adventure' books from our childhood.
Group your slides into themes or create chapters and let them pick what they want to see next. It's a fun, interactive way to keep them on their toes and engaged.
3) Use personalization for creating tailored stories
You know those emails that greet you by name and make you feel all special? Imagine bringing that warmth to your presentations using dynamic variables.
By integrating with your CRM, you can fetch specific data about your audience and weave it into your slides. This simple trick can make your audience feel like the content was crafted specifically for them, creating a deeper connection.
If you’re making a presentation to showcase your product, you can even use dynamic variables to create a mock-up with your prospect’s name and logo design on it to make your deck stand out.
4) Use narrated design
Scrollytelling is where the magic of scrolling meets the art of storytelling. It's an interactive content experience that weaves text, images, videos, and animations into a captivating narrative.
Instead of static slides, scrollytelling guides readers through a story, allowing them to control the pace. It breaks down complex content into bite-sized chunks, enhancing engagement and retention.
Our founder, Itai Amoza, wanted everyone to enjoy this dynamic content experience. So, he joined forces with visualization expert Prof. Steven Franconeri to weave scrollytelling into Storydoc.
Thanks to their partnership, we have dedicated storytelling slides in Storydoc, like the narrator slide you can see below , designed to make content both clear and captivating for all.

5) Tell stories with videos
Videos have this unique power to turn complex ideas into simple, engaging stories. A video might break down a tricky process into fun, easy-to-follow narrative, or give us a peek into real-life examples or experiences.
It's all about making your content feel alive, relatable, and super easy to understand. Because, let's face it, everyone's a sucker for a good story.
Here's a great example of a storytelling video:
6) Use roadmap and timeline slides
Ever tried reading a long-winded description of a company's journey or a product's development process? Yawn, right?
Now, imagine swapping that snooze-fest with a vibrant roadmap or timeline. Instead of slogging through paragraphs, you get a fun, visual play-by-play.
Picture a colorful line showing a startup's journey from a garage brainstorm to its first big sale.
Or a playful timeline marking the stages of turning a wild idea into a bestselling product. It's like turning a history lesson into a comic strip—way more fun and a whole lot clearer!
You can see what it looks like below:

7) Direct attention using animations
Ever been to a theater where the spotlight focuses on the main act? That's what animations do for your presentation.
Whether it's a cheeky arrow pointing out a fun fact, a grand entrance animation for a new idea, or using grayed-out content to highlight a key point, animations are your stage directors.
They ensure your audience's eyes are exactly where you want them to be, soaking in all the important bits.
Here's a great example:

8) Add interactive calculators
Who said numbers have to be boring? With interactive calculators, you're turning math into a fun game . Let your audience punch in numbers and see real-time results.
Whether they're calculating potential savings, ROI, or just playing around, it's an engaging and creative way to make your points tangible. It's like turning your presentation into a hands-on workshop.
9) Use AI-generated images
Instead of sifting through countless stock photos, thanks to the magic of AI, you can have an image that's tailor-made for your slide in seconds.
Storydoc presentation maker lets you generate any image directly in your deck - just give the AI assistant a short description and you’re good to go.
What's great is that you always get an image that matches your topic to a tee. No more "that'll do" compromises. Plus, think of all the time you save when you don't have to hunt for the right picture or take it yourself.
Here's a short video showing how it works:

10) Pop into the presentation with video bubble narration
Imagine if, during a presentation, a mini version of you could pop up, share a quick tip, or clarify a point. That's video bubble narration in a nutshell.
It's like having a friendly guide accompanying your audience, ensuring they get the most out of your content. It adds a creative personal touch, making your presentation feel like a cozy chat between friends.
11) Use before-and-after to show transformation
There's something magical about witnessing a transformation. Just think about the buzz online when someone shares a 'before and after' of a design revamp, weight loss journey, or how they helped a client grow their business.
With a before-and-after slide , you're giving your audience that 'aha!' moment. Even if you can't see their reactions in real-time, you can bet they're sliding back and forth, captivated by the change.
Whether it's showcasing a product's impact, a website redesign, or a process improvement, it's a visual treat that makes your message more powerful.
Here's an example of a before-and-after slide:

12) Close with a smart CTA
The grand finale of your presentation deserves a touch of flair. Instead of a simple 'Thank you' slide, imagine ending with an interactive live chat prompt or a calendar invite for a follow-up. It's like the encore at the end of a concert, giving your audience a chance to engage further.
These smart CTAs aren't just functional; they're creative extensions of your narrative. By integrating them, you're not just concluding your presentation; you're opening doors to new conversations and possibilities.
Here's a great example of a smart CTA:

3 presentation opening ideas
Kicking off a presentation with a bang can set the tone for everything that follows. Here are 3 captivating ways to grab your audience's attention right from the get-go:
Dive into a story: Begin with a personal anecdote or a relatable tale. It's like inviting your audience around a campfire, setting the stage for a memorable narrative.
Pose a thought-provoking question: Challenge your viewers with a question that gets their gears turning. It's an instant engagement booster, making them active participants.
Share a startling statistic: Drop a number that makes jaws drop. When you hit them with a fact that's hard to ignore, you've got their undivided attention.
Want more insights on crafting the perfect presentation opener? Check out our article on how to start a presentation people read to the end .
3 presentation closing ideas
Wrapping up a presentation is just as crucial as the opening. It's your final chance to leave a lasting impression. Here are 3 best ways to ensure your audience walks away inspired:
Circle back to the start: Revisit your opening story or statement, bringing your narrative full circle. It's a neat way to tie everything together and reinforce your key message.
End with a Call-to-Action: End with a captivating personal video message or a lively animation. It's a unique way to engage, surprise, and guide your audience on what's next.
Share an inspiring quote: Leave them with words that resonate. A powerful quote can sum up your message and linger in their minds long after.
Here's an example of a presentation with a personal video message at the end:

Hungry for more tips on crafting the perfect presentation finale? Read our blog post on how to end a presentation and get people to act .
Best tools for making creative presentations
Crafting creative presentations is an art, and like any artist, you need the right tools to bring your vision to life. Here's a curated list of platforms that are pushing the envelope in presentation design:
Storydoc : Beyond traditional slides, Storydoc offers interactive web stories. It's not just about displaying content; it's about creating experiences. With dynamic visuals and interactive elements, your audience is in for a treat.
Pitch : Collaboration is Pitch's forte. Designed for teams, it offers real-time editing, customizable templates, and a sleek interface. It's where ideas transform into visually stunning stories.
Genially : From animated presentations to responsive infographics, Genially provides tools that make your content come alive on the screen.
Beautiful.ai : Automated design assistance is its claim to fame. Feed in your content, and watch as the tool intuitively crafts slides that are both coherent and captivating.
Canva : A versatile design platform, Canva boasts a variety of templates for presentations, graphics, and more. Its drag-and-drop interface ensures even design novices feel like pros.
Visme : Tailored for visual storytelling, Visme offers a rich library of assets. Think dynamic charts, data widgets, and a suite of animations that turn your data into visual narratives.
Creative presentation templates
Ever felt the weight of the cursor blinking on an empty slide, almost taunting you to come up with something creative?
It's like being handed a stage with an eager audience, but the script is yet to be written. That initial step can be the hardest, but what if you had a little nudge in the right direction?
Creative presentation templates can help you shape your story in a way that stands out in a sea of monotony. Think of them as the paint-by-numbers kits, where the structure is set, but the colors and flair? That's all you.
Grab one and see for yourself.

Hi, I'm Dominika, Content Specialist at Storydoc. As a creative professional with experience in fashion, I'm here to show you how to amplify your brand message through the power of storytelling and eye-catching visuals.

Found this post useful?
Subscribe to our monthly newsletter.
Get notified as more awesome content goes live.
(No spam, no ads, opt-out whenever)
You've just joined an elite group of people that make the top performing 1% of sales and marketing collateral.
Create your best presentation to date
Try Storydoc interactive presentation maker for 14 days free (keep any presentation you make forever!)

Create a template
If you frequently create a certain type of document, such as a monthly report, a sales forecast, or a presentation with a company logo, save it as a template so you can use that as your starting point instead of recreating the file from scratch each time you need it. Start with a document that you already created, a document you downloaded, or a new Microsoft template you customized.
Save a template
To save a file as a template, click File > Save As .
Double-click Computer or, in Office 2016 programs, double-click This PC .
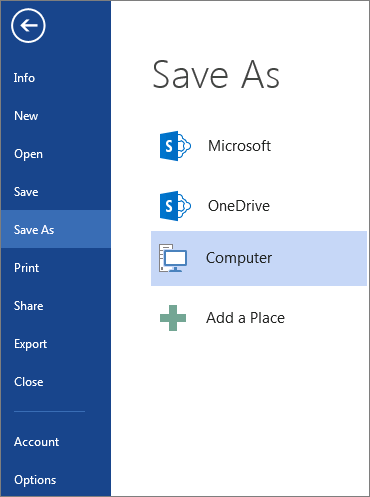
Type a name for your template in the File name box.
For a basic template, click the template item in the Save as type list. In Word for example, click Word Template .
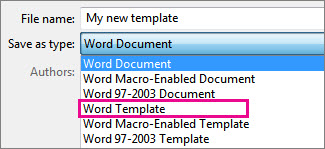
If your document contains macros, click Word Macro-Enabled Template .
Office automatically goes to the Custom Office Templates folder.
Click Save .
Tip: To change where your application automatically saves your templates, click File > Options > Save and type the folder and path you want to use in the Default personal templates location box. Any new templates you save will be stored in that folder, and when you click File > New > Personal , you'll see the templates in that folder.
Edit your template
To update your template, open the file, make the changes you want, and then save the template.
Click File > Open .
Double-click Computer or This PC .
Browse to the Custom Office Templates folder that’s under My Documents .
Click your template, and click Open .
Make the changes you want, then save and close the template.
Use your template to make a new document
To start a new file based on your template, click File > New > Custom , and click your template.
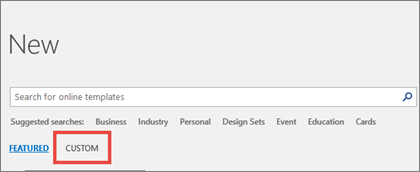
Note: If you're using Office 2013, this button may say Personal instead of Custom .
Use your templates from earlier versions of Office
If you made templates in an earlier version of Office, you can still use them in Office 2013 and 2016. The first step is to move them into the Custom Office Templates folder so your application can find them. To move your templates quickly, use the Fix it tool .
Save a document as a template
Open the Word document that you want to save as a template.
On the File menu, click Save as Template .
In the Save As box, type the name that you want to use for the new template.
(Optional) In the Where box, choose a location where the template will be saved.
Next to File Format , click Microsoft Word template (.dotx) , or, if your document contains macros, click Microsoft Word Macro-Enabled template (.dotm) .
Unless you select a different location, the template is saved in /Users/ username /Library/Group Containers/UBF8T346G9.Office/User Content/Templates.
To change where Word automatically saves your templates, on the Word menu, click Preferences , and then under Personal Settings , click File Locations . Under File Locations , select User templates from the list, and then click Modify . Type the new folder and path you want to use, and Word will save any new templates in that folder.
Create a new template based on another template
You can customize an existing template to make it even more useful. Add static information to the existing template, and then save the file again (as a template).
On the File menu, click New from Template .
Click a template that is similar to the one you want to create, and then click Create .
Note: If you can't find a template, you can search for it based on keywords in the Search All Templates box.
Add, delete, or change any text, graphics, or formatting, and make any other changes that you want to appear in all new documents that you base on the template.
Next to File Format , click Microsoft Word template (.dotx) , or, if your template contains macros, click Microsoft Word Macro-Enabled template .
Use your template to create a new document
To start a new document based on your template, on the File menu, click New from Template , and then select the template you want to use.
Delete a template
In the Finder , open /Users/ username /Library/Group Containers/UBF8T346G9.Office/User Content/Templates.
Drag the templates that you want to delete to the Trash.
Create a PowerPoint template
Open a blank presentation, and then on the View tab, click Slide Master .
The slide master is the largest slide image at the top of the slide thumbnail list. Associated layouts are positioned beneath it.
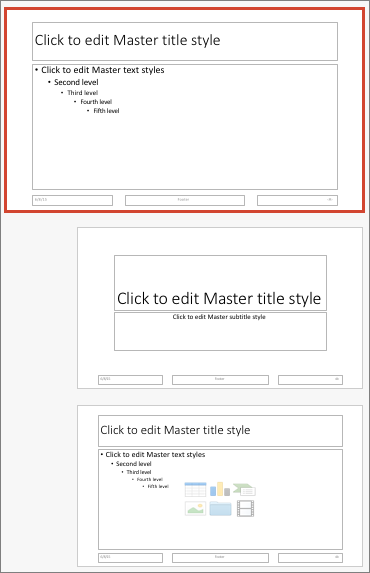
To make changes to the slide master or layouts, on the Slide Master tab, do any of these:

To add a colorful theme with special fonts, and effects, click Themes , and pick a theme.
To change the background, click Background Styles , and pick a background.
To add a placeholder for text, picture, chart, and other objects, in the thumbnail pane, click the slide layout that you want to hold the placeholder. From Insert Placeholder , pick the type of placeholder you want to add, and drag to draw the placeholder size.
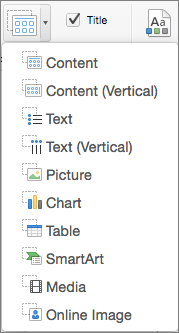
Save your presentation as a PowerPoint template
Open the presentation that you want to save as a template.
On the File tab, click Save as Template .
Next to File Format , click PowerPoint Template (.potx) , or, if your presentation contains macros, click PowerPoint Macro-Enabled Template (.potm) .
Add, delete, or change any text, graphics, or formatting, and make any other changes that you want to appear in all new presentations that you base on the template.
Next to File Format , click PowerPoint Template (.potx) , or, if your template contains macros, click PowerPoint Macro-Enabled Template (.potm) .
Use your template to create a new presentation
To start a new presentation based on a template, on the File menu, click New from Template , and then select the template you want to use.
Save a workbook or sheet as a template
Open the workbook that you want to save as a template.
Next to File Format , click Excel Template (.xltx) , or, if your workbook contains macros, click Excel Macro-Enabled Template (.xltm) .
Add, delete, or change any content, graphics, or formatting, and make any other changes that you want to appear in all new workbooks that you base on the template.
Next to File Format , click Excel Template (.xltx) , or, if your template contains macros, click Excel Macro-Enabled Template (.xltm) .
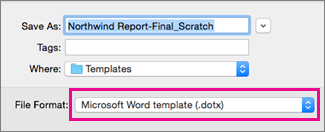
Use your template to create a new workbook
To start a new workbook based on a template, on the File menu, click New from Template , and then select the template you want to use.
Differences between templates, themes, and Word styles
If you think of your current document as a template, you can save it with a different name to create a new document that's based on the current one. Whenever you want to create a document like that, you'll open your document in Word for the web, go to File > Save As , and create a document that's a copy of the one you started with.
On the other hand, if you're thinking of the kind of templates you see by going to File > New , then no: you can't create those in Word for the web.
Instead, do this:
If you have the Word desktop application, use the Open in Word command in Word for the web to open the document in Word on your desktop.
From there, create a template. When you go to File > New in the Word desktop application, you'll be able to use your template for new documents. And if you store the documents online, you can edit them in Word for the web.
Microsoft Templates and Themes
Download free, pre-built templates
Free background templates for PowerPoint
Edit templates

Need more help?
Want more options.
Explore subscription benefits, browse training courses, learn how to secure your device, and more.

Microsoft 365 subscription benefits

Microsoft 365 training

Microsoft security

Accessibility center
Communities help you ask and answer questions, give feedback, and hear from experts with rich knowledge.

Ask the Microsoft Community

Microsoft Tech Community

Windows Insiders
Microsoft 365 Insiders
Was this information helpful?
Thank you for your feedback.
- Enter Our Giveaway
- Meta Quest 4
- Google Pixel 9
- Google Pixel 8a
- Apple Vision Pro 2
- Nintendo Switch 2
- Samsung Galaxy Ring
- Yellowstone Season 6
- Recall an Email in Outlook
- Stranger Things Season 5
How to create a Powerpoint Presentation
Powerpoint presentations are a great way to share information with a team, but making them is a skillset in its own right. We've got guides on general Powerpoint use , but if you're keen to just get started making a slideshow right now, this is the way.
How to create a Powerpoint presentation
How to build your first slide, how to add more slides to a powerpoint presentation, how to make an awesome slideshow presentation.
Here's how to make a Powerpoint presentation.
What You Need
Powerpoint or Microsoft 365 subscription
The first step in building your fancy slideshow is to create the presentation itself. Here's how to do it.
Step 1: Install Powerpoint (as part of Microsoft 365 ) if you haven't already, then open the app up.
Step 2: The home screen will give you a range of options for selecting templates and premade presentations to give you a great starting-off point. Select one of them if they're applicable. For even more options, select the New tab from the left-hand menu.
Alternatively, if you want to start from a blank canvas, select Blank presentation.
Step 3: From there, it's a good idea to name and save the presentation so you can come back to it later. Select File > Save or* Save As*, then name the file on the right, choose a location for it, and select Save .
Step 1: Your first slide will automatically have text fields for a title and subtitle. If you want to have that on your first slide, select them, then type in what you want them to read. You can also click and drag them around, or resize them using your mouse.
Hover your mouse over the white circles, then click and drag them to resize the box. Alternatively, select the rotational arrows near the corners of the box, to rotate it.
If you don't want those text fields, select their boundary individually and press the Delete key to remove them.
Step 2: If you want to add more text to this slide (or any others in the future), select the Insert tab, then select Text box. Click on the slide where you want the box to appear, then use your mouse to drag the box to the desired shape.
Then click the box and type in what you want that text box to say. The contextual home menu will automatically adjust to give you quick access to font choices and other text style options.
You can access more detailed text formatting options by selecting the Format tab. There you'll find options for changing text coloring, its outline, and any text effects you want to use.
Step 3: To add pictures to your slideshow, select the Insert tab, then select Pictures in the top-left. You'll then have the option to insert an image from your local PC, a selection of stock images, or a range of online images.
Step 4: You can also freehand draw or annotate your slides, using the Draw tab, or alter the entire theme of the slideshow by selecting Design.
To add a new slide to your presentation, select the Insert tab at the top of the screen, then select New slide on the left. Then choose the type of slide you want. You can have a blank slide to do it all yourself, or you can get a headstart on its design by copying a previous slide, using the same theme as another part of your presentation, or having a predefined layout.
Want even more tips on making a great slideshow? We've got you covered. Check out our guide on how to use Microsoft Powerpoint , for all the most important tips.
We've also got a guide for more tips and tricks for making engaging and attractive slides .
Editors’ Recommendations
- The best PowerPoint templates
- How to change the background in Powerpoint
- 5 ways to add music to PowerPoint
- How to print a PowerPoint presentation with notes
- How to convert PDF to PowerPoint
- How-To Guides

While PowerPoint is widely used to develop presentations, using Google Slides has become a popular alternative. Part of what makes it so popular is that it's free to use, as is other Google software such as Google Docs and Google Sheets – which is a stark contrast to the premium price you'll pay for Microsoft Office and PowerPoint.
Even if you know how to use Microsoft PowerPoint, you might want to jump ship to Slides, and Google makes it easy to do so. In fact, it takes little more than a few clicks to convert a PowerPoint to Google Slides. Whether you need to change the format for a coworker or want to permanently switch to the free platform, here's a look at how to convert your PowerPoint into a Google Slides presentation.
We all know that Microsoft’s PowerPoint software has been a presentations staple for a few decades now. And whether you only used it in school once or twice, or you use it for work on a daily basis, there’s always something new to learn about the classic Microsoft platform.
Even if you know how to use PowerPoint, did you know that you can embed videos in your presentations?
Creating a successful slideshow is no small task. So, if you’re new to Microsoft PowerPoint, you’ll need to familiarize yourself with the features and tools you need to build a presentation.
We’ll guide you through the process of creating a PowerPoint slideshow by adding slides and elements as well as how to present the show when you finish. These basics are just what you need as a beginner and should get you off to a terrific start with PowerPoint.
- Alternatives 🔥
Interactive Presentation: How to Create Yours with AhaSlides | Ultimate Guide 2024
Jasmine • 06 September, 2024 • 16 min read
We live in an age where attention is like gold dust. Precious and hard to come by.
TikTokers spend hours editing videos, all in an effort to hook viewers in the first three seconds.
YouTubers agonise over thumbnails and titles, each one needing to stand out in a sea of endless content.
And journalists? They wrestle with their opening lines. Get it right, and readers stick around. Get it wrong, and poof - they're gone.
This isn't just about entertainment. It's a reflection of a deeper shift in how we consume information and interact with the world around us.
This challenge isn't just online. It's everywhere. In classrooms, boardrooms, at big events. The question's always the same: How do we not just grab attention, but hold it? How do we turn fleeting interest into meaningful engagement ?
It's not as hard as you might think. AhaSlides has found the answer: interaction breeds connection .
Whether you're teaching in class, getting everyone on the same page at work, or bringing a community together, AhaSlides is the best interactive presentation tool that you need to communicate, engage, and inspire.
So, let’s discover how to make an interactive presentation using AhaSlides that your audiences will never forget!
Table of Contents
What is an interactive presentation.
An interactive presentation is an engaging method of sharing information where the audience actively participates rather than just passively listening. This approach uses live polls, quizzes, Q&As, and games to get viewers directly involved with the content. Instead of one-way communication, it supports two-way communication, letting the audience shape the presentation's flow and outcome. Interactive presentation is designed to get people active, help them remember things, and create a more collaborative learning or discussion environment.
Main benefits of interactive presentations:
Increased audience engagement: Audience members stay interested and focused when they actively take part.
Better memory: Interactive activities help you remember important points and reinforce what you've gained.
Enhanced learning outcomes: In educational settings, interaction leads to a better understanding.
Better teamwork: Interactive presentations make it easier for people to talk to each other and share ideas.
Real-time feedback: Live polls and surveys give useful feedback in real-time.
Why Choose AhaSlides For Interactive Presentations?
There is a lot of engaging presentation software out there, but AhaSlides stands out as the best. Let's look into why AhaSlides really shines:
Various features
While other tools may offer a few interactive elements, AhaSlides boasts a comprehensive suite of features. This interactive presentation platform lets you make your slides fit your needs perfectly, with features like live polls , quizzes , Q&A sessions , and word clouds that will keep your audience interested the whole time.
Affordability
Good tools shouldn't cost the earth. AhaSlides packs a punch without the hefty price tag. You don't have to break the bank to create stunning, interactive presentations.
Lots of templates
Whether you're a seasoned presenter or just starting, AhaSlides' vast library of pre-designed templates makes it easy to get started. Customize them to match your brand or create something entirely unique - the choice is yours.
Seamless integration
There are endless possibilities with AhaSlides because it works well with the tools you already know and love. AhaSlides is now available as an extension for PowerPoint , Google Slides and Microsoft Teams . You can also add YouTube videos, Google Slides/PowerPoint content, or things from other platforms without stopping the flow of your show.
Real-time insights
AhaSlides doesn't just make your presentations interactive, it provides you with valuable data. Keep track of who is participating, how people are reacting to certain slides, and learn more about what your audience likes. This feedback loop works in real time, so you can change your talks at the last minute and keep getting better.
Key features of AhaSlides:
- Live polls: Gather instant feedback from your audience on various topics.
- Quizzes and games: Add an element of fun and competition to your presentations.
- Q&A sessions: Encourage open dialogue and address audience queries in real-time.
- Word clouds: Visualize collective opinions and ideas.
- Spinner wheel: Inject excitement and randomness into your presentations.
- Integration with popular tools: AhaSlides works well with the tools you already know and love, such as PowerPoint, Google Slides, and MS Teams.
- Data analytics: Track audience participation and gain valuable insights.
- Customisation options: Make your presentations fit your brand or your own style.
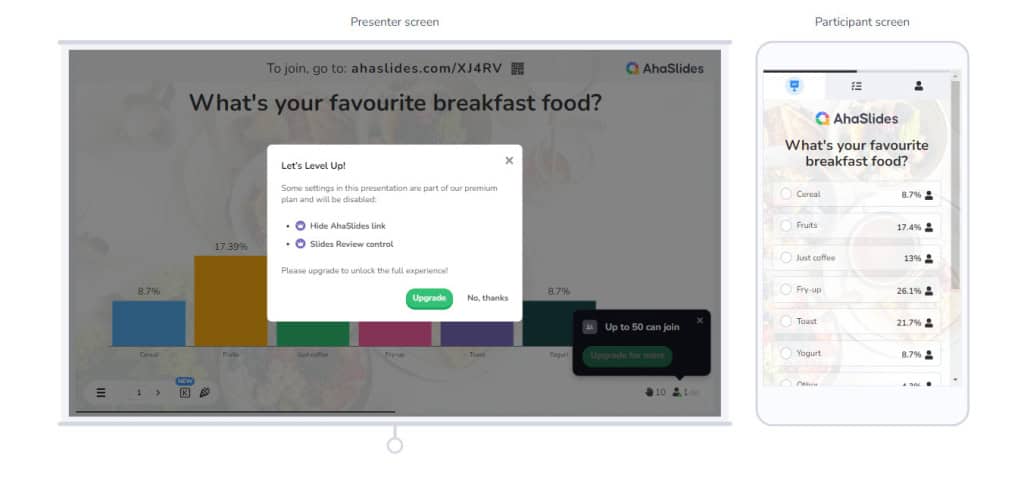
AhaSlides is more than just a tool for making interactive presentations. It, actually, is a way to connect, engage, and communicate effectively. This is the best choice if you want to improve your talks and make an impact on your audience that lasts.
Comparison with other presentation tools:
Other interactive presentation tools, like Slido, Kahoot, and Mentimeter, have dynamic features, but AhaSlides is the best because it is cheap, easy to use, and flexible. Having a lot of features and integrations makes AhaSlides an ideal option for all your interactive presentation needs. Let's see why AhaSlides is one of the best Kahoot alternatives :
| Free plan | Live chat support | No prioritised support |
| Monthly plans from | $23.95 | ✕ |
| Yearly plans from | $95.40 | $204 |
| Priority support | All plans | Pro plan |
| Spinner wheel | ✅ | ✕ |
| Audience reactions | ✅ | ✅ |
| Interactive quiz (multiple-choice, match pairs, ranking, type answers) | ✅ | ✕ |
| Team-play mode | ✅ | ✅ |
| AI slides generator | ✅ | ✅ (highest-paid plans only) |
| Quiz sound effect | ✅ | ✅ |
| Survey (multiple-choice poll, word cloud & open-ended, brainstorming, rating scale, Q&A) | ✅ | ✕ |
| Self-paced quiz | ✅ | ✅ |
| Participants' results analytics | ✅ | ✅ |
| Post-event report | ✅ | ✅ |
| Participants authentication | ✅ | ✕ |
| Integrations | - Google Slides - PowerPoint - MS Teams - Hopin | - PowerPoint |
| Customisable effect | ✅ | ✕ |
| Customisable audio | ✅ | ✅ |
| Interactive templates | ✅ | ✕ |
How To Create An Interactive Presentation With AhaSlides
Step-by-step guide for you to make an interactive presentation using AhaSlides in a few minutes:
Create a free AhaSlides account or choose a suitable plan based on your needs.
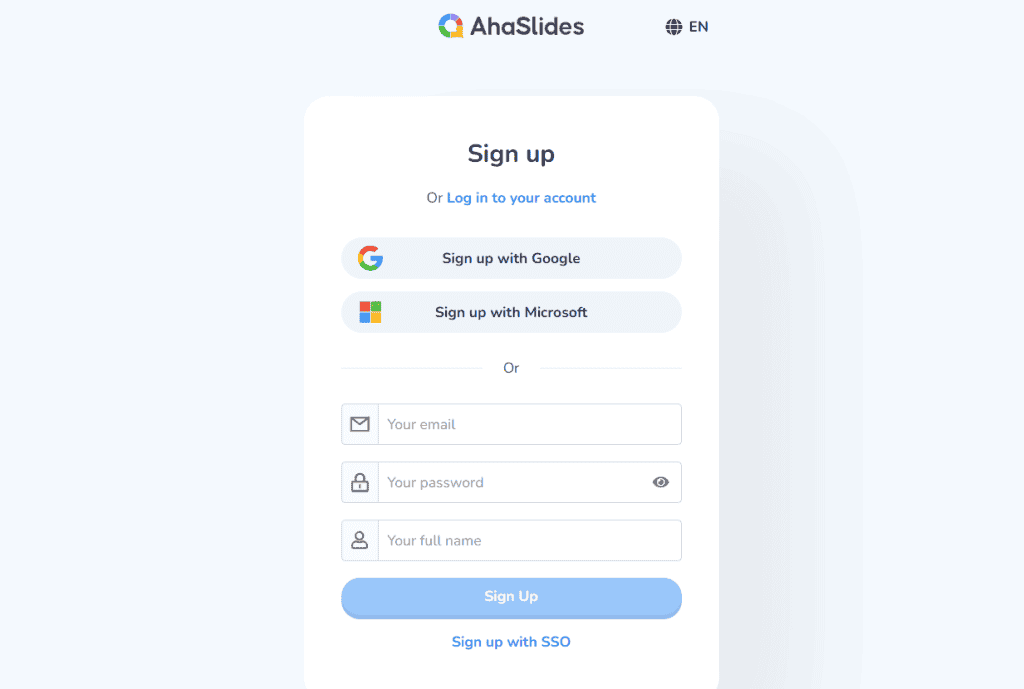
2. Create a new presentatio n
To create your first presentation, click the button labelled ' New presentation' or use one of the many pre-designed templates.
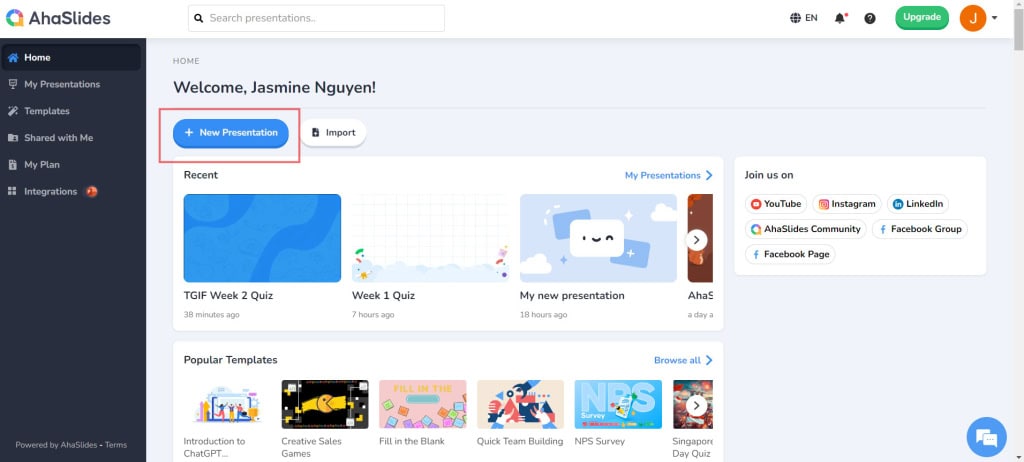
Next, give your presentation a name, and if you want, a customised access code.
You will be taken directly to the editor, where you can start to edit your presentation.
3. Add slides
Choose from various slide types.
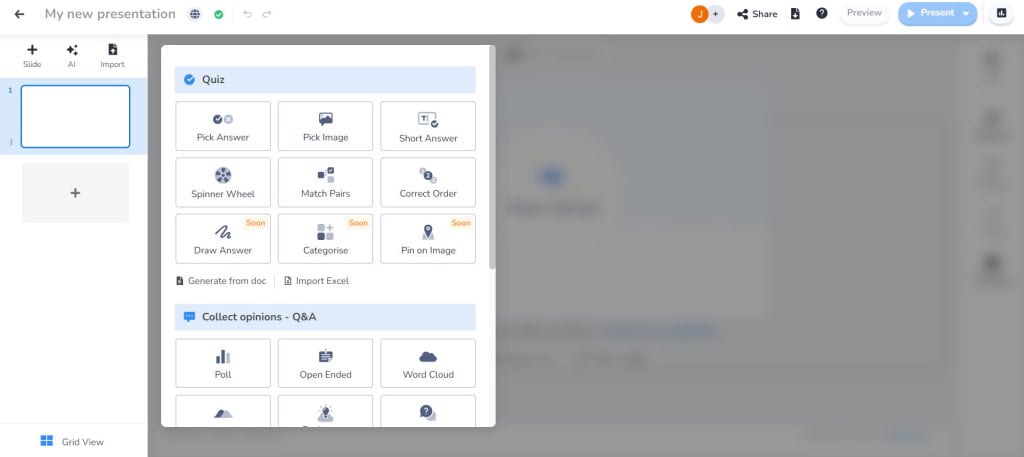
4. Customise your slides
Add content, adjust fonts and colours, and insert multimedia elements.
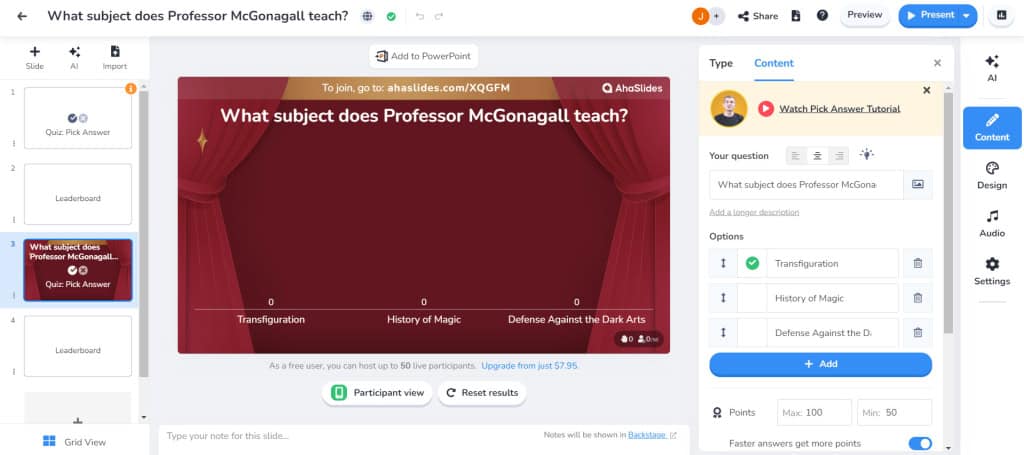
5. Add interactive activities
Set up polls, quizzes, Q&A sessions, and other features.
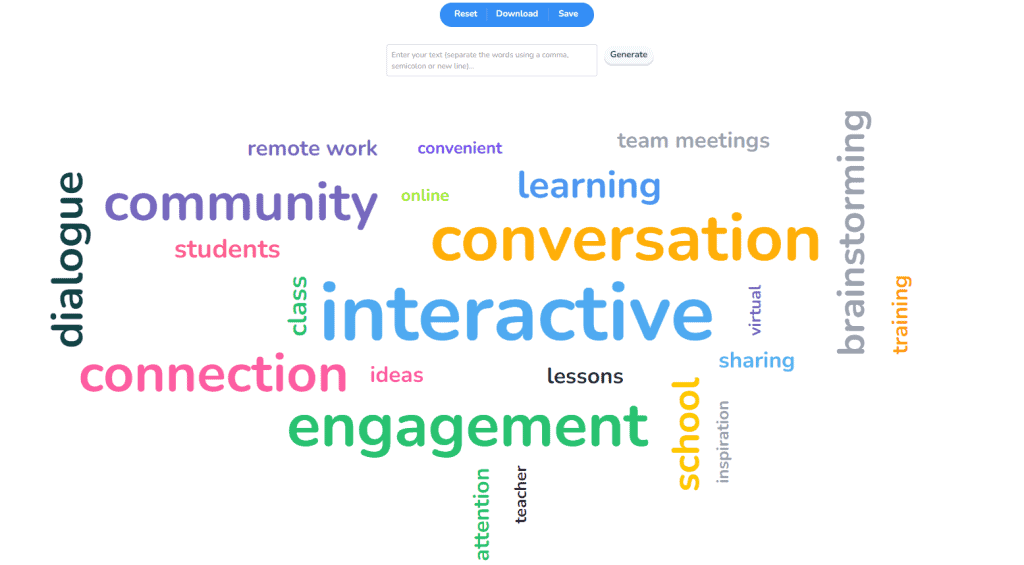
6. Present your slideshow
Share your presentation with your audience via a unique link or QR code, and enjoy the taste of connection!
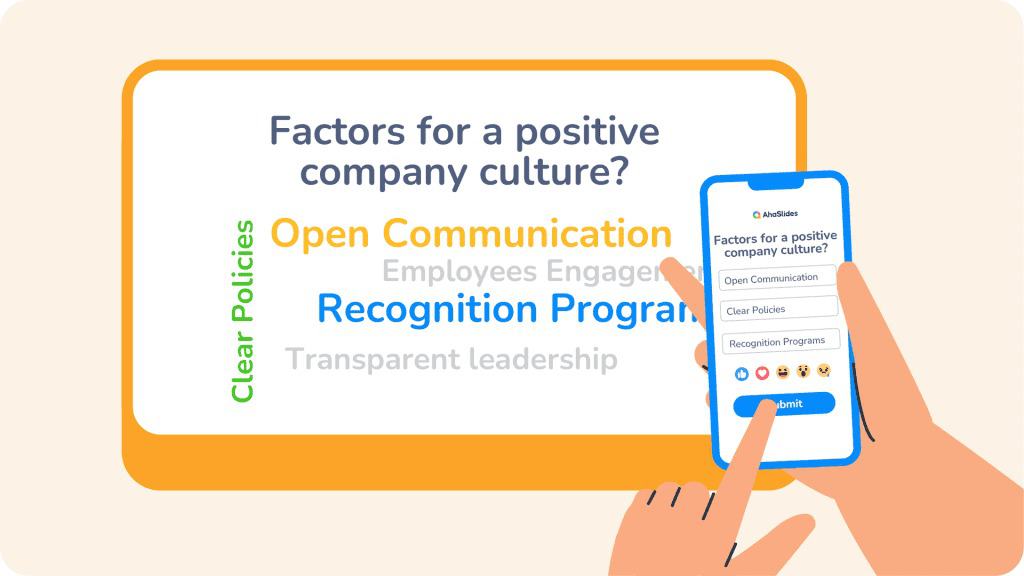
5 Effective Techniques To Make Presentations Interactive
Still wondering how to make a presentation interactive and super engaging? Here are keys:
Icebreaker activities
Icebreaker activities are a great way to kick off your presentation and create a welcoming atmosphere. They help to break the ice between you and your audience, and they can also help to get your audience engaged in the material. Here are some ideas for icebreaker activities:
- Name games: Ask participants to share their name and an interesting fact about themselves.
- Two truths and a lie: Have each person in your audience share three statements about themselves, two of which are true and one of which is a lie. The other members of the audience guess which statement is the lie.
- Would you rather?: Ask your audience a series of "Would you rather?" questions. This is a great way to get your audience thinking and talking.
- Polls: Use a polling tool to ask your audience a fun question. This is a great way to get everyone involved and to break the ice.
Storytelling
Storytelling is a powerful way to captivate your audience and make your message more relatable. When you tell a story, you are tapping into your audience's emotions and imagination. This can make your presentation more memorable and impactful.
To craft compelling stories:
- Start with a strong hook: Grab your audience's attention from the beginning with a strong hook. This could be a question, a surprising fact, or a personal anecdote.
- Keep your story relevant: Make sure your story is relevant to your presentation topic. Your story should help to illustrate your points and make your message more memorable.
- Use vivid language: Use vivid language to paint a picture in your audience's mind. This will help them to connect with your story on an emotional level.
- Vary your pace: Don't speak in a monotone. Vary your pace and volume to keep your audience engaged.
- Use visuals: Use visuals to complement your story. This could be images, videos, or even props.
Live feedback tools
Live feedback tools are a great way to encourage active participation and gather valuable insights from your audience. These tools can help you gauge your audience's understanding of the material, identify areas where they need more clarification, and get feedback on your presentation overall.
Consider using:
- Polls: Use polls to ask your audience questions throughout your presentation. This is a great way to get their feedback on your content and to keep them engaged.
- Q&A sessions: Use a Q&A tool to allow your audience to submit questions anonymously throughout your presentation. This is a great way to address any concerns they may have and keep them engaged in the material.
- Word clouds: Use a word cloud tool to collect feedback from your audience on a specific topic. This is a great way to see what words and phrases come to mind when they think about your presentation topic.
Gamify the presentation
Gamifying your presentation is a great way to keep your audience engaged and motivated. Interactive presentation games can make your presentation more fun and interactive, and it can also help your audience to learn and retain information more effectively.
Try these gamification strategies:
- Use quizzes and polls: Use quizzes and polls to test your audience's knowledge of the material. You can also use them to award points to the audience members who answer correctly.
- Create challenges: Create challenges for your audience to complete throughout your presentation. This could be anything from answering a question correctly to completing a task.
- Use a leaderboard: Use a leaderboard to track your audience's progress throughout the presentation. This will help to keep them motivated and engaged.
- Offer rewards: Offer rewards to the audience members who win the game. This could be anything from a prize to a bonus point on their next exam.
Pre and post-event surveys
Pre and post-event surveys are a great way to gather feedback from your audience and improve your presentations over time. Pre-event surveys can help you to identify your audience's expectations and tailor your presentation accordingly. Post-event surveys can help you to see what your audience liked and disliked about your presentation, and they can also help you to identify areas for improvement.
Here are some tips for using pre and post-event surveys:
- Keep your surveys short and sweet. Your audience is more likely to complete a short survey than a long one.
- Ask open-ended questions. Open-ended questions will give you more valuable feedback than closed-ended questions.
- Use a variety of question types. Use a mix of question types, such as multiple choice, open-ended, and rating scales.
- Analyze your results. Take the time to analyze your survey results so that you can make improvements to your presentations in the future.
👉Learn more interactive presentation techniques to create great experiences with your audience.
4 Types Of Interactive Activities You Can Include
Quizzes and games.
Test your audience's knowledge, create friendly competition, and add an element of fun to your presentation.
Live polls and surveys
Gather real-time feedback on various topics, gauge audience opinions, and spark discussions. You can use them to gauge their understanding of the material, gather their opinions on a topic, or even just break the ice with a fun question.
Q&A sessions
A Q&A session allows your audience to submit questions anonymously throughout your presentation. This can be a great way to address any concerns they may have and keep them engaged in the material.
Brainstorming activities
Brainstorming sessions and breakout rooms are a great way to get your audience working together and sharing ideas. This can be a great way to generate new ideas or solve problems.
👉 Get more interactive presentation ideas from AhaSlides.
9 Steps For Interactive Presenters To Wow Audiences
Identify your goals.
Effective interactive presentations don't happen by chance. They need to be carefully planned and organized. First, make sure that each interactive part of your show has a clear goal. What do you want to achieve? Is it to gauge understanding, spark discussion, or reinforce key points? Is it to see how much people understand, start a conversation, or stress important points? Pick activities that fit with your material and audience once you know what your goals are. Lastly, practice your whole presentation, including the parts where people can connect with you. This practice run will help you find problems before the big day and make sure everything goes smoothly.
Know your audience
For an interactive slideshow to work, you need to know who you're talking to. You should think about your audience's age, job, and amount of tech knowledge, among other things. This knowledge will help you make your content more relevant and pick the right interactive parts. Find out how much your audience already knows about the subject. When you're talking to experts, you might use more complex interactive activities. When you're talking to regular people, you might use easier, more straightforward ones.
Start strong
The presentation intro can set the tone for the rest of your talk. To get people interested right away, use an icebreaker game. This could be as easy as a quick question or a short activity to get people to know each other. Make it clear how you want the audience to participate. To help people connect with you, show them how any tools or platforms you use work. This makes sure that everyone is ready to take part and knows what to expect.

Balance content and interaction
Interactivity is great, but it shouldn't take away from your main point. When you're giving your presentation, use interactive features wisely. Too many interactions can be annoying and take attention away from your main points. Spread out your interactive parts so that people are still interested in the whole show. This pace helps your audience stay focused without being too much. Make sure you give both your information and the interactive parts enough time. Nothing irritates an audience more than feeling like they are being rushed through activities or that the show is going too slowly because there are too many interactions.
Encourage participation
The key to a good interactive presentation is making sure that everyone feels like they can participate. To get people to take part, stress that there are no wrong choices. Use language that makes everyone feel welcome and encourages them to join in. However, don't put people on the spot, as this can make them feel anxious. When talking about sensitive topics or with people who are more shy, you might want to use tools that let people respond anonymously. This can get more people to take part and get more honest comments.
Be flexible
Things don't always go as planned, even when you plan them out very well. For every engaging part, you should have a backup plan in case the technology fails or the activity doesn't work for your audience. You should be ready to read the room and change how you talk based on how people react and how energetic they are. Don't be afraid to move on if something isn't working. On the other hand, if a certain exchange is leading to a lot of discussion, be ready to spend more time on it. Give yourself some room to be spontaneous in your talk. Most of the time, the most memorable times happen when people interact in ways that no one expected.
Use interactive presentation tools wisely
Presentation technologies can make our talks a lot better, but if it's not used correctly, it can also be annoying. Before you give a show, you should always test your IT and tools. Make sure that all of the software is up to date and works with the systems at the presentation place. Set up a plan for tech help. If you have any technical problems during your talk, know who to call. It's also a good idea to have non-tech options for each engaging part. This could be as easy as having handouts on paper or things to do on a whiteboard ready in case something goes wrong with the technology.
Manage time
In interactive presentations, keeping track of time is very important. Set clear due dates for each engaging part, and make sure you follow them. A timer that people can see can help you, and they stay on track. Be ready to end things early if you need to. If you're short on time, know ahead of time which parts of your talk can be shortened. It's better to squish together a few exchanges that work well than to rush through all of them.
Gather feedback
To make the best interactive presentation the next time, you should keep improving with every talk. Get feedback by giving surveys after the show. Ask the people who attended what they liked best and worst about the presentation and what they would like to see more of in future ones. Use what you've learned to improve how you create interactive presentations in the future.
Thousands Of Successful Interactive Presentations Using AhaSlides…
Teachers all around the world have used AhaSlides to gamify their lessons, boost student engagement, and create a more interactive learning environment.
Marek Serkowski - Teacher in Poland
"I really appreciate you and your presentation tool. Thanks to you, me and my high school students are having a great time! Please continue to be great 🙂 " Marek Serkowski (A teacher in Poland )
Corporate training
Trainers have leveraged AhaSlides to deliver training sessions, facilitate team-building activities, and enhance knowledge retention.
"It's a very very fun way to build teams. Regional managers are super happy to have AhaSlides because it really energises people. It's fun and visually attractive. " Gabor Toth (Talent Development and Training Coordinator at Ferrero Rocher )

Conferences and events
Presenters have utilised AhaSlides to create memorable keynote speeches, gather audience feedback, and foster networking opportunities.
" AhaSlides is amazing. I was assigned to host and inter-committee event. I found out that AhaSlides enables our teams to solve problems together. " Thang V. Nguyen ( Ministry of Industry and Commerce of Vietnam )
Frequently Asked Questions
Is ahaslides free to use.
Absolutely! AhaSlides’ free plan is great for getting started. You get unlimited access to all slides with live customer support. Try the free plan and see if it meets your basic needs. You can always upgrade later with paid plans, which supports bigger audience sizes, custom branding, and more - all at a competitive price point.
Can I import my existing presentations into AhaSlides?
Why not? You can import presentations from PowerPoint and Google Slides.

I love the feeling of belonging. Being connected. Being heard. That's why I desire to instil this sense in AhaSlides readers and audiences worldwide.
Tips to Engage with Polls & Trivia
More from AhaSlides
Unsupported browser
This site was designed for modern browsers and tested with Internet Explorer version 10 and later.
It may not look or work correctly on your browser.
- Communication
How Do You Prepare a Good Presentation in 2024 in 12+ Practical Steps? (+ Expert Tips)
There's nothing more nerve-wracking than having a big presentation coming up and feeling unprepared. Public speaking can be difficult. Not feeling ready makes it even more of a trial. Learn the essential steps for presentation preparation.

If you want to calm those nerves and wow your audience, then it's a good idea to understand the basics of creating attention-getting presentations.
In this guide, I'll share 12+ presentation preparation tips that'll walk you through how to prepare for a presentation from start to finish. So, you can feel confident when preparing to give a presentation .
Find Premium Presentation Slides on Envato Elements
One way to save time in the presentation preparation phase is to use a premium template to design your slides. This will help you feel secure about how your presentation looks, even if design skills aren't your core strength.
.png)
A great place to find templates when preparing to give a presentation is Envato Elements. This marketplace has a great offer you can grab today. Download as many premium PowerPoint presentation templates as you want, all for one low price.

This offer includes other items you can use to make your presentations stand out, like stock photos, graphics, icons, and more.

The great thing about using premium design elements for your presentations is that they're well supported by the creators, are compatible with major software and apps, and are kept up to date .
Get More PowerPoint Presentation Templates on GraphicRiver
Envato Elements is an excellent resource if you've got plenty of presentations to do. But if you need a single presentation template for one-off use, try GraphicRiver.
.png)
GraphicRiver is a great option if you prefer to pay as you go, and choose a single PowerPoint presentation template each time you need to create a new presentation.
How to Prepare a Good Presentation Step by Step in 2024 (+ Expert Quotes)
Now, let's look at some of the key steps in preparing a presentation, covering everything from topic selection to delivery, so you understand how to develop a presentation :
1. Choose the Right Topic

One of the most important presentation preparation tips is to pick the right topic for your presentation . You've got a few choices that'll give you a head start on wowing your audience. For example, you can:
- Choose a topic you're passionate about. This will make it easy to give an animated and appealing presentation.
- Pick your topic based on your knowledge and skills, so that you can wow your audience with the information you include.
- Do a data-driven presentation based on the latest statistics on a topic of interest, plus your expert opinion or conclusions.
- Select a presentation topic that relates to your business goals, such as reporting on key performance indicators (KPIs) or revenue .
Stephanie Schwab , Marketing Expert, Coach and Consultant, advises:
"Finding the right topic is all about knowing your audience. What's keeping them up at night? What do they really need to hear from you, right now, that will help them in their lives, or their businesses? If you're not sure what they need, ask them - survey them through email, ask your community on social media, talk to your customers directly. Meet your audience where they are and they will come to you again and again."
2. Know Your Audience
Related to that, another important step in presentation preparation is to know your audience . Your presentation plan will be completely different depending on whether audience members are novices or experts in your topic. Understanding who you're presenting to helps you select appropriate data and anecdotes to convey your topic.
Jared Karol , Speaker, Coach and Group Facilitator, says it's extremely important to think of your audience when preparing your presentation:
"If you can trust that your content and presentation flow is solid, you can give more attention to how your audience is thinking and feeling during and after the presentation. Involve the audience as much as possible. Invite them to be part of the presentation––whether rhetorically by using "we" and/or "you" language––and literally by utilizing chat and poll features, or, depending on the size of the group, allowing verbal interaction. Remember that you are creating an experience, not just delivering content."
If you're presenting to the C-suite, you'll want to keep your presentation short and focused to avoid wasting their time . Learn more executive presentation preparation tips in the following article:

3. Brainstorm
The next tip in our series of presentation steps is to brainstorm. This can be something you do on your own or with others. Either way, note down initial ideas and inspiration for your presentation. Use tools like mind mapping to connect related concepts.
By the end of this process, you'll have a clearer idea of the intended focus of your presentation and can move onto the next stage of your presentation plan.
4. Do Your Research

If you're thinking about how to prepare a great presentation, one of the key elements that separates good business presentations from the rest is research.
Tara Furiani , CEO & Host, Not the HR Lady, says:
"On our show, Not the HR Lady, we are huge proponents of ‘facts’ and call on our audience to fact check us. Presentations must be rooted in more than the theories of the presenter, to be credible. This can take on a lot of different looks. For me, I use and reference a lot of movies, music and pop culture to humorously drive serious points home (like racism, misogyny, bigotry, etc…) and that means finding just the right clip that illustrates your point. Not all ‘research’ has to be academic in nature, but all presentations should call upon someone other than one’s own opinions, for maximum impact and action."
Once you know your topic, you can search for supporting information such as:
- recent news or features
- the latest statistics (taken from reliable sources like .gov and .edu industry reports, and Google Dataset Search )
- relevant quotations
Once you've got that information, you're ready for the next step in presentation preparation.
5. Plan Your Presentation
Now it's time to put your presentation plan together. This is where you bring together ideas from your brainstorm and information from your research and organize them into a rough outline.
A good way to do this is with headings for different parts of your presentation and bullet points with facts, quotes, and stats. By the end of this process, you'll have a pretty good idea of the content of your slides. That's a crucial part of presentation preparation.
6. Draft/Write Your Presentation
Of course, creating a presentation isn't just about the slides. Use the outline you've created to draft the spoken part of your presentation. It's good to start with an overview of what your presentation will cover. Get it right, and this will whet your audience's appetite and make them pay attention.
Plan your introduction to draw your audience in . Using a story, or an unusual fact or stat can help with this. Christina Strickland , Vice President of Crackerjack Marketing, says:
"Presentation introductions are a chance to capture your audience’s attention right away. This is a good time to set the tone for the presentation and the meeting in general. Before you head in, know in your own mind the objectives for yourself and for your audience. When you introduce the presentation, begin by laying out the objectives for the audience and then a quick overview of the format and flow. This will help participants know what to expect and the right time to ask questions."
Plan your conclusion, too. It's helpful to know where you're headed so you can steer your presentation the right way.
Use storytelling throughout to keep your audience's attention. Don't be concerned if the final spoken presentation is a little different from your prepared outline. The outline is a guide, but you'll know what you need to include or exclude as you start to polish the actual presentation.

That's part of the reason you don't always need to create your slides at the outline stage of presentation planning. Instead, update that initial outline based on what your ACTUAL presentation will be. Then it's time for slide preparation (PPT templates, as you'll see, will be a big asset for the next stage).
7. Design Your Presentation Slides

Wondering how to prepare your presentation with minimum hassle? Use a premium presentation template from Envato Elements to get a harmonious design. This means you can focus on your content, rather than worrying about needing graphic design skills . Remember, you can download unlimited PowerPoint presentation templates from Envato Elements, all for one low price.
There are also attractive PowerPoint presentation templates on GraphicRiver , for those preferring a single-use template. So, there's lots of choice.
Here are some other useful presentation preparation tips:
- Don't overdo the font choice . A single heading font and a single body font will be fine for most presentations.
- Choose your fonts carefully . Some fonts look attractive on your computer but are hard to read.
- Pay attention to font size . You'll need to make sure that even someone who's at the back of the room can read your slides.
- Avoid walls of text . They make slides hard to read and is pretty off-putting. A wall of text is a sure way to lose your audience.
- Make one key point per slide . Have a few supporting bullet points.
- Use charts, graphics, images, and quotes . They can help make your points and keep your audience's attention.
For more presentation creation tips, check out our in-depth PowerPoint tutorial: How to Use PowerPoint (Ultimate Tutorial Guide) .
8. Expect Questions
Once your main presentation is ready, there's one more way to make your presentation great. That's to prepare for questions. As part of your presentation planning, you should:
- Think about what people might ask about your presentation content and be ready with answers.
- Consider how to deliver your presentation to lead people to ask certain questions that you're prepared for.
- Prepare an answer for when you've got no answer so that you're not left floundering.
Christina Strickland says:
"Unexpected questions are bound to happen. Don’t feel like you are required to answer every question that comes up. It’s always good to have a few different responses prepared for different types of questions. Remember, it’s ok to say “That’s a really good question but it’s not really in my area of expertise.”"
9. Practice the Presentation

When you're happy with your slides and have prepared for questions, it's time for some presentation practice. This is where you do a complete run-through of your presentation, with both your presentation script and the slides.
As you practice, pay attention to anything that doesn't flow, or is hard to say . Edit both your script and your presentation slides to remove these items. You don't want to be stumbling over your words on the day.
Some people prefer to practice alone but consider using a few friends or trusted colleagues as a test audience. It's a good way to make sure your material is clear and easy to understand.
Keep practicing till you feel you know your material inside out. This will help you deliver a polished presentation when it's time. If you're presenting online, Jared Karol suggests:
"The biggest thing to focus on when delivering presentations virtually is the idea of presence over performance. Try to recreate as closely as possible the vibe and feel you would create if you were all in the room together. Yes, prepare and rehearse. Yes, make sure the technology is good to go. And, remember that how you deliver the information is just as important as what information you're delivering. Wherever possible, try to personalize and humanize your presentation. Try to make your audience feel something not just remember something."
To learn more about presenting in public, read our public speaking guide:
.jpg)
10. Prepare the Room
When thinking about how to practice for a presentation, there's one element some people overlook: the presentation space . If it's possible, check it out well before it's time for you to present.
One thing to pay attention to is the presentation equipment. Whether you're using a laptop and screen, a projector and screen, or some other piece of technology, get familiar with the presentation technology so you can ensure it'll work as expected.
And if you're able to book rehearsal time, take advantage of it. If you do, there won't be any surprises on the day.
Here are a few additional tips for giving an online presentation.
11. Adjust Slide Design For Virtual Displays

If you're doing a virtual presentation, one of the most important tips for presentation preparation is to adjust the design of your slides. People will tune in from different size screens. So, make sure you don't have any text too near the top, bottom or sides of the slide, or some people won't be able to see it. Stephanie Schwab says:
"I like to give instructions to the audience on how to get the best view of the presentation; I use Zoom most of the time, so I'll do a quick explanation of how to switch from gallery view to speaker view, and how to slide the screensharing portion bigger or smaller. That way I can have a little bit more confidence that the audience will take in the presentation in the way I want them to see it, and not get distracted by gallery view."
12. Look After Background and Lighting
We've all been on Zoom calls where the speaker is backlit, or where there's something distracting in the background. Avoid both of these so your audience can focus on your presentation. Experiment with the room you're presenting in to find the best lighting or get a ring light or two to ensure your face is always visible. And consider using a virtual background to keep distractions to a minimum.
Tara Furiani says:
"The differences between presentations online and those that are in-person, are largely dependent on the skill of the facilitator. For example, one who’s engaging, tech savvy and can command a room… should find the presentations in-person or online, pretty much the same. When I present in a live setting, I use far less imagery than I would for an online session, because the focus would be on me. Virtually, I tend to add a touch more visual content, since my face alone should only be looked at for so long. By anyone."
13. Use Interactive Features
When preparing your presentation plan for an online presentation, try interactive features in your delivery platform to keep the audience engaged. Since you won't be able to use - or see body language - here are some tactics to try:
- Include polls.
- Ask questions people can respond to in the chat section.
- Encourage the use of emoji reactions to get the audience involved.
These features are a big advantage of presenting online, says Tara Furiani:
"One shift, I think, that we will miss about online presentations (when in-person becomes the ‘norm’ again) is the ability to know, in the moment, if you are affecting change with people and resonating. Reactions, re-quotes, comments, and questions are delivered to us, while we are presenting, instantaneously… training survey be damned, this is real-time feedback. We’re going to miss that; I just know it. In real life, save for applause, there aren’t ‘reactions’ to click that appear over the speakers’ head… maybe there should be?"
Presentation Preparation: Online vs In-Person
More conferences and events are being held online, and that's likely to continue. That means going one step further to understand how to develop a presentation to give a virtual audience a great experience. Stephanie Schwab comments:
"A lot of people think that giving an online presentation means you have to show slides the whole time - and I think just the opposite. I might have some slides to backup some of my points, but I'm usually pretty fluid between sharing my screen with a slide and then turning off sharing, so that the online audience can focus on me."
Do you wonder "what is a good presentation for online audiences?" Here are some differences in presentation preparation between online and in-person presentations.
- You can't read the room . When presenting in-person, you can tell if people are engaged because they may lean forward, make eye contact or respond in some way. On a video call, you may not be able to see them properly, and they'll likely be muted to avoid background noise. To make up for this, pause regularly and ask for comments or feedback.
- You can't rely on body language . An in-person presenter can use physicality for emphasis. That's not possible in the boundaries of a small screen.
- Visual cues are essential . In-person you can gesture or point at a key part of your slides. That's harder on a small screen. So, design your slides with visual cues like arrows and circles to direct your audience to what's most important on any slide.
- Working technology is more important for virtual presentations. It's essential to ensure your mic and camera are working properly so you look professional. In contrast, you always have the option of going tech-free in an in-person presentation.
- You handle questions differently . In-person, it's pretty easy to see when someone has a question, especially in a small room. Online, that's much harder, so have someone on hand to keep track of who's raised a hand or typed a question into the chat box.
- Camera position is crucial. In-person, you may not have a camera. Even if you do, you can walk around the room to make eye contact with different people. That's not possible online, so make sure you're looking directly into the camera. That will allow you to make virtual eye contact with every participant.
Learn More About How to Prepare Your Presentation
Now you know how to prepare a good presentation, but don't stop there. Find even more useful presentation preparation tips in the following guides and tutorials:

Find More Presentation Templates
Are you still looking for the right presentation template? Find great templates for any type of presentation in the following roundups:

Start Your Presentation Preparation
Now, it's your turn to prepare a presentation. You've learned some key presentation steps, including the importance of developing a presentation plan as well as the importance of presentation practice. You're ready to get started.
Don't forget. You can find attractive PowerPoint presentation templates on Envato Elements. And, for one-off use, you can also choose from the presentation templates on GraphicRiver. Check out the best PowerPoint templates available today.
Editorial Note: This post has been updated with contributions from Sharon Hurley Hall . Sharon is a freelance instructor for Envato Tuts+.

How to Create an Agenda Slide in PowerPoint
Easily create a professional agenda slide in PowerPoint with these straightforward steps and tips.
Step 1: Add a New Slide

Step 2: Insert a Title

Step 3: List Your Agenda Items

Step 4: Add Visual Elements

Step 5: Customize the Background

Step 6: Add Animations and Transitions

Frequently Asked Questions
Why is an agenda slide important in a presentation, what should i include on my agenda slide.
- Title: A clear title such as "Agenda" or "Today's Topics."
- Agenda Items: A list of the main points or sections of your presentation, presented in the order they will be discussed.
- Visual Elements: Optional shapes, icons, or images to represent each agenda item visually.
Should I use animations and transitions on my agenda slide?
Create ppt using ai.
Just Enter Topic, Youtube URL, PDF, or Text to get a beautiful PPT in seconds. Use the bulb for AI suggestions.
character count: 0 / 6000 (we can fetch data from google)
upload pdf, docx, .png
less than 2 min
Sanskar Tiwari
Founder at MagicSlides
How to create a dos and donts slide in PowerPoint
1 August 2024
How do I enable design ideas in PowerPoint?
How to delete a PowerPoint presentation completely
How to Create a QR Code for a PowerPoint Presentation
How to share a PowerPoint presentation as a link
How are additional slides added to a PowerPoint Presentation
How to combine PowerPoints into one PDF
How to Make a Comparison Slide in PowerPoint
How to apply a template to an existing presentation in PowerPoint
Stunning presentations in seconds with AI
Install MagicSlides app now and start creating beautiful presentations. It's free!

Get AI-Generated Presentations Ready in Seconds
Free AI PPT Tools
Tools, tips, and guides for interactive map creation
How to create engaging interactive map presentations.
by Philippe | Learn how to
Interactive maps can be a powerful addition to various business presentations, from sales decks and marketing collateral to company reports. By bringing geographic data to life, interactive maps can capture your audience’s attention, enhance data visualization, and tell a compelling visual story. With user-friendly map software like Mapme, building an interactive map is as easy as creating a PowerPoint presentation.
Why Use Interactive Maps in Presentations?
- Engagement : Interactive elements like maps help maintain audience interest and attention better than static visuals alone.
- Data Visualization : Maps can display complex geographical data in an intuitive, easy-to-understand format.
- Customization : Presenters can focus on the specific regions or data points most relevant to their topic.
- Storytelling : An interactive map allows for a narrative journey through different locations or periods.
- Real-time Updates : Interactive maps can display live data, keeping your presentations current and dynamic.
Use Case Examples
- Sales Decks : A construction company can showcase its portfolio of projects on an interactive map, allowing the presenter to highlight the most relevant projects during the presentation and Q&A. Map Example.
- Marketing Collateral : A non-profit organization can boost fundraising by integrating an interactive impact map in their presentations, visually demonstrating the reach and effect of their work. Map Example.
- Company Reports : An interactive map embedded in an annual report can provide an engaging, visual representation of a company’s global reach and performance. Map Example.
How to Integrate Interactive Maps in Presentations
Embedded maps.
Embed the interactive map directly into the presentation, similar to embedding a map on a website. This approach offers the full impact of the map, allowing users to engage and interact with it immediately.
Image with Link
If embedding the map isn’t possible, you can insert a static screenshot of the map and link it to the interactive version. This ensures your audience can still access the interactive map, even if they can’t view it directly within the presentation.
Map URL and Screenshot
For most presentation platforms, you’ll need both a map screenshot and a map URL. Here’s how to get them with Mapme:
- Map URL : Publish the map and click on “Embed” in the sidebar. Use the copy button to get the map URL.
- Screenshot : Mapme automatically generates a social sharing image, which is also great for use in presentations. Update the image with your latest changes, click on the orange arrows, and then click “View Image File and Save” to open the image in a new tab. You can then copy the image URL from the browser bar or save the image to your computer.

Step-by-Step Guide for Adding Interactive Maps to Presentations
Check out our step-by-step guides for integrating interactive maps in popular presentation platforms like PowerPoint , Google Slides , StoryDoc and Canva .
PowerPoint (PPT)
Option 1 – Use the Web Viewer Add-In (Office 365)
- Install Add-In : Home tab > Add-ins > Search “Web Viewer” > Insert.
- Enter Map URL : Paste the map URL into the Add-In’s panel.
- Resize and Position : Adjust the embedded map as needed.
Option 2 – Insert a Map Screenshot (All Versions)
- Insert Screenshot : Insert > Pictures > This Device > Choose your screenshot image file
- Link the Image : Right-click image > Link > Paste map URL.
Google Slides
Since Google Slides does not support embedded content, you’ll need to insert a screenshot with a link to the map.
- Insert Screenshot : Insert > Image > By URL > Paste screenshot URL.
- Add Link : Insert > Link > Paste map URL.
- Add an Embed Block : Add an “Embed” or “Custom Embed” block to the desired section.
- Get the Embed Code : Copy the interactive map embed code
- Paste the Code : Insert the embed code into the embed block in Storydoc.
- Adjust and Save : Adjust settings if needed, then save and preview your presentation.
- Publish : Once satisfied, publish or share your presentation.
Canva has a feature to embed Web content in the presentation design.
- Embed Map : Click “Embed” from the menu > Paste map URL > Add to design.
- Adjust Size : Resize the embedded map on the page as needed.
Get Started Today
Ready to bring your presentations to life with interactive maps? Sign up for a free 7-day trial of Mapme and let our customer success team guide you through the process.
Contact Us
Questions. Need help? Use the chat button or the Contact Us form
I Getting Started
Check our 2 mins Getting Started Tutorial video
New Features
Check the release notes for the latest features and improvements

Diagram Tool
Business Use
Individual Use
A Detailed Steps to Create Powerful Funnel Chart Excel
At the heart of a successful business is its sales pipeline. Yet, dealing with complex data can be challenging, hindering your capacity to examine your sales process and identify improvement areas. Funnel chart Excel is a visually engaging instrument that illuminates your sales journey. This guide will provide you with the know-how to construct effective funnel charts in Excel, guiding you through a series of steps from organizing data to personalizing your chart. Let's also recognize the best alternative, MindOnMap. We'll cover both techniques, enabling you to select the best method that matches your abilities and requirements. Let's turn your sales pipeline data into a valuable and enlightening visual story.


IMAGES
VIDEO
COMMENTS
Create a new PowerPoint presentation and place yourself on the first slide. Go to Insert tab > Picture > This device (you can also try images from Office or Bing). Find the image you saved in the first step and insert it into your presentation. Go to the Design tab and press the PowerPoint Designer tool.
7 steps to create a presentation in PowerPoint. Begin with a surprise or bold statement. Provide necessary background information. Frame your presentation as a story. Keep the text concise and meaningful. Use visuals to complement the text. Incorporate interactive design. Conclude with actionable insights.
The slide master tool lets you edit the layout from a single slide. This makes it easy to edit the layout of multiple slides at once. To access the slide master tool, click on the View tab. Next, click on the Slide Master icon.This opens up the tool.
To create a presentation based on a template, follow these steps: Open Microsoft PowerPoint. Choose New from the sidebar. The built-in templates will now be displayed: At the top of the screen, you will see a search box which allows you to search by keywords related to a topic or design style. Underneath the search bar, you will see some ...
Start with a template
Click Blank Presentation. You can either select here or go to File > New > Blank Presentation. On Mac, simply opening PowerPoint might open a new presentation depending on your settings. If it does, skip this step. 3. Click the Design tab. It's in the editing ribbon above your PowerPoint with File and Home. 4.
To customize the text in this template, you can work with the built-in text placeholders. To start, click into any text box. Then, press Ctrl + A (Cmd + A on Mac) to select all the text inside. Type over the text placeholders in a premium professional presentation so that the slides tell your story.
Use a personal template to create a new ...
Microsoft PowerPoint is a presentation design software that is part of Microsoft 365. This software allows you to design presentations by combining text, images, graphics, video, and animation on slides in a simple and intuitive way. Over time, PowerPoint has evolved and improved its accessibility to users.
A step-by-step guide to captivating PowerPoint ...
How to Create a PowerPoint Presentation
The first thing you'll need to do is to open PowerPoint. When you do, you are shown the Start Menu, with the Home tab open. This is where you can choose either a blank theme (1) or a pre-built theme (2). You can also choose to open an existing presentation (3).
How To Make a Good Presentation [A Complete Guide]
The first step when creating a template in PowerPoint is to select a color scheme for your template (preferably one that reflects your company's brand image). ... This will make it hard for people to read my slides during a presentation. In the steps below, I will use the old method (non-Office 365 subscription) for creating a transparent ...
4. Use a Professional PowerPoint Template. One way to make sure that you've got a great, visually appealing PowerPoint presentation is to use a premium PowerPoint template such as those available through Envato Elements or GraphicRiver. Here are some great PowerPoint examples from Envato Elements of templates that can be useful in creating your presentation.
How to Create a PowerPoint Presentation Using a Template
Step 3: Customize Your Slides. Once you've selected your template and logged in to your Renderforest account, it's time to personalize your presentation. This includes adding your own content, such as text, images, videos, and audio, and customizing the overall design of your presentation.
Step 4: Create Your Presentation Slides. Including clear, concise, and visually engaging information is important when creating a slide. You can also create a free account to pick a preset template, which can make customization very convenient for you. Here are some tips for what to include in a presentation slide:
Weave in personalization using dynamic variables. Enhance storytelling with animations. Highlight key points using subtle visual cues. Engage with interactive elements. Showcase ideas using vibrant images. Sprinkle in video narrations. Wrap up with a smart CTA. Browse creative presentation templates.
Create a template
Step 4: You can also freehand draw or annotate your slides, using the Draw tab, or alter the entire theme of the slideshow by selecting Design. How to add more slides to a Powerpoint presentation
How To Create An Interactive Presentation With AhaSlides. Step-by-step guide for you to make an interactive presentation using AhaSlides in a few minutes: 1. Sign up. Create a free AhaSlides account or choose a suitable plan based on your needs.
Benefits of a Timeline PPT Template. Adopting the use of a timeline PowerPoint template in one's personal development plan has the following benefits: Clarity: It becomes possible to see what needs to be done and when. Increased motivation: You're able to see progress, and that will increase your motivation to keep going.
1. Choose the Right Topic. One of the first presentation steps is picking the right presentation topic. One of the most important presentation preparation tips is to pick the right topic for your presentation. You've got a few choices that'll give you a head start on wowing your audience.
Easily create a professional agenda slide in PowerPoint with these straightforward steps and tips. ... How to apply a template to an existing presentation in PowerPoint. 1 August 2024. ... MagicSlides.app helps you create presentations using AI. You can create presentations from any URL, PDF, Youtube video, or topic in seconds for free. ...
For most presentation platforms, you'll need both a map screenshot and a map URL. Here's how to get them with Mapme: Map URL: Publish the map and click on "Embed" in the sidebar. Use the copy button to get the map URL. Screenshot: Mapme automatically generates a social sharing image, which is also great for use in presentations. Update ...
Here are the detailed steps for creating a funnel chart in Excel. Funnel charts help show how data moves through different steps or phases, like sales pipelines or stages of a process. Organize your info into a table, sorting it by steps and their values. Make the data spread out more, including the title.
An image of the PowerPoint home screen with options to create a blank presentation or choose a themed presentation. Then within PowerPoint, select the Copilot button in the Home tab of the ribbon and either enter your prompt or select "create presentation about" to create a first draft of your presentation using your theme or template.
Opening PowerPoint: Opening it, choose a suitable roadmap template or create a new slide. Describe Your Roadmap: Define major milestones, phases of work, and deliverables. Adding Text and Icons: Add text, icons, and images portraying milestones and activities to the roadmap.